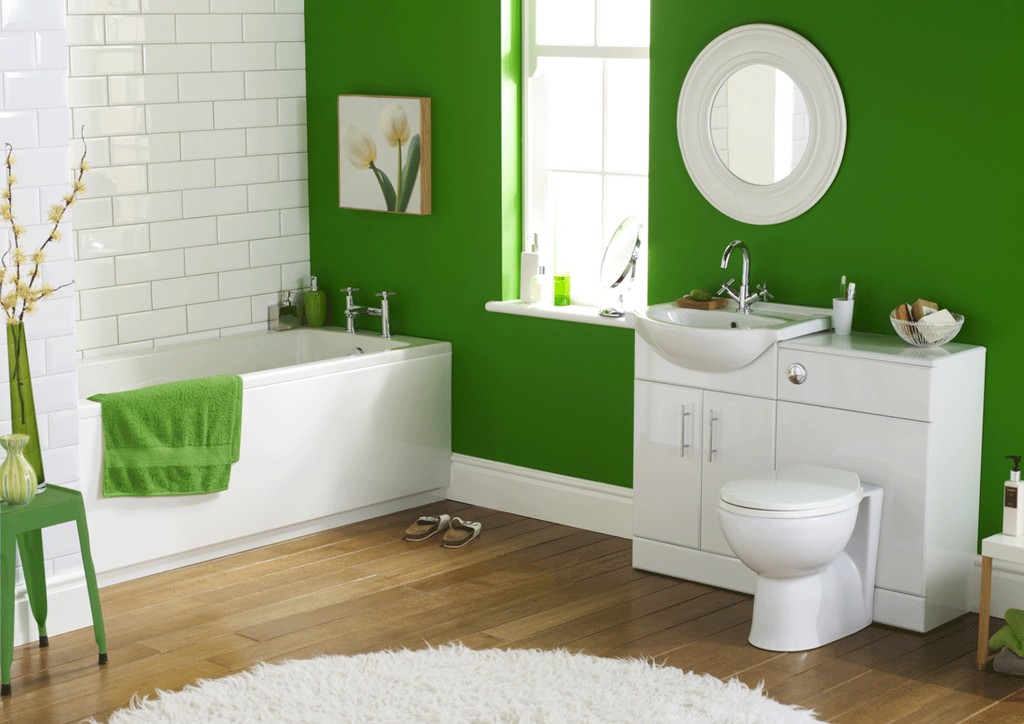
The bathroom of any house or apartment is a special area designed to provide the owners with comfort and a pleasant pastime. Quality repairs can ensure the convenience of using the bathroom and have a beneficial effect on your health. The bath should be warm, and a long enough to maintain a comfortable temperature, excessive humidity should not spoil the atmosphere and the room. The work of equipment located in the bathroom, namely a boiler, sanitary ware, water supply and sewerage is often accompanied by annoying noises, so sound insulation is not just necessary, but necessary. Extra noise should not disturb the residents of the apartment, especially at night.
If you want to save yourself and your family from the inconveniences in the bathroom, you must lay the thermal insulation of the walls and floor of this room. This type of repair work can be done independently and save money to pay for the work of the builders.
Do I have to insulate the bathroom?
The layout of the house can be built in such a way that one of the walls of the bathroom will go out onto the staircase or be completely angled. This arrangement will not provide proper comfort without additional heat insulation work. If external walls houses are not thick enough, you will have to insulate the bathroom from the inside by yourself. How to insulate the bathroom and what is needed for this, we will try to understand.
What materials can be used for insulation?
- The choice of insulation materials is quite wide: from traditional ones, which are used for many years, to new ones modern innovations building industry. So what is better to insulate the bathroom?
- The most common materials are:
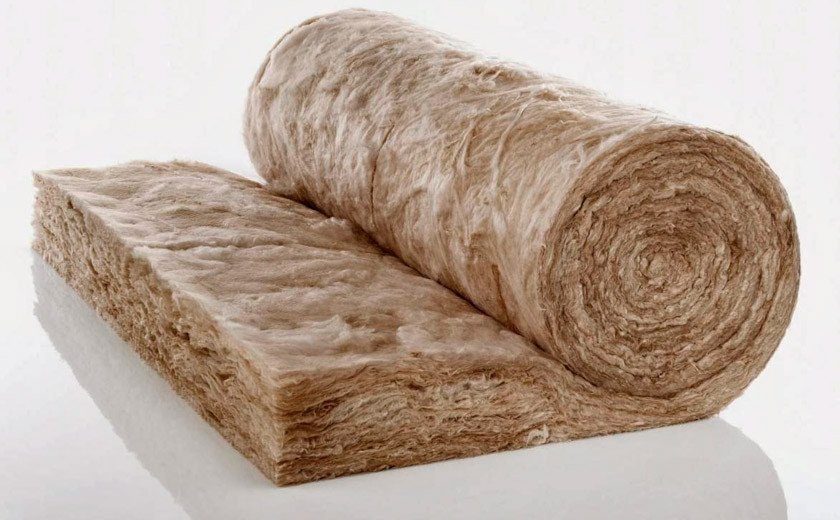
- mineral wool;
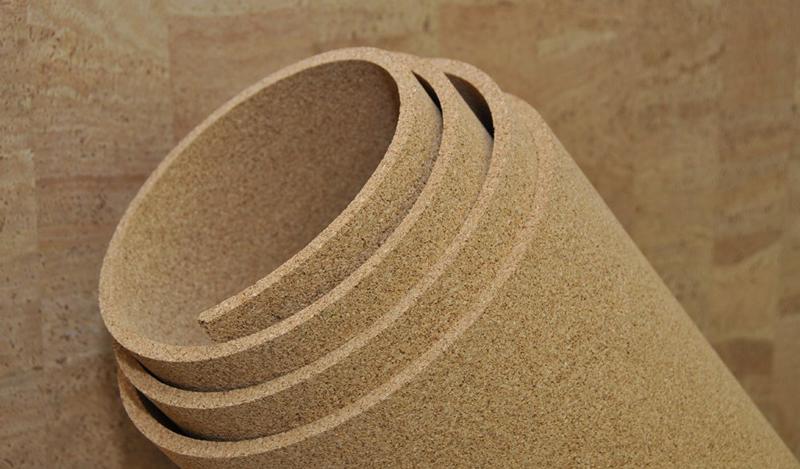
- cork insulation;
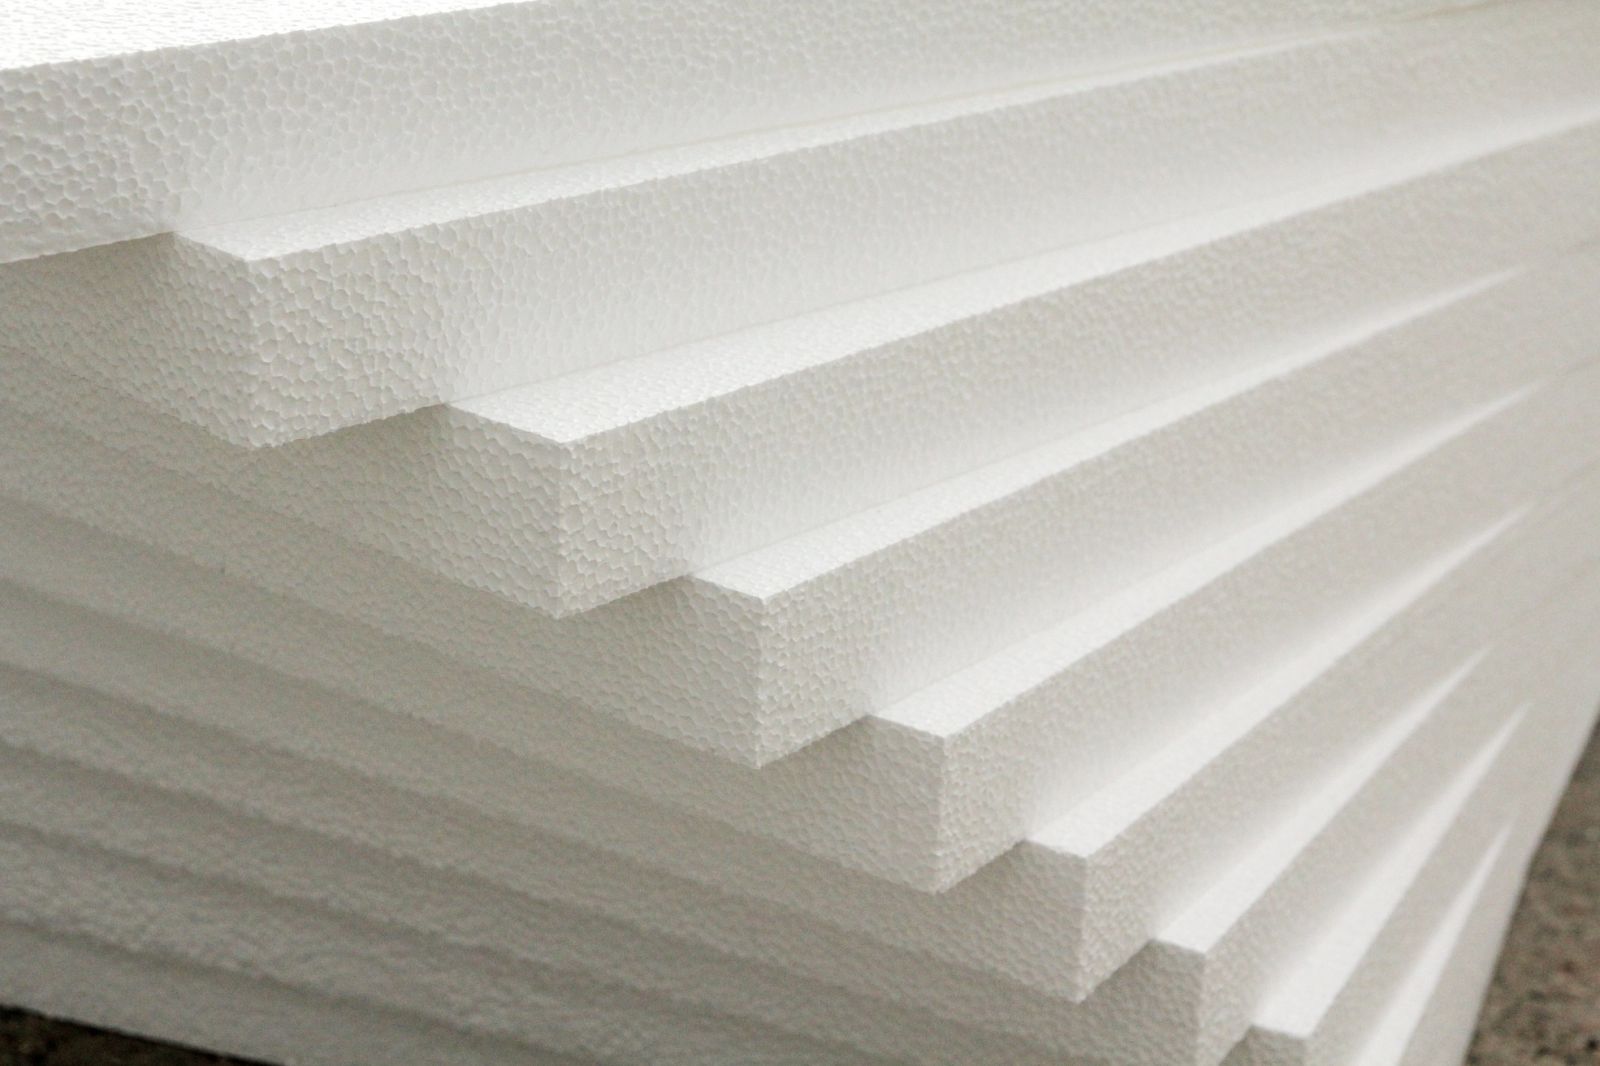
- styrofoam.
- Particularly popular is mineral wool, tested by years and millions of successfully insulated bathrooms. This material is not so expensive, but its main advantage is the obstacle to the appearance on the walls of condensate. However, cheapness is not accidental, along with the positive qualities of cotton wool has a high hygroscopicity. Steam and moisture gradually spoil the material, so if you still decide to choose mineral wool, you need to take care of its waterproofing.
- Heater from the cork will be a little more expensive, because it has more wax impregnation. When using this type of insulation, the workflow will be broken into several stages - the main and preparatory. First, it is necessary to thoroughly scour the inside of all the walls, and then to paste the insulation itself with a special glue. Despite its cost and staged work, the cork insulation is effective to keep the heat in the bathroom.
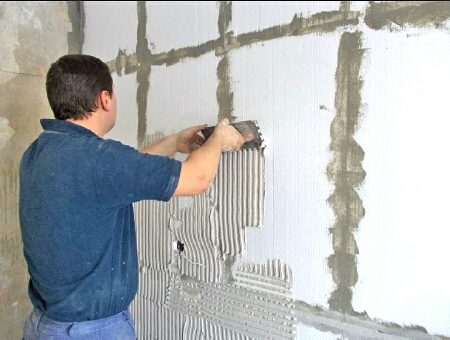
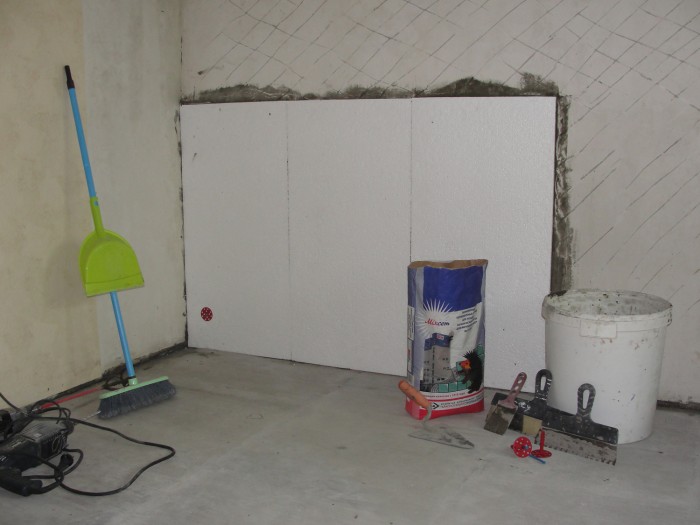
- Thermal insulation of walls with foam sheets is the cheapest and accessible way warming the walls. It is not necessary to hire professional builders, these jobs do not require high qualifications and extensive experience. Polyfoam simply need to be attached to the wall with a special glue. If plasterboard is used for finishing the surface, the foam is fixed with a special frame made of galvanized metal structures.
Warming of foam plastic
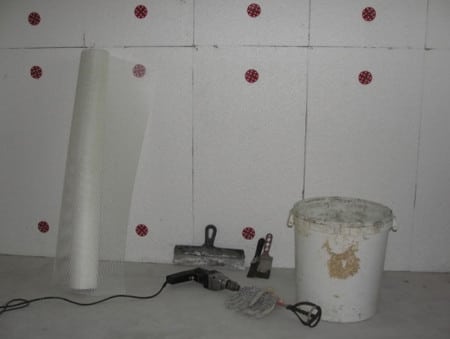
- Thermal insulation foam is effective and does not cause any special hassle. A complete list of tools that must be stocked for this type of material and work:
- sheets of foam plastic;
- special glue;
- finishing putty;
- putty knives;
- rubber roller;
- a construction knife, a string, a hacksaw for gypsum plasterboard.
- Having prepared everything you need, you can start work. The main thing is to follow a clear sequence and developed technology:
- preparatory works: clean the surface of the walls from dirt and debris from previous coatings;
- during the primer, apply a special mortar to level and moisture the surface;
- prepare a glue solution according to the manufacturer's instructions;
- cover the sheets of styrofoam in size with glue using a notched trowel;
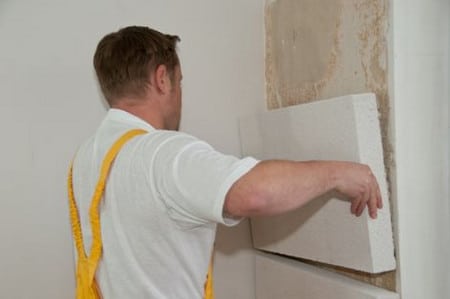
- glue the sheets to the surface of the walls, pushing a little on the entire surface, do not put much effort, foam - the material is brittle and can break;
- gently roll the attached sheets of foam plastic rubber roller, ensuring an even distribution of the solution and good quality gluing;
- apply a layer of finishing putty on the surface of walls with polystyrene foam;
- wait until the surface dries, and then sand it with sandpaper and varnish.
Warming with the use of "warm" plaster
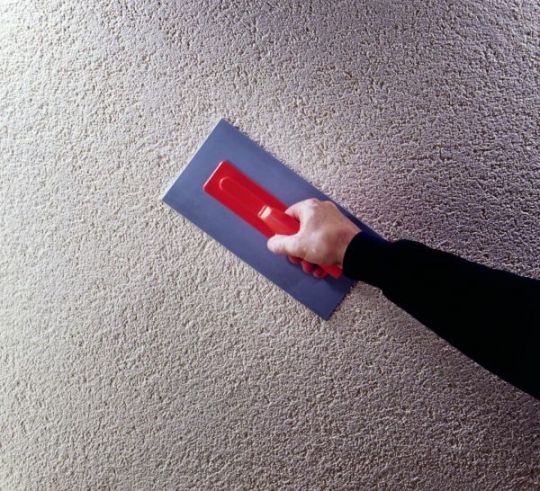
- Recently, for the heat insulation of the walls began to use "warm" plaster. This method of insulation has a number of features. The basis of the composition of this material is ordinary cement, but as a filler are specific additives, which provide a reduction in thermal conductivity.
- For sale, you can find three compositions of "warm" plaster, with different fillers:
- the composition contains expanded vermiculite, the advantage of which is lightness and very low thermal conductivity;
- composition with wood sawdust and cellulose, which, unlike the first filler, under the influence of steam and moisture gradually deteriorates, and foci of mold appear on the surface;
- composition with the addition of expanded polystyrene, which due to granular expanded polystyrene is not exposed to moisture and vapor, so its use allows you to produce a high-quality insulation not only the walls, but the ceiling of the bathroom.
- The use of "warm" plaster has both positive and negative aspects. The following can be classified as positive:
- plastering walls does not require special skills and time;
- before the insulation there is no need to level the surface;
- this material has good adhesive properties;
- after surface treatment, there are no so-called cold bridges.
- The drawbacks of "warm" plaster include the following:
- for a high degree of thermal insulation, a sufficiently thick layer of plaster is needed, approximately 1.5 times the thickness of the foam sheet;
- there is no need for additional finishing material.
- The technology of thermal insulation has the following technology and consistency:
- prepare the surface of all walls;
- apply a primer layer;
- mix the dry adhesive mixture in the proportion according to the instructions, it is important that it will need to be used within 2 hours;
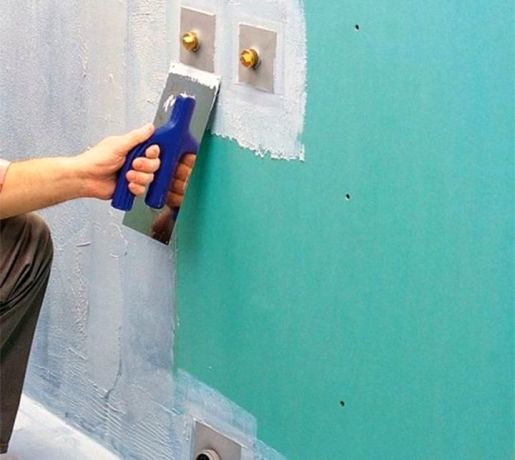
- apply the plaster evenly with a special wide spatula, each layer equal to the width.
- The very first layer should be within 2 cm. It is important to allow the surfaces to dry completely, it is usually from 4 to 5 hours, and then start to apply the next layer. Do not rush, non-observance of the technology leads to cracking and rapid precipitation of the coating.
Warming of the bathroom in the panel house
- The owner of the apartment panel house decides for himself how to insulate the bathroom. When choosing materials and technology, it is necessary to take into account the loss of useful space, cost and subsequent efficiency.
- If you use isolon or penofol you will significantly gain in space, and in case of the wall of the bathroom with a foam, you will lose at least 5 cm.
- If using foam and mineral wool, you install them on the crate, then the losses will be quite significant, within 10 cm. At the same time, the quality of the insulation will get you a happy high, especially if the wall is bordered by a street or a staircase. But it all depends on the size of the room.
Warming of the bathtub
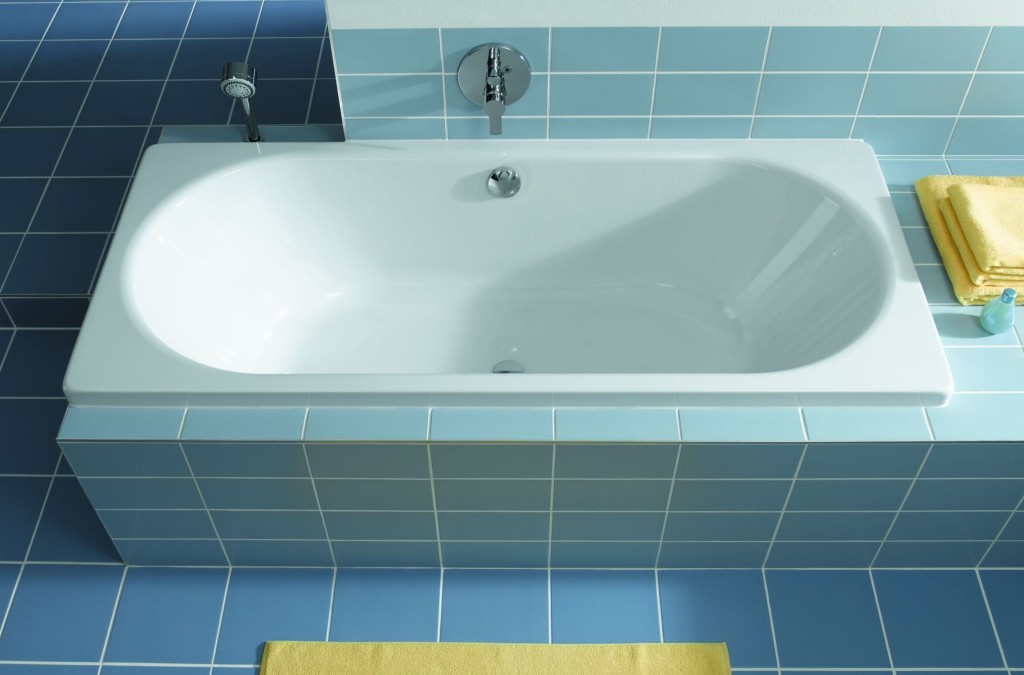
- Often bath rooms are equipped with steel baths. They are strong enough, reliable, durable and affordable. However, the steel bath badly holds heat and the water in it quickly cools. This is a great inconvenience for fans to soak in the foamy water. Such a defect can be eliminated by insulating it from the outside. Such a procedure is easy to do on your own, without the involvement of specialists. The simplest solution for the thermal insulation of the bath is the use as a heater of ordinary mounting foam.
- Processing the bottom of a steel bath will significantly reduce the thermal conductivity of the material and increase the sound insulation of the produced noise. The easiest way to use polyurethane sealant. On average, for standard size need about 4 cylinders.
- Work on the insulation of the bath must be done before its installation, because it is impossible to treat the bottom of the already installed bath evenly. Either do it right away, or you'll have to dismantle it, which is not advisable.
- For cladding, it is sufficient to install a drain siphon, to strengthen the support legs and the guiding profile. After such simple manipulations, your bathtub will be fully ready for installation - now proceed with its warming.
- Prepare the following materials and tools:
- mounting foam;
- pistol;
- mortar putty;
- glue;
- fiberglass cloth.
- As usual, the work begins with the preparation of the surface. The bath should be turned and cleaned of debris, and then moistened.
- After this, prepare cylinders with polyurethane for laying on the surface. To do this, take a can and hold it under a stream of hot water. Experienced builders use this technique to provide a volumetric foam output. Then, by gently pressing the lever, start laying the composition in the form of a snake until you cover the entire surface.
- On the siphon and a small space around it do not need to apply the composition, it may be necessary to replace this part, the same applies to the overflow opening.
- It's important to start from the bottom. After you finish covering it, wait for about 15 minutes before solidification, and continue to apply the composition, making sure that the sealant does not leak. Work with sealant requires caution, it should not get on other surfaces, let alone on bare skin. It is not possible to wash your hands with ordinary soap, you need to use a special solution.
- Work in the overalls, covering his hair and wearing gloves. Floor cover, cover all objects and walls in the bathroom with protective equipment. In the event of a balloon rupture, which sometimes happens, the scattered spray will immediately cover everything around and instantly freeze.
Walls and ceiling
- The walls and ceiling can be insulated with foam in two ways:
- glue with a special glue;
- use a special mount.
- If you have chosen the first method, then before gluing, be sure to clean the surface, primer, and then evenly apply the adhesive on the foam and attach the sheets to the wall. For stronger fixing, special fasteners are used.
- After the foam is adhered, the walls should be applied with a layer of a uniform thickness. It is important to understand that such a method of wall insulation in the bathroom does not involve the use of tiles for further cladding. After puttying the walls can be painted with a waterproof paint.
- The second method of warming the walls of the bathroom with foam plastic is carried out with the help of a crate. It can be wooden or metal. The choice of its design depends on the choice of a further method of facing the wall surface. With this method, drywall is used either plastic panels. After the installation of the battens, the sheets of foam are densely packed in the spaces between the posts. Formed as a result of mounting plates small gaps, filled with mounting foam. With this method of fixing the foam it is possible to do without the subsequent puttying of the walls.
- It will be good if you put the putty on metal mesh - this will serve as additional protection of the insulation from rodents, which can cause significant damage. As a heater can be used mineral wool. Vata, like polystyrene, is packed with dense strips over the entire area of the walls. To prevent condensation on the walls, the cotton should be sewn with a special film for insulation from the steam.
- Nothing too complicated in the warming of the walls by these methods, no. They are available to anyone without the use of special skills. For those who have never done this, you can watch a special video from step by step instructions how to insulate the bathroom with foam.
- Insulate the ceiling, after the work on the insulation of walls. Warming of the ceiling begins with the manufacture of a skeleton for a false ceiling. It is possible to fix the foam and mineral wool directly to the rough ceiling, but this fastening is less durable and more complex than the fastening to the frame.
Warming of the floor in the bathroom
- To ensure that the bathroom was warm and comfortable, you need to insulate floors, especially for apartments on the first floor. An excellent solution The problem of the warm floor is the arrangement of an electric or water heating surface.
- Leaving the bathroom on a warm floor is certainly nicer and safer for health, besides the warm floors increase the overall temperature in the room. Electric mats are very popular for this purpose. Installation of such insulation is simple and does without preliminary preparation. Before flooring, you can see a more elementary video about how to insulate the floors in the bathroom, and everything will go like clockwork.
- Advantages of electric floor heating before water:
- electric mats will be inexpensive;
- the heating of the floor will be autonomous and it is independent of the main heating system of the apartment or house;
- such a system will function without interruption for long enough;
- such a method has a high degree of reliability;
- insulation with mats does not take up much useful space, because the thickness of the material is very small, and the heating of the floor using a water system takes up to 8 cm of space.
- Installation of electric mats has several stages:
- preparation of the floor surface;
- fastening of electric mats to the prepared base;
- process of comfort temperature adjustment.
Taking water treatments in a cold bathroom is at least unpleasant, and there is always a chance of catching a cold and getting sick. Constant warmth creates a favorable atmosphere, which will allow you to relax and enjoy the water procedures after a hard day. A morning shower will help wake up and tune in for a successful day.
The bathroom, first of all, should be comfortable. If in the room pulls dampness and cold, then hygienic procedures are unlikely to bring pleasure. There are several reasons for excessive coolness in the room. It may be a malfunctioning or clogged heated towel rail. But most often the cause of the cold is the presence outer wall, which goes into the entrance. To get rid of this discomfort, you will need to insulate the bathroom from the inside.
First of all, it is necessary to ensure that the room has a comfortable temperature. For this, it will be necessary to carry out measures for the insulation of the enclosing structures. In private homes, the walls are mostly insulated, which allows for a much better effect. However, in a multi-storey building, this procedure is rather difficult, so you have to solve the problem.
Types of heaters
At the moment there is a huge variety of insulation, so choosing the most suitable is not so simple.
Mineral wool is a traditional insulating material, but for a bathroom it is not often used. Of course, this type of insulation allows the wall to "breathe", which eliminates the causes of condensation. However, mineral wool is hygroscopic, so it will have to be carefully waterproofed from the action of water and moisture.
A cork heater with wax impregnation can be a good enough option for warming the bathroom. But in order to produce work with this material you need to stock up with special glue for cork and soil. This material is glued in almost the same way as wallpaper, so the process will not cause difficulties even for inexperienced masters.
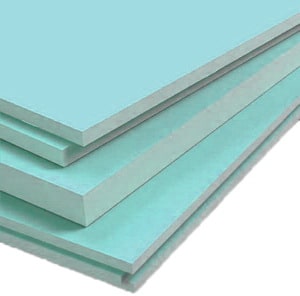
Most often as a heater for the bathroom choose polystyrene foam. This material is quite cheap, has a weak thermal conductivity and, despite its artificial origin, is not harmful to health. The foam plastic can simply be glued to the walls, or you can install it in the crate, made from the profile for installing plasterboard. After this, the walls will need to be covered with moisture-resistant plasterboard or glass-magnesite sheets.
Wall warming
The easiest, but effective method of warming the bathroom from the inside is to pasted them with foam plates. First of all, you need to stock up with tile glue, foam sheets, rubber roller, finishing putty, spatulas of different size, spatula with jagged edges and a construction knife.
First of all, it is necessary to prepare the walls, clean them of dust and old coating, then apply several layers of antiseptic soil. Glue, previously mixed with water, should be applied with a notched trowel on the sheets of foam. Then the foam should be installed so in place of fastening, so as not to break the sheets, and then roll with a rubber roller. Once all the sheets have been glued, you can proceed with the putty. The mixed finishing putty is applied evenly to the walls. After it dries, the walls will need to be painted or trimmed from the inside in other ways.
"Warm" plaster is a heater based on cement, which has recently appeared on the market building materials, so not all masters apply it to warm the walls. To reduce the thermal conductivity of the coating, it is desirable to use special additives instead of sand. A warm plaster may have the following composition. In the sawdust composition, wood sawdust and cellulose are usually used, so the insulation with this material is best made in dry rooms to avoid the appearance of mold on the walls. As a filler for vermiculite composition, a mineral is used which has poor thermal conductivity and a small weight - expanded vermiculite. This plaster is better to choose for wet rooms, since it has antiseptic properties. In the expanded polystyrene composition, polystyrene beads are used as a filler.
Warming of the bathroom with the help of "warm" plaster occurs quickly, because in this case it is not necessary, besides the material has an excellent adhesion to all materials and does not form cold bridges. But to achieve a good effect, the plaster will have to be applied in a thick layer, about 2 times thicker than when the composition is applied to the foam. The plaster is not a finishing coat, so it is necessary to finish it with other material on top of it.
Before applying "warm" plaster to the walls, they must be thoroughly cleaned from dust and old coating and apply a primer. After that, from the dry mixture and water should be prepared composition, which is applied to the walls with a wide spatula. Remember that the plaster should not be immediately applied with a very thick layer, the optimal thickness should not exceed 2 cm, with each layer should be allowed to dry for 4-5 hours. If you do not adhere to this rule, then soon the plaster will begin to crack and peel off. Warming the walls of the bathroom from the inside will allow you to be in the room with comfort, as well as prevent the appearance of condensation and, accordingly, dampness.
Warming of the floor
Warming the floor in the bathroom is best to begin with a waterproofing. After all, all the moisture that hit the walls, still drains to the floor. And if suddenly there is an accident, the water will quickly penetrate into the next apartment.
To prevent this, you should take advantage of waterproofing materials penetrating or okleyechnogo type. But it is best to apply liquid rubber to the surface, because once the material dries, it completely isolates the building structures from moisture penetration. The floor in the bathroom is not very practical to insulate with styrofoam. The fact is that the floor will rise, and above insulation construction will have to build an additional screed to put the tile or laminate. Therefore, it is best to arrange a system of warm floors.
At the moment there are many options for heating the floor in the bathroom. For example, you can preheat the floor with hot water, you can also install an electric heating cable or special heating mats in the floor base.
Warming the floor with the first method is not very practical, because the hot water in the pipes is gradually cooled. In addition, the technical water is not cleaned, there are a lot of impurities in it, which fall into the sediment and clog the pipes. When there is no hot water in the system, it will be impossible to heat the floor in the bathroom.
So, to insulate the room with electric mats, you first need to align and clean the base under the mats, and in some cases under the construction specifically make a concrete screed. Mats need to be laid on concrete, they are already protected from moisture by special materials, after which the system should be poured with concrete. A thermostat is provided in the design, by means of which it is possible to adjust the amount of room heating, while the entire system operates from a conventional electrical network. It is recommended to entrust the installation of the electrical floor heating system to specialists, because it is very important that the electrical wires are insulated correctly. If you have a choice between water heating the floor and electric mats, then preference is best given to the latter. Warm floors guarantee high reliability and long service life, besides they are quite cheap.
If you do not have the opportunity to install heated floors, then insulate the floor in the bathroom with thermal insulation material. However, in this case, the construction will need to be covered with a concrete screed. To begin with, the floor is leveled and cleaned, then a layer of waterproofing is applied and left to dry. At the next stage, the structure needs to be poured with concrete, after which it is possible to put a tile or other lining material. Remember that, despite the ease of installing the floor, care must be taken when performing work, and all safety requirements are met.
On this insulation of the bathroom from the inside is complete. Properly executed work will significantly improve the feeling of coziness and comfort that arise when taking various water procedures, since it is difficult to call comfort in a damp cold room.
The bathroom is a room in which, first of all, it should be comfortable. If the room is drawn by cold and damp, the hygiene procedures will not bring pleasure. The reasons for excessive coolness in the room can be a lot. It can be a hammered towel warmer, and incorrectly working ventilation. But often enough the cause of the cold is the presence in the room of the outer wall that goes into the entrance. To get rid of the discomfort, it is necessary to warm the walls from the inside in the bathroom. Consider how you can do this work.
To add comfort in the bathroom, you need to achieve that there was a comfortable temperature. For this, it is necessary to carry out measures for the insulation of enclosing structures.
In private houses, the walls are usually insulated from the outside, and this solution allows for an excellent effect. In an ordinary high-rise building, it is very difficult to make the walls from outside, so you have to solve the problem from the inside. Consider what materials you can use if you want to insulate the walls in the bathroom.
Types of heaters
Today there are many different types of insulation, so choosing the most suitable is not so simple.
Mineral wool
Traditional insulation material, but it is not often used for bathing. This type of insulation allows the wall to "breathe", which eliminates the causes of condensation. But the mineral wool is very hygroscopic, so it will be necessary to waterproof it most carefully from the action of water and steam.
If the walls are insulated in the bathroom with mineral wool, then you should choose the material in the form of mats, not rolls. Heat insulation in mats is more rigid. They are installed between the guides of the assembled frame, this eliminates the sliding of the insulation from the wall.

To create a frame, you must use a galvanized metal profile. The use of wooden racks in the bathroom is irrational, since the tree is destroyed by the action of moisture, therefore, such a crate does not last long. Besides, wooden frame can eventually lead, which will lead to a displacement of heat-insulating layers.
In places of installation heating devices (heated towel rails, etc.) walls that are insulated with mineral wool from inside are to be additionally protected by installing a screen made of aluminum foil.
Cork insulation
If you want to warm the walls in the bathroom, then a cork heater can be a good option. Make this insulation from the bark of cork oak. The material is ecologically safe and natural, it has good thermal insulation properties, in addition, it perfectly passes steam. Especially for bathrooms, a cork heater with wax impregnation is produced. This material retains its properties for a long time.
The only but significant drawback of the material is its high price. Warming even a small bathroom will cost a tidy sum, even if you give up the services of builders and do the work yourself. In order to perform the insulation with this material you will need:
- Special glue for cork.
- Priming.
This insulation is pasted in almost the same way as wallpaper, so the process does not cause difficulties even for very inexperienced masters.
Styrofoam
Solving the question of how to insulate the wall in the bathroom, most often as a heat insulation foam is chosen. This material has a weak thermal conductivity, it is quite cheap and, although of artificial origin, is not harmful to health.
Polyfoam can simply be glued to the walls or installed in a crate made of a profile for installing plasterboard. Over the installed foam plastic walls are covered with gypsum plasterboard (moisture resistant) or glass-magnesite sheets.
How to insulate the walls in a bathroom with polystyrene foam
Simple, but effective way Wall insulation is pasted with foam plates. Consider how this work is done. It is necessary to prepare:
- Sheets of foam in sufficient quantity.
- Tile glue.
- Finishing putty.
- Several spatulas of different sizes (one with serrated edges).
- Roller rubber.
- Construction knife.
Progress:
- Walls before the foam sticker should be cleaned of old coating and dust, then apply two layers of antiseptic primer on them.
- The glue is mixed with water.
Advice! To mix the glue, use a construction mixer or a drill with a nozzle.
- Using a notched trowel, glue is applied to sheets of foam. Then the foam is carefully installed in the place of attachment.
- Press the sheets against the wall carefully, so as not to break the sheets. Then the glued foam is rolled with a rubber roller.
- After completing the pasting, it will be possible to proceed to puttying. The final putty is mixed and applied to the walls with a spatula.
Advice! To obtain a perfectly flat surface, the first layer of putty should be sanded with a sandpaper and a second layer applied over it, which, after drying, is also processed by the trowel.
- Filled walls can be painted or finished using any other methods.
"Warm" plaster in the bathroom
Another option of how you can make the walls of the bathroom is warming up is applying a "warm" plaster. This material appeared on the market relatively recently, so not everyone knows how to use it. In fact, this is a material based on conventional cement. Only as a filler is used not sand, but special additives that reduce the thermal conductivity of the coating.
Types of warm plaster
- Vermiculite formulations. In such plasters as a filler used expanded vermiculite - a mineral that has a small weight and poor thermal conductivity. Such formulations possess antiseptic properties, therefore can be used and in damp premises.
- Opilnye composition. As a filler in such plasters, cellulose and wood sawdust are used. These compounds are recommended to be used in dry rooms, when applied in the bathroom, mold on the walls may not be ruled out.
- Styrofoam preparations. This kind of plaster is prepared using polystyrene granules as a filler. These compounds are also great for use in bathrooms.
Advantages and disadvantages of "warm" plasters
Among the advantages are:
- Speed of application.
- Do not need to level the walls before applying.
- Excellent adhesion to all materials.
- This type of insulation does not form "cold bridges".

The disadvantages of coverage are:
- To achieve a good effect, you must apply a fairly thick layer of plaster (if you compare with polystyrene, the layer of plaster should be thicker by 1.5 times).
- The rendered plaster is not the finish coat. On top of it, you need to finish other materials.
How to apply "warm" plaster?
- Walls are cleaned of old coatings and dust, they are applied to the ground.
- Preparing the composition of a dry mixture with the addition of water.
Advice! Cook the plaster in such quantity that it can be used within two hours.
- The prepared composition is applied to the walls with a wide spatula in the direction from the bottom up.
- Apply immediately too thick layer of plaster is impossible, the thickness of each of the layers should not exceed 20 mm. In this case, after applying the next layer of the surface should be allowed to dry for at least four hours.
- The most common defects of the finished plaster coating are cracking and peeling. They can arise from the fact that the plaster solution was applied to an undried surface, or plaster was placed too thick. Therefore, it is important to comply with the application technology.
So, the warm walls in the bathroom are a guarantee of the comfort of being in the room. In addition, the insulation of walls is a measure of preventing the appearance of condensate, that is, the way to reduce the dampness in the room. This, in turn, reduces the risk of mold growth on walls and other surfaces, that is, the warming of walls in the bathroom is a concern for the health and well-being of all household members.
Quality insulation largely depends on the properly selected material, the choice of which, in addition to the color palette and aesthetics, should pay attention to their quality and specifications. Today the construction market offers a huge range of different thermal insulation materials, among which for insulation of walls in the bathroom you can choose glass fiber, mineral wool or extruded polystyrene foam.
How to keep warm in the bathroom
Before you begin to warm the walls, you need to take care of the heat, which will need to be maintained. Heating by means of radiators in this case is not able to fully cope with the fulfillment of this task. In addition, they heat only in the heating season. It is for this reason that experts recommend installing an electric heater in the bathroom, for example in the form of a warm floor.
For the device of a warm floor a two-wire cable is used, which is laid on the floor with a certain frequency. The more often the heating wire rings are located, the more efficient the floor heating will be. The laid construction is poured with a concrete screed, only one wire is left outside, intended for connection to the network.
The warm floor in the bathroom allows you to enjoy the warmth even after turning off the central heating.
Ways of warming the walls in the bathroom
Walls of bathrooms can be laid out using different materials. Most often it is brick and concrete. These materials are excellent moisture and cold, and therefore before the start of insulation they need to be finished with waterproofing materials. After processing of brick and concrete walls, you can proceed to their insulation, for which you can use two methods.
Method one:
Wall foam foam or extruded polystyrene foam;
- over heat insulating material paste a moisture-resistant plasterboard sheet;
- lay the ceramic tile next layer.
Method two:
Make metal carcass from the wall profile;
- between the vertical frames of the frame, put the chosen insulation in two layers;
- pull isosphere on top of the received structure;
- attach two layers of gypsum board to the frame;
- finish the wall.
When carrying out work, it is necessary to take into account that the warming of the walls leads to their thickening, and this helps to reduce the useful area. Especially it concerns the second method, where a metal frame is used.
Sometimes the bathroom is located in such a way that its wall goes either to the unheated room or to the street. With the onset of cold weather from such walls it is cool, the room is damp and not comfortable. In this situation, the question of how to warm the wall in the bathroom is very acute.
Heat and comfort in the bathroom can be ensured if the following rules are observed when carrying out the insulation work:
- Warming the bathroom from the inside, it is necessary to create conditions for the qualitative functioning of the exhaust ventilation.
- The installation of the heater should be carried out in such a way as to prevent a loose fitting of the thermal insulation material and the formation of voids. Otherwise, in the process of exploitation, it may subsidence and wetting, which will have a most negative effect on the quality of insulation.
- All actions for warming the walls must be carried out after they are necessarily treated with antifungal agents. The surface must be absolutely dry.

- The thermal insulation layer needs protection from direct exposure to water, so a hydro-barrier is needed.

Wall water in the bathroom
- "Cold bridges" should be further insulated by applying a waterproof filler or mastic for this purpose.
- It is important to properly treat the seams of decorative lining with a water-repellent sealant.
- A significant criterion in the choice of insulation is durability and form stability. Quality material is guaranteed to keep the shape (not deformed) and properties during the entire period of operation.
Polyfoam - an excellent variant of a heater for the bathroom, is not afraid of moisture, very easy to install
Choose the material and insulate the walls of the bathroom
The microclimate of the bathroom assumes the use of materials that meet certain requirements as a heater. First of all, this is a high resistance to moisture and vapor permeability. To decide how to insulate the bathroom from the inside and on what material to choose, we will get to know them a little closer.
Styrofoam (extruded or foamed). One of the best materials for insulation of walls from the inside, which has excellent thermal insulation and performance characteristics. Its undoubted merits include:
- low thermal conductivity;
- simplicity of installation and ease of cutting;
- practically zero water absorption;
- low weight of plates.
Foam polystyrene for wet rooms
When using expanded polystyrene, there is no need for additional film vapor barrier. It is important only to carefully isolate the places of contiguity of the material to the enclosing structures and the joints between the insulation sheets. You can do this with polyurethane foam. Today, slabs having a stepped edge are produced, so it is easy to achieve a tight alignment of the sheets.
Installation of expanded polystyrene. Heater does not need additional vapor barrier
The process of insulation with extruded polystyrene foam
A fairly simple method, in which slabs of material, the thickness of which is 25-30 mm, are mounted on the bathroom wall by dot-gluing using a polymer-cement glue. After that with this glue the surface of a heater is reinforced on a glass net. After three days, you can proceed to the front trim ceramic tiles or, after plastering the surface, paint with a favorite paint, intended for wet rooms. For installation, plastic dowels can also be used.
You can insulate the wall in the bathroom with foam or the same expanded polystyrene, using a different installation option, in which it is necessary to make a metal frame. To create a structure, a profile is used for plasterboard. The space between the elements of the frame is filled with sheets of heat insulator flush with the profile and lined with moisture-resistant plasterboard. This option allows you to solve several tasks at once: alignment, warming and preparation for putty.
It should be remembered that the warming of the walls from the inside by any means "conceals" the area and without that, usually, a small room. If you want to minimize the loss of space, then the next option is suitable.We use liquid insulation
Optimal way, which saves space, you can consider the use of liquid hyperfine insulation Corundum, which is applied to the surface like ordinary paint. The thickness of such a heater is 1 mm (two layers of 0.5 mm each). It is a suspension of white color, has excellent adhesion to any surface. Thermal insulation is environmentally safe, high moisture resistance makes it possible to use it for warming the walls of the bathroom. Completely dry coating is suitable for staining or tiling.
Application of liquid waterproofing
Mineral wool for warming the walls of the bathroom
The variant is quite common, but not the most successful for such a damp room as a bathroom. To create a heat-insulating layer, a metal frame is mounted, between which the plates of mineral wool are placed. Good results are obtained using basalt wool, for example, Technonikol.
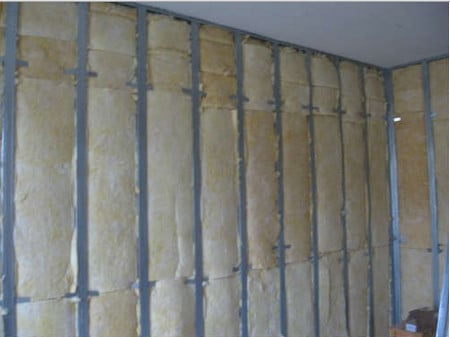
Warming of the walls of the bathroom with mineral wool
The distance from one rack to the other should be approximately 58 cm. It is very important, in this case, to insulate the insulation with a vapor barrier. It is better if it is foil. Before fixing the plasterboard over the vapor barrier, arrange the grating to create an air gap (approximately 1 cm).
Then the resulting structure is plastered with gypsum plasterboard (moisture resistant). Clearance for ventilation should be mandatory. Steam insulation is necessary to protect the enclosing structures and the heat-insulating layer from the effects of water vapor from the inside of the room. The material is afraid of moisture, and if it penetrates through the vapor barrier layer, the insulation does not fulfill its functions.
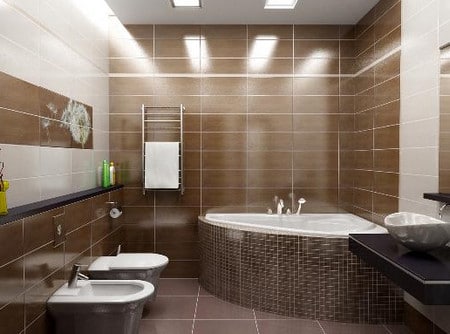
Competent heat insulation will create a comfortable atmosphere in the room
Video story about the insulation of walls and ceiling with polyurethane foam
Before you insulate the bathroom, it does not hurt to check how well the battery and ventilation work. It may happen that the insulation of the wall is not required at all, but you only need to install a fan in the vent and a good radiator or heated towel rail. After all, even the thinnest insulation is taken from the wall about three centimeters.
Solve the problem of warming the walls in the bathroom you can yourself. Of course, if there is time, and at least some knowledge and skills. If there is doubt about the ability to cope with the process on its own, it is better to use the services of professional builders. Most likely, the result will be better and faster.