Any repair, however partial or capitalized, leads to certain questions. Most often, difficulties arise with the kitchen, because this room combines a high humidity and a rather high temperature.
Asking the question, than in the kitchen to finish the walls, one must understand that not every material will withstand such an environment.
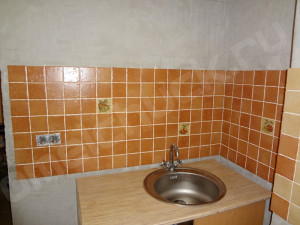
Facing tiles - this is the material that will not only decorate the kitchen, but also free from repeated repairs for a decade. In this case, do not think about how to trim the working wall of the kitchen, ceramic tiles are ideal for places with high temperatures (oven or stove).
There are several types of this tile, which have their own characteristics:
- Mode of production (extruded - manufactured using an extruder of moistened mixtures, pressed - a mixture of sand, clay and other materials, compacted with a press).
Tip: The number of firing, before you finish the tiles in the kitchen wall, you need to know which firing is more suitable for this. There are only two types of firing: single and double, for walls, the first type is preferable, the same firing is applied for flooring.
- Application area (if you plan to trim the walls from the baseboard to the cornice is suitable ordinary tiles, for framing the top of the wall or mating walls, you need to choose a shaped tile).
Than to finish walls on kitchen: variants with various inserts
Buying a tile you need to look at its corrugated side, it is she who is responsible for the quality fixation of the tile on the wall, than the surface of the corrugation, the correspondingly better. The choice of colors and various patterns of ceramic tiles is very large.
Therefore, the options for finishing the walls in the kitchen are very diverse. But, to give the finish a finished look, it will not be superfluous to use shaped details, for example a curb, panels or various inserts.
So:
- Panel - a ceramic insert, representing a few small or one large tile with some kind of pattern. Very popular panels are frisais, complete with several tiles, you can place them as you like, create vertical stripes or cross-shaped compositions.
- Inserts - are square tiles. For the kitchen, the finishes with inserts can be different.
You can choose inserts with a complex pattern, a convex image, for the kitchen there are inserts in the form of hooks for towels or small shelves for spices, see the photo.
- Curbs is a decorative ceramic element of rectangular shape. Curbs can be framed the upper row or put between rows, very well this element zoniruet kitchen, you just need to choose suitable for the main tile tint.
Tip: To understand the better the walls in the kitchen, or rather how to choose a good tile, you need to know its characteristics.
How to choose a tile for a kitchen
First you need to determine the texture, as well as the color of the facing tiles. If a small kitchen is not worth choosing dark material, preference should be given to light tones, small tile sizes and it is better if it is not matte, but slightly shiny.
Before you finish the walls of the kitchen with a tile of several colors you need to be ready for careful installation, as contrasting combinations maximally attract attention.
Tip: Special attention should be given to the quality of ceramic tiles. It should have a clear color without stains, without chips and cracks.
If the laying method is seamless, then attention is paid to the side faces, they should be as flat as possible without the slightest chipping.
Stages of tiling with ceramic tiles
Before you finish the walls in the kitchen you need to prepare the tools you need to work.
For laying tiles you will need:
- Glue for fixing tiles.
- Solution.
- Joint filler.
The decoration of the walls will consist of three stages:
- Align the base of the wall.
- Create a layer of glue.
- Installation of the cladding.
To install ceramic tiles you need a solution, it is also useful for leveling the surface. The solution should consist of portland cement, water and construction sand.
Before you finish the walls with tiles in the kitchen, you need to prepare them, that is, align them.
- Now you can proceed to laying the tiles. Can be stacked in straight rows or diagonally. A straight row can be made from both square and rectangular tiles. Laying diagonally is carried out only from a square tile.
- Wall cladding should begin from the very bottom. With the help of a level, you need to measure a straight horizontal line along which to establish rails along the walls - rules.
The verticality of the wall must also be clarified. To do this, hang the walls with a rope with a load. If there are difficulties when measuring the wall, it will not hurt to find and watch a video on this topic.
![]()
Council. Before fixing the tiles on the wall, it is necessary to make a trial version for determining the required number of tiles for the horizontal and vertical rows.
- If the lining is to be made with seams, calculate the number of tiles you need to take into account the width of the seams. If the calculations show that whole tiles can not do, you need to prepare in advance the required size chopped tiles.
- Before you finish the kitchen wall they need to be moistened with water, it's more convenient to do this with a paint brush. After that, the tile, or rather its back side for a moment, needs to be immersed in the cement milk, you can simply moisten it with water.
This technique improves the adhesion of the tile to the wall surface and to the mortar. - Begin the installation from the corner of the wall or from the middle. On the back of the tile, a mortar is applied with a notched trowel, after which the tile is applied at an angle to the wall.
If from the first time the tile has risen unevenly, until the solution is frozen with light tapping it is necessary to adjust it. After the first row is completely laid, it is necessary to hammer the pins for the second row.
Thus, all tiles and necessary fittings are mounted.
As you can see, putting the tiles with your own hands is not at all difficult, and financially it is much cheaper than calling a working team.
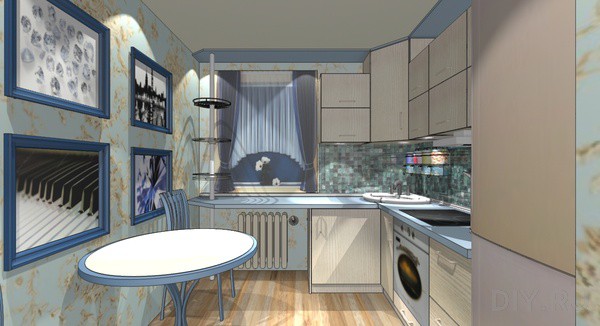
Finishing the kitchen in 9 square. m
Of course, if you are lucky with large dimensions, then the question is how to trim the walls in the kitchen disappears. Here everything depends on the owner's preferences and material condition.
This can be the aforementioned ceramic tile and natural or artificial stone. Necessities to protect every millimeter of the kitchen, no.
But what if the kitchen is not very large? Of course, to select materials for walls that will not hide the space, but on the contrary create a feeling of airiness in the room.
What are the options for finishing the kitchen 9 square meters. m?
So:
- The use of tiles, but not ceramic, but glass. Such a tile is made from waste glass with the use of various additives.
The fact that the glass is brittle material here does not work. Since if the tile is broken (unlikely) there will be no splinters, to all this, this tile is not afraid of moisture, it is durable and certainly safe.
And her external qualities will expand a small room, visually of course, but this is also important.
Council. Before you finish the kitchen with glass tiles you need to sort out some of its types and choose a more suitable option.
- Glass enameled tiles - Ideal for wet rooms, baths or kitchens. At the same time, it has a wide range in color, opaque and high strength.
- Penodecor - a tile with a smooth surface, covered with a glassy film. Suitable for bathrooms and kitchens.
- Stemalite - very strong tile with a diverse relief. But the fact that the stemalite differs in the large size of the tile does not make it possible to use it in a small kitchen.
- Glass Container - more suitable for the kitchen option, small decorative tiles of various colors give the opportunity to lay out the mosaic or combine with other types of tiles.
The price of such a tile has a wide spread, so there is a choice.
Finishing the kitchen in 10 meters
What can be the options for finishing the kitchen in 10 meters? Of course, in this case there are many options. This is painting, decorative panels and wallpaper.
So:
- Painting - the main point, choosing the right color. Here you can use only bright, not bright colors.
For the kitchen, you need to take a paint with a high moisture resistance. But choosing such a method of finishing the walls as a painting, you need to be ready to carefully level the walls. - Decorative panels - very comfortable in installation material, does not require wall alignment, ideal for wet rooms, including kitchens, has a huge selection of patterns and shades.
For reference. There are two types of paneling: high, when the panel goes one sheet from floor to ceiling and the support panel, when the panel covers the lower part of the wall, you can cover up with wallpaper.
- Wallpaper - for the kitchen you need to choose with high characteristics, moisture resistant and of course washable. For the kitchen in 10 square. m can be used and bright with any pattern.
Ideal for wallpaper wallpaper and bedding with small drawings.
Finishing the kitchen in Khrushchev
What are the options for finishing the kitchen in Khrushchev? Since such kitchens have an area rarely exceeding 6 meters, then it is not necessary to talk about facing the walls with tiles, since the space will decrease due to the tile itself.
Here it is worth using several materials for wall decoration.
You can use a decorative panel for the working wall, and wallpaper the rest of the wall (as already mentioned only light colors). To simplify the task, you can wall the walls only with decorative panels, the installation of which is faster than with other materials, and external data is not inferior to expensive wallpaper and tiles.
At the same time, the panels are durable enough and easy to clean.
Whatever the size of the kitchen, and whatever material is chosen for the cladding, special attention should be given to the adhesive composition. It depends on him how long the cladding material will stay on the walls.
Adhesive composition should be high-quality and strictly for a certain material, the attached instructions will help to properly prepare the adhesive mixture.
Kitchen - this is the most highly functional and often visited by the family room. To its design, and in particular to the decoration, you must be treated with special responsibility. Let's look at the finest materials used in the kitchen.
Interior decoration materials should be selected carefully, because the kitchen is a very humid room in which thermal processes take place. Finishing materials must be waterproof, heat-resistant, maximum resistant to mechanical damage. Finishing materials for the kitchen should be easy to clean, because in the kitchen a lot of fat settles, oil is constantly sprayed, water drips and so on.
If your budget is unlimited, experts recommend choosing high quality, expensive finishing materials for the kitchen. But if your budget is not large, the assortment of modern finishing materials will allow you to pick up goods of a cheaper type.
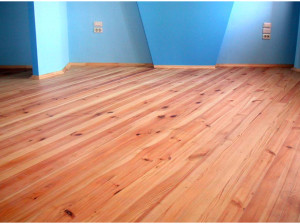
What material to finish the floor in the kitchen
The floor covering should be resistant to mechanical damage, as in the kitchen often something falls to the floor. And the patency of the kitchen is higher than in other rooms. The flooring material must be indelible.
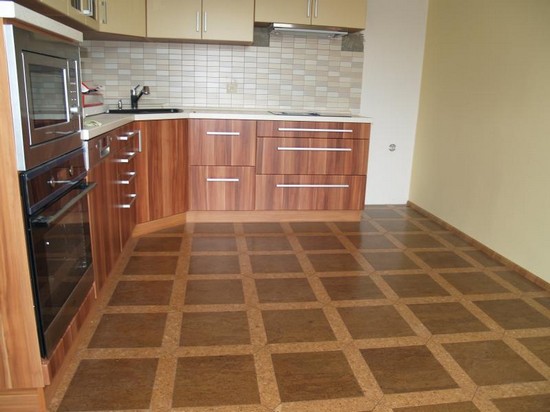
The most popular options are laying linoleum or karmic tiles.
Ceramic tiles are good in all respects, except that this material is too hard, and the dishes falling on the tile will in any case be broken, unlike linoleum. In addition, the tile is very cold material, which will need to be insulated.
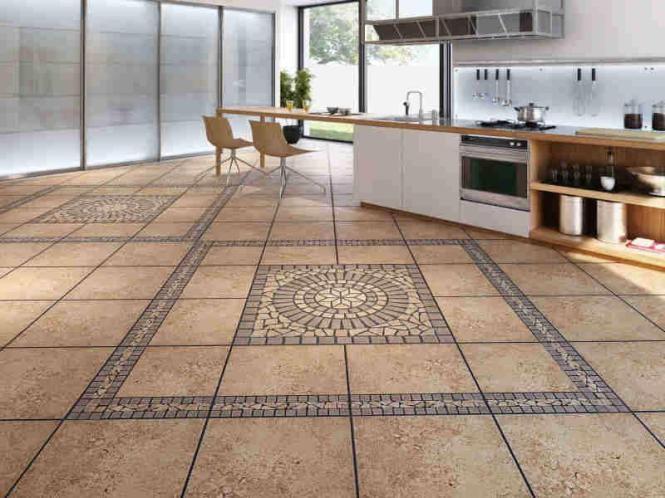
When choosing ceramic tiles in the kitchen, stay on options with a non-slip surface, as the kitchen is often sprinkled on the floor with water, which can be traumatic.
Linoleum is the most popular material for flooring in the kitchen. Its performance is high, and the price is relatively small. When choosing linoleum, give preference to insulated versions.
Speaking about natural materials for flooring, you can distinguish boards with a moisture-resistant coating. However, this option is quite expensive and requires the installation of a professional. Its more cheap artificial analogue is a moisture-resistant laminate. Thanks to a wide assortment, laminate can be selected to any style.

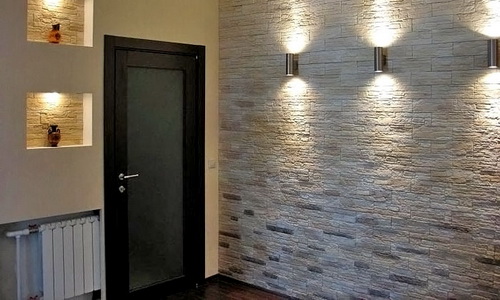
What building materials can be used for wall finishing in the kitchen?
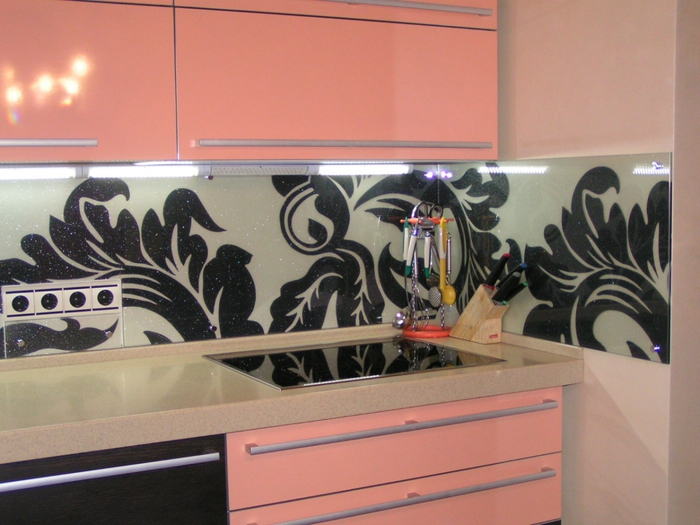
 The most important part of the wall in the kitchen is the kitchen apron (the space between the work surface and the hinged cupboards). It is located mainly next to the sink and hob (stove). The performance characteristics of the finishing material for the apron should be high. The material should be waterproof, shockproof, heat-resistant, easy to clean and resistant to strong chemical detergents.
Traditionally, for the kitchen apron choose glass, laminated particle board (wood-laminated plastic), ceramic tile or mosaic. These materials are more practical to use.
The rest of the walls can be finished with any material you like. You can simply trim the walls with ceramic tiles or paint with paint.
The most popular option is to choose wallpaper, because the material is relatively cheap, and you can do the sticking yourself and do the work in one day.
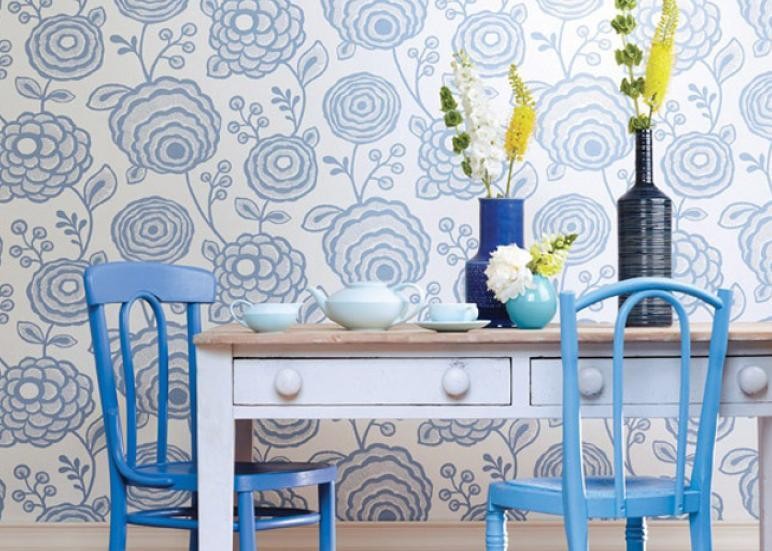
Choosing wallpaper for the kitchen, give preference to vinyl samples. Such wallpaper is easy to clean, do not afraid of moisture and temperature, do not burn out in the sun, because they are covered with PVC film (polyvinylchloride). In addition, such material is the safest for the kitchen, it does not ignite and does not emit toxic fumes, unlike plastic panels.
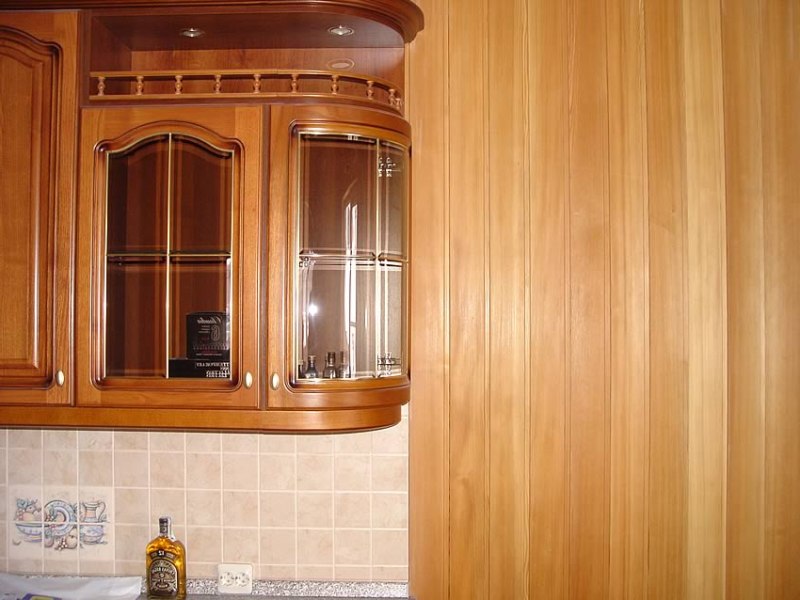
For kitchen walls, it is possible to use textured plaster (actual for rustic styles) or to enclose the kitchen with a lining (wooden, glass, plastic).
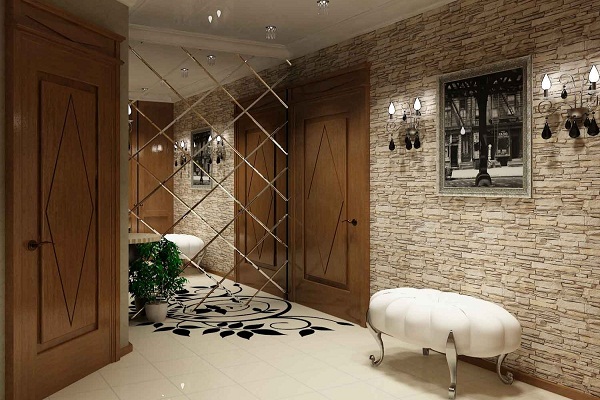
Modern trends allow designers to decorate the walls of the kitchen with a stone (natural or artificial). However, this option is quite expensive. In addition, the stone is not combined with wallpaper and plastic.
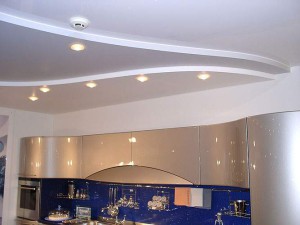
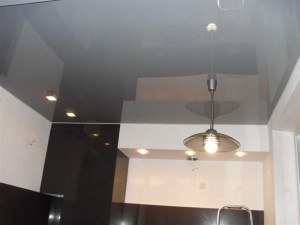
What material can you trim the ceiling in the kitchen
The ceiling in the kitchen should also be made of a material that is easy to clean and not afraid of high temperatures and moisture.
Often, water-based ceiling paints (water-based or water-dispersive) are used. You can cover the ceiling with vinyl wallpaper or trim a tree.
The constructions of tension and suspended ceilings have become popular, in which modern point light fixtures are easily integrated. Thanks to such designs, multi-level ceilings are constructed, which allows zoning the kitchen space.
Please note that the ceiling is always finished before the walls and the floor, except for cases with suspended and tension ceilings. Their installation is usually performed after the completion of the repair work.
Whichever chosen design style, the kitchen should be finished with materials with exceptionally high performance, otherwise the repair will have to be done every 3 months. The modern market of finishing materials is so wide that you can easily select the materials you need for stylistic features and pricing.
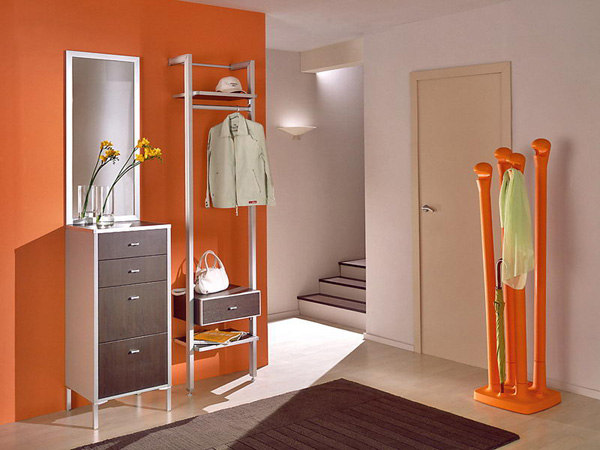
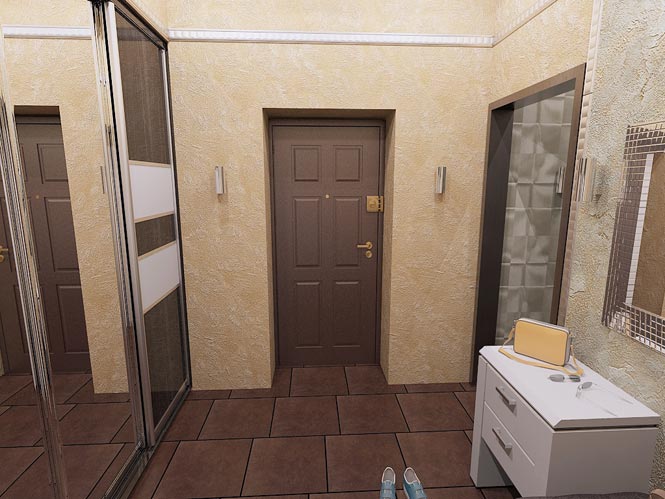
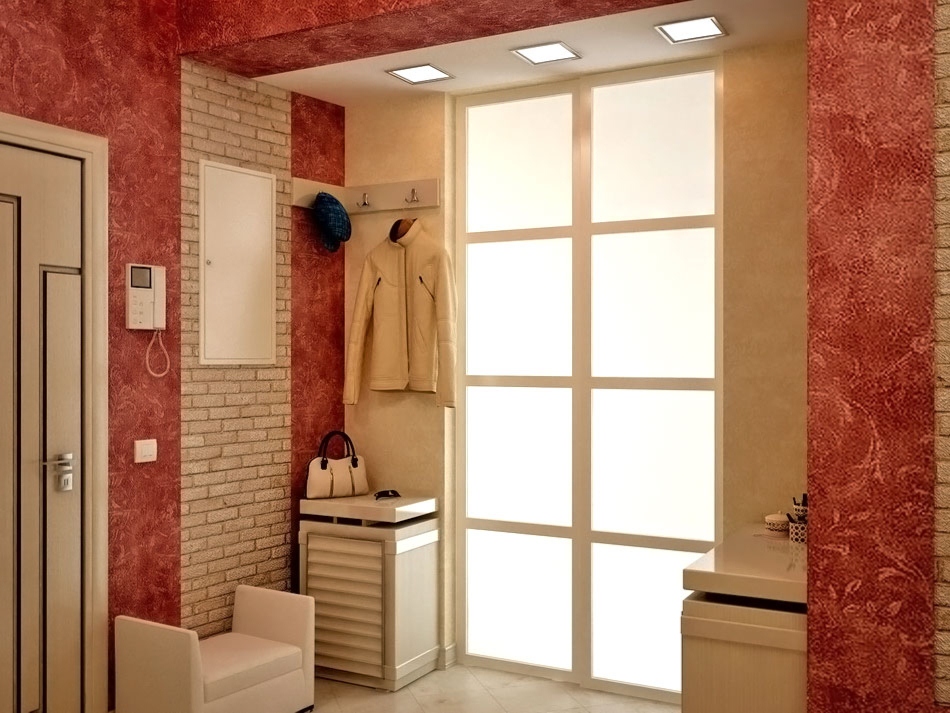
Walls - one of the most vulnerable places in the apartment, because they are exposed to a lot of negative influences. They get a drop of dirt and moisture, brought on shoes, clothes and umbrellas from the street, they can rely on when putting on or removing shoes, the child can hook the walls with runners of sledges, and the animal - with claws. There are many possible impacts, but the result is one. To not have to every year, you need to take care of durable, durable, wear-resistant and easy to clean wall covering. Which are suitable for the walls of the hallway is best?
№1. Paint
- this is not only the most economical and easiest way to finish them, but also one of the most practical. For the walls of the hallway fit latex, silicate, silicone and acrylic paints, which quickly dry and have a sufficient number of shades. The surface colored with such compounds can be washed, which can be called the key advantage of this solution. Among other advantages is:

Among the minuses painting only the need to carefully prepare the surface of the walls. They, so that the cover on them looked neat.
№2. Decorative plaster
Allows you to create a fairly interesting and unique finish: thanks to the fillers, you can get a smooth shiny surface (Venetian plaster) or relief. In addition to interesting decorative effects, plaster is often used in vestibules and thanks to other benefits:
On non-standard architectural forms, with the space of the hallway will not be reduced, which is important for owners of small apartments. The only drawback is the high cost of some types of plasters, but this minus is more than compensated by the durability and practicality.
No. 3. Micro cement
Micro cement - a material that appeared on the construction market recently. On a number of properties it can be attributed to decorative plasters, but outstanding performance makes it necessary to consider it separately. The material consists of a polymer-cement mixture into which dyes are added.
The main advantage of micro cement - the ability to apply it to any substrate: on a tree, and the metal to hold such a finish will be equally strong. In addition, using micro cement, you can create a smooth, rough, matte or embossed surface. Due to the structure of the material, any color turns out to be natural, as it is slightly muffled. The wall made by the micro-cement turns out to be strong, it does not lend itself to mechanical influences, so for the hallway it is just an ideal option, especially as it will be cheaper to cost than ordinary decorative plasters.
№4. Wallpaper
Despite the existence of many types of modern decoration materials, the wallpaper continues to be actively used everywhere, including. . Of course, for this room will not work, but new types of wallpaper with interesting properties have appeared, and the assortment has expanded so much that it is not difficult to choose the material suitable for the characteristics and colors.
Us simplicity in installation, low cost, a huge selection of shades and patterns. Among all the numerous types for the hallway are the following wallpapers:

By the way, using color and wallpaper designs you can visually fix some of the disadvantages of the hallway: use light wallpapers, and for low hallways the wallpaper with a vertical strip is suitable.
№5. Plastic panels
- one of the varieties of wall panels, which are now successfully used to equip the hallway. The main advantages are:
- low price;
- a huge variety of design options, and you can choose as monochrome panels, and material with ornaments or imitating wood, stone, etc. At a low price, you can achieve amazing visual effects;
- easy installation and no need to level the walls;
- possibility of wet cleaning.
To consit is worth attributing the property to burn under the influence of sunlight. In addition, the material can not be called the strongest: a strong blow will damage the integrity, but in the usual conditions of the hallway panels show themselves well and justify their value.
№6. MDF panels
But they are more durable, environmentally friendly and look more solid. In fact, this is an alternative, and at its core is an MDF plate that is veneered, laminated or painted to imitate some kind of wood, leather or stone.
The main advantages of MDF panels are:
- a wide range of;
- simplicity of installation and maintenance;
- durability;
- ecological compatibility;
- affordable price.
When arranging the hallway in this way, it is necessary to take into account the low fire resistance of the material, as well as its solid weight and the need then to equip special fastenings, if necessary, to hang something on the wall.
№7. Fake diamond
Artificial stone is made on the basis of gypsum, so you can talk about the environmental friendliness and safety of the material. Modern technologies allow you to create exact copies of such natural stones as marble, onyx, granite and many others, but they are made easier and cheaper. On the basic properties of an artificial stone is almost inferior to natural, and among its advantages is:
To disadvantages stone is not considered to be the lowest cost, therefore, not all the walls in the hallway, but only their lower parts and doorways, are formed: so, a decent saving is achieved, and the most dangerous parts of the walls will be reliably protected. Combine the decorative stone with paint or plaster.
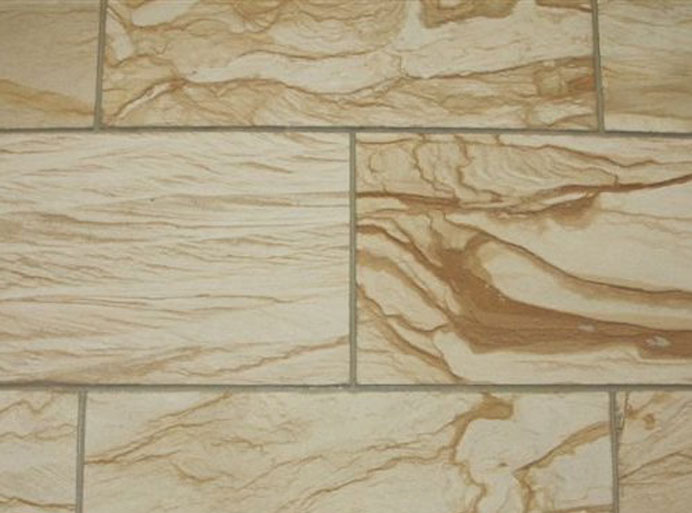
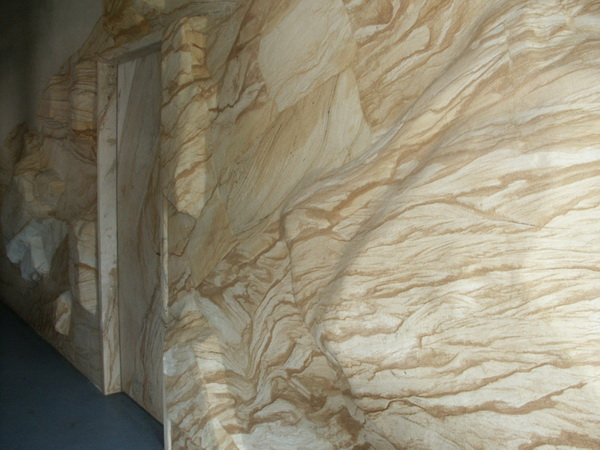
№8. Flexible stone
The flexible stone appeared not so long ago on sale, therefore has not found enough popularity yet, and many simply do not know about its existence and advantages. This is a natural material that can be used even for finishing facades, which indicates strength, resistance to wear and moisture. It produces a flexible stone based on sandstone, which is applied to the fiberglass. Thus, the finishing material is obtained in the form of plates and wallpaper, the main advantages of which are:
- environmental friendliness and harmlessness;
- simplicity of installation;
- resistance to moisture and fire;
- ease of maintenance;
- durability. Experts say that the material will last at least 35 years;
- since the flexible stone is plastic, it can take completely unexpected configurations, so that you can realize the most unexpected solutions.
Of the minuses, it is worth mentioning only the price that remains at the level of natural stone, but for durability and exceptional operational qualities it is necessary to pay.
№9. Ceramic tile
Yes, we are all accustomed to associate or, but this material with a good selection, perfectly fit into the interior of the hallway, and even its excellent performance can not be said. Among the main advantages of ceramic tiles is:
- a huge range, so it's not difficult to choose the material of the desired color and with a certain pattern;
- practicality, resistance to scratches, to moisture and temperature changes;
- strength;
- durability.
Today, a huge selection of ceramic tiles: it can even imitate wood, stone or leather, therefore, perfectly fit into the interior of the hallway. Moreover, for some interior styles tiles are the main element of decor. So, it will look great in the hallway in the style of Provence or country, it is not necessary that all the walls - it is important that their lower part is well protected.
Finally
Since the hallway regularly suffers from the negative effects associated with street mud, it must be designed so that after any contamination it can be quickly put in order. First of all, this concerns the walls. The choice is complicated by the fact that the finishing material must also be attractive in appearance, to meet the chosen style of the interior. It does not prevent to think over several suitable options and will stop at the one that will suit the maximum number of parameters. Do not forget about the possibility to combine some materials with each other, while achieving interesting design solutions.
Many owners of apartments (especially small ones) increase living space by adding loggias and balconies. If you properly glaze and insulate the balcony, you can keep the required heat. However, people who realize this idea, are wondering - the better to trim the balcony inside? There are several options, with their help you can not only arrange a place to rest, but also organize, for example, a summer garden, a full-time study or even a small gym.
When choosing a particular finishing material, it is necessary to take into account, first of all, the functionality of the future premises; in addition, you need to do the following:
- objectively assess the strengths and weaknesses of suitable materials;
- determine how fit the finish is in terms of care and practicality;
- to find out whether it will be possible, if necessary, to carry out repairs on their own.
Also do not forget that the balcony is located closer to the street than the rest of the apartment. Therefore, the finishing material will be subject to greater influence of negative factors. Therefore, the chosen option should be durable, resistant to temperature changes, humidity and ultraviolet.
Today we will consider possible options, and comparison of those. characteristics will help to find out which one is better to use in the skin.
Until recently, wooden lining was almost the only material that was used to finish the room described. People liked (and still like) the aesthetics and attractiveness of these products. Wrapped walls create a feeling that you are somewhere on the terrace of a country house, and city residents, as you know, are more than favorable to such things.
Main characteristics
We should start with the delineation of two concepts. The boarding is a planed plank with natural moisture, but the lining is dry. In addition, the lining is more qualitative, differs in the complexity of the profile, the increased demand for moisture levels, and also channels for ventilation are provided in it. Despite significant differences, both materials are similar in their technical characteristics.
We will become acquainted with the main advantages of lining.
- Good insulation. Yes, the described material refers to finishing, but it has excellent thermal and noise insulation characteristics.
- Environmental Safety. Lining is a natural material that does not have any harmful properties.
- Easy installation, quality connections. With this material, you can create simple, but extremely reliable designs.
- Durability. At observance of all operational requirements the vagonka (eurowall) will serve from 15 to 20 years.
Also, we note that some grades of material are inexpensive, which today can be called one of the main advantages. But in order for the board to last as long as possible, it is better to give preference to pine profile boards - they are somewhat more expensive than, for example, fake, but better quality. For the lining, selective expensive grades of wood are generally used, which after drying are treated with special antiseptics and fire retardants.
Molded board - types
Important information! Equally important is the labeling of products. Almost the entire board passes the same production cycle, and sorting is already done at the output when forming. It is at this stage that the material is checked for quality and grouped (assigned one of three classifications - "A", "B", "C"). The higher the class, the higher the quality of the products.
The material of class "C", in fact, is the usual waste. You can work with such a lining, but you should not expect a good result.
Boarding grade "EXTRA"
Mounting Features
Both the lining and the lining are mounted on the same technology.
Stage 1. First you need to prepare the walls. All working surfaces are thoroughly cleaned, leveled and prepared for the installation of the crate.
Step 3. The last step is directly the skin, which can be performed in one of the following ways:
- hidden;
- open.
The panels of the lining can, for example, be joined by the spike-groove method by means of kleimers (these are special staples). As for the usual lining, it can also be attached to the Kleimer. This method is called hidden. With the open method for installation, self-tapping screws and nails are used.
The installation procedure itself is quick and easy, but, importantly, the lining is recommended for use on well-insulated balconies.
Video - How to sew a balcony with a lining
Option number 2. MDF panels
They are fibreboard, having an average density. Such products can be of several types - from flat panels covered with veneer or a polymer film, to elements with relief patterns.
Advantages of the material
The main advantages of MDF panels include:
- excellent operational properties;
- a variety of textures and colors;
- simplicity of installation (the panels can be mounted in any direction);
- the possibility of laying a heat insulator or wiring in a sub-panel space;
- no need to prepare the walls (this does not affect the quality of the installation).
Mounting Features
The procedure for paneling the balcony using MDF panels looks like this.
Step 1. As we have just noted, there is no need to prepare the walls, but the crate will still have to be installed, since it is the cladding material that will be attached to it.
Step 2. The starting panel is placed in the corner of the erected crate, after which it is fixed by means of a special glue.
Step 3. The remaining panels are mounted in the same way and are additionally attached to each other by means of grooves.
Stage 4. The last panel is trimmed according to the required size, fastened to the glue and snaps into place with the adjacent one.
As you can see, sheathing with this material is able even for a beginner, because no special effort, no time for installation will be required.
Option number 3. Drywall
The following material is also popular, and many are wondering if it can be used for balconies. At once we will make a reservation that the drywall is fragile, it is rather difficult to clean it, and it loses its original appearance quickly, but at the same time it has its advantages.
To such it is possible to carry:
- simplicity of installation;
- the possibility of implementing various design solutions;
- low cost.
Important information! Drywall can only be used as an initial layer, ie, a different finishing material is mounted on top of it. Another drywall (GK) is fragile (if we speak of it as a cladding), and for a balcony it is suitable only if carefully insulated.
Now we will get acquainted with the installation technology.
Table. We cover the balcony with plasterboard
| Steps, №№ | Brief description of actions | A photo |
|---|---|---|
| Step 1 | First you need to build an iron crate, on which the GKL will be installed. | |
| Step 2 | Then (if necessary), insulating material is placed in the cells of the crate. All formed cracks and joints are filled with mounting foam or sealant. | |
| Step 3 | After this, the drywall assembly begins immediately. The sheets are attached to the metal crate by self-tapping screws, while the latter should be screwed with utmost care to avoid deformation. | |
| Step 4 | At the end of the finishing work. A layer of putty or any other material of a similar purpose is applied over the drywall. |
When all the work is completed, the walls can be painted to make the material look more neat.
Option number 4. Siding
As a rule, panels of siding are used for exterior decoration of buildings, but they can be successfully used for internal works. In the manufacture of vinyl panels a special technology is used, thanks to which the material has several significant advantages.
- It is sufficiently resistant to atmospheric influences of almost all types.
- If the surface is damaged, then instead of a costly full repair, you just need to change the damaged panel (or panels).
- Siding is environmentally friendly, it does not contain any flammable or harmful substances.
- The material described is also heat-resistant, so it can be mounted under any temperature conditions.
- Finally, siding allows you to create "breathing" walls.
Features of the installation
The technology of paneling the balcony with siding panels is also not anything complicated and consists of three main stages.
Stage 1. The first thing to do is install a crate, on top of which the entire installation structure will be fixed.
Step 2. By means of screws, fixing profiles (special, intended for siding) are fixed. First, at the bottom, the starting bar is mounted, and then the profiles themselves (H- or J-shaped) are installed. Ends with the installation of the finishing strip.
Additional elements
The material is similar in its characteristics to the vinyl siding described above, but differs, first of all, in that it is intended exclusively for internal works. More details about the installation process can be found in the video below.
Video - We improve the balcony with PVC panels
Option number 6. Sandwich panels
Sandwich panels for logs
As for the installation process, it should look like this.
Step 1. A special fittings (outer and inner corners, as well as final parts) are being built.
Step 2. The starting panel is assembled (its narrow part is placed in the corresponding groove), after which the accuracy of the installation is checked through the building level.
Step 3. Self-tapping screws or staples are used to fix the wide part of the panel.
Step 4. The second panel is connected to the start panel by mounting the narrow part and further fixing it. Similarly, all subsequent panels are mounted.
So what to choose?
Whatever it was, everyone should decide for themselves which finishing material suits him best. But if you do not have the appropriate skills, then it is advisable to buy either siding or lining. If the main goal of the work is qualitative isolation, then preference should be given to sandwich panels. And the above features of each material with the installation rules will help you make the right choice.
The conclusion. Ceiling and floor
The ceilings are often covered with the same material as the walls, thus ensuring the integrity of the room. You can combine different invoices to hide the flaws of the balcony. There is, for example, one old method that helps to raise the ceiling. This method consists in applying materials that are contrasting in color.
Important information! When covering the ceiling, remember that it will be placed lighting (if it is provided).
The floor, as a rule, is covered with linoleum, but recently there have appeared several alternative variants having the same performance characteristics, but looking much better. The floor on the balcony can be covered, for example, with a laminate (necessarily moisture resistant) or ceramic tiles.