It is better to lay the thermal insulation inside the house only as an additional measure. If the outer walls are not protected from the cold, during the warming inside the house, condensation will constantly form in the room, which will promote the development of fungus and mold in the walls.
Dew point
The dew point is the temperature at which steam turns into water. Condensation falls on the heat-cold boundary. In our case, it will appear in the place where the unheated wall comes into contact with the warm air coming from the room. And the more the difference between the wall temperature and the temperature inside the room, the more condensate will be.The dew point in the wall of the house
If the house is insulated from the outside, there will be no sharp temperature drop when laying additional heat insulation inside the house, so the amount of condensate inside the building will be minimal. But he will still accumulate.
To ensure that the walls do not get wet after the warming, not only the insulation choose the right material, but also to take measures for the ideal sealing of seams. To avoid condensation, it is better to insulate only separate parts of the walls from the leeward side, the end parts and corners.
Choice of materials
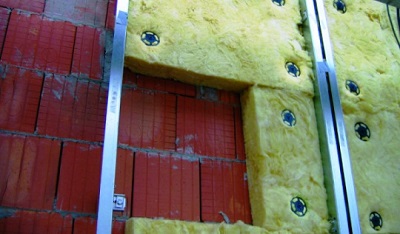
For internal insulation should not choose materials that have a high degree of moisture absorption: mineral wool, a cork, warm plaster or plasterboard. The last two materials can be used only as a finishing layer.Porous penoplex does not absorb moisture, but has a low vapor permeability, so it can only be used if the quality of the seams is ideal. If thermal insulation layer will be leaky, between the wall and finishing material condensate will form.
The air permeability of the foam is higher, in addition, to achieve an ideal docking with the wall with the help of this material is very problematic, so it is for interior decoration It is better not to use its walls or to choose a foam of increased strength.
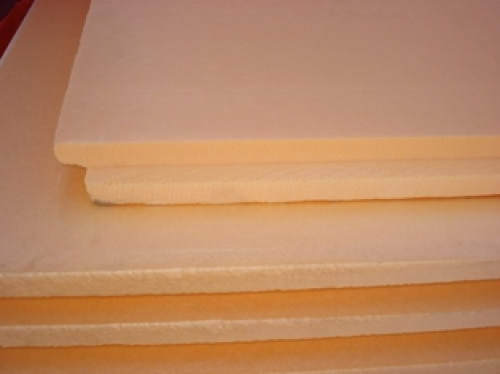
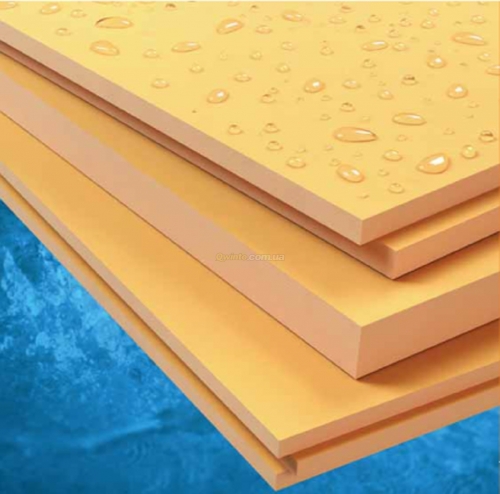
Penoplex
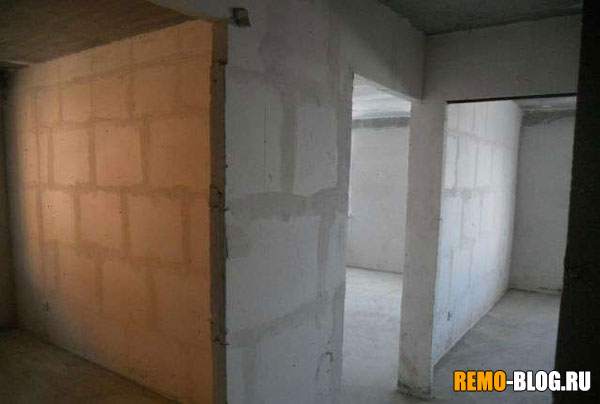
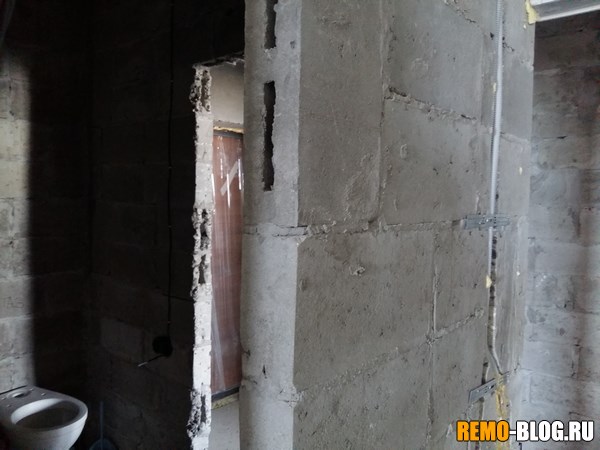
Wall Preparation
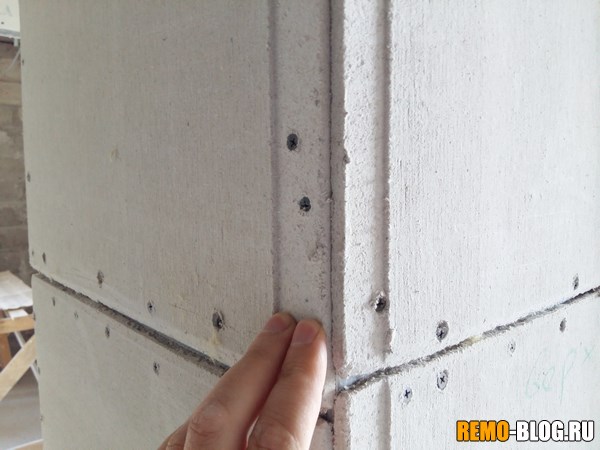
Before sticking heat-insulating materials, the walls must be completely cleaned of old wallpaper, paint and crumbling plaster. To do this, you can use a metal brush, a construction hair dryer or a Bulgarian with a special nozzle. In the presence of mold or fungus, these areas after treatment are further treated with antiseptics.In order to avoid the appearance of cold bridges and condensation loss, all cracks should be completely filled up with foam or mortar. The protruding parts of the wall, which do not allow to lay the heat-insulating material evenly, are knocked down. Too large dents are smoothed with mortar.
Cleaning walls
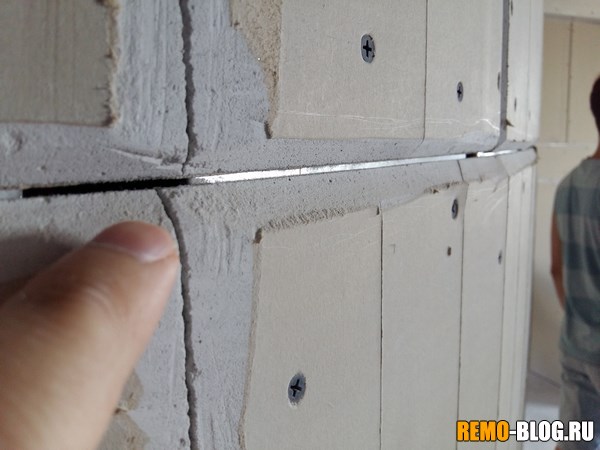
Carefully and all holes and cracks between the wall and the window are fixed with the help of mounting foam. After its solidification, the residues are cut with a knife.
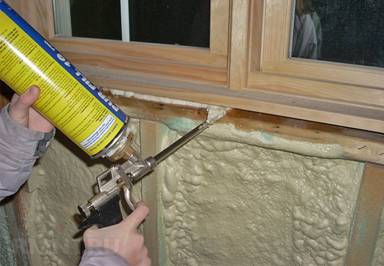
Fixing the slots with foam
Padding
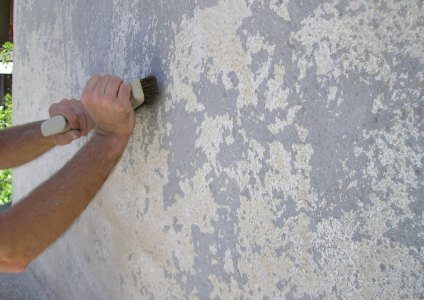
Applying a primer layer will reduce the degree of vapor permeability of the walls, strengthen the surface and increase the degree of adhesion to the adhesive composition. In addition, this treatment will prevent the development of the fungus.For priming, deep penetration formulations should be chosen. For the treatment of wood, it is better to choose alkyd mixtures. Acrylic primer is universal and can be used for any kind of surfaces. Epoxy compounds are used only for the processing of concrete and brick walls.
Primer is applied twice. The second layer is applied only after the first layer dries. Smooth walls can be primed with a roller. In the presence of a large number of dents and chips it is better to use a conventional brush, which bristles are able to penetrate even into the smallest cracks.
Wall priming with roller
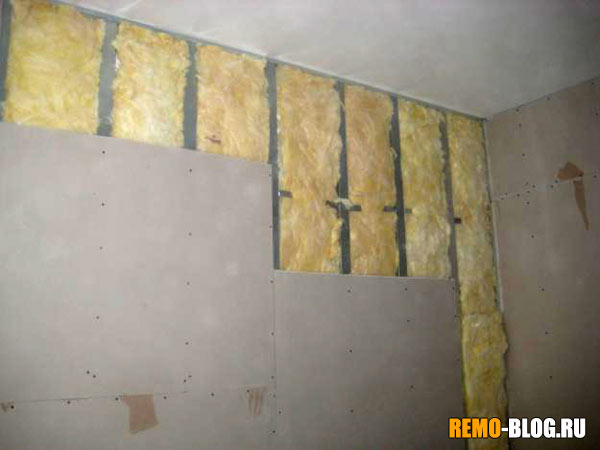
Laying a vapor barrier film
Before mounting the heater on the wall is fixed foil material reflecting heat, or a thick polyethylene film. They are fixed to wooden bars or profile with the help of staples, adhesive tape or mounting glue. The foil is laid shiny side outside, to the room.All joints are glued with building tape. In places of contiguity to building structures and pipes, they are additionally treated with a liquid sealant and fixed with a stapler.
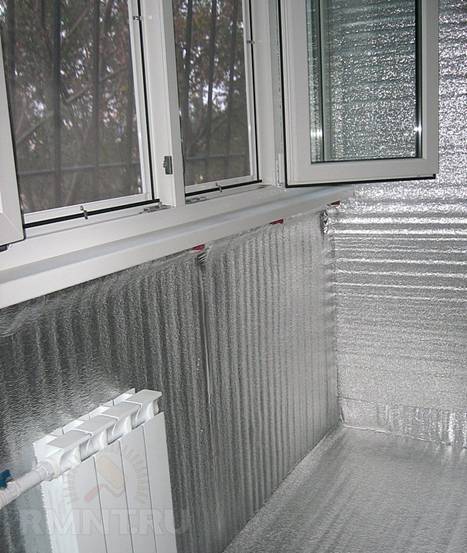
Finishing with foil insulation
The film or foil material is overlapped, while the joints of the web should fall on the frame racks. On the adjoining walls, windows, ceiling and floor is a small allowance.
Mounting of insulation
Unlike foam plastic, the foam does not have a rough, but a smooth surface, so to increase its adhesion to the wall before the label it is processed needle roller or sandpaper.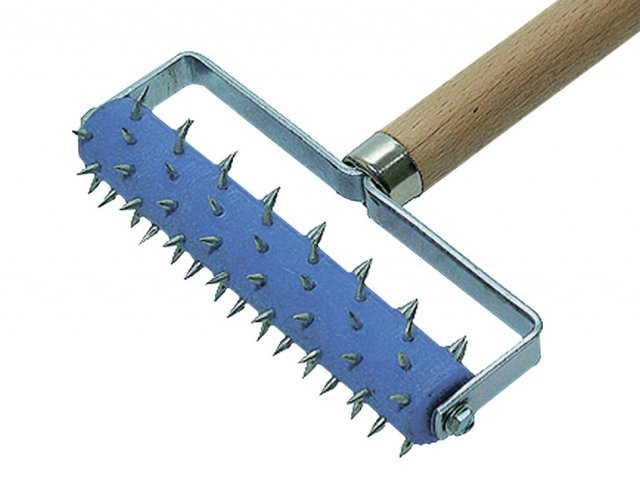
Needle roller
Small areas (space under batteries, slopes and window ebb) are isolated first. Penoplex is well cut with a hacksaw or sharp knife. To avoid damage to the material, it can be cut by hot wire.
Important! Work should be carried out in the summer after thorough drying of the room. The walls, on which the thermal insulation material will be laid, should be as dry as possible.
Wall decoration by penokleksom
To fix the sheets to the wall, it is better to use a special adhesive compound designed for work with foam foam. It must be diluted in small amounts: the dried mixture will crumble and the insulation will be broken. It retains adhesion for 10 minutes - during this time, the penoplex sheet should be fixed to the wall.
The adhesive is spread evenly over the entire sheet using a notched trowel. With uneven walls, the adhesive can be applied with a thicker layer only in the center and perimeter of the sheet.
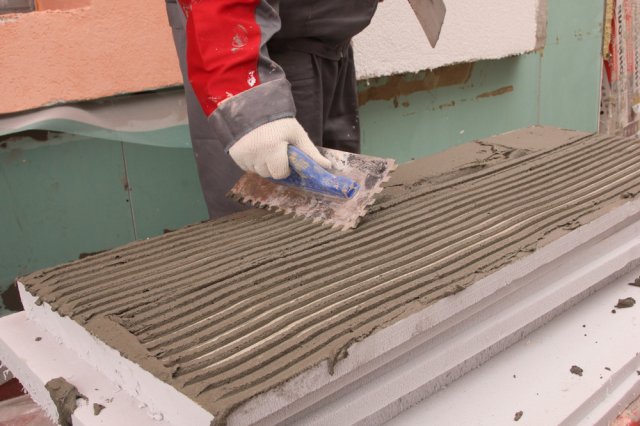
Plastering of sheets
The sticker starts at the bottom of the wall. The sheets are joined together end to end. Unlike foam, the foam has protrusions along the perimeter, so this connection will be more hermetic. As a support for the bottom sheet is better to use starting metal profile rail, which is fixed to the wall with dowels and washers.
The sheet is glued upwards. It tightly presses against the surface, and then the excess glue "expelled" from under the sheet. For displacement (the penplex is glued in staggered order), the first sheet of the second row is cut in half. The correct installation of the penoplex is controlled by the building level.
Important! The crevices between the penokleksom are filled with scraps of material and are glued. It is not recommended to use a mounting foam for this purpose. In the process of expansion, it can lift the penoplex sheet, which will lead to a breach of the tightness and the formation of cracks.

Penoplex fixation
Additional fixing of the sheets is done with the help of plastic "fungi", in which the dowels are inserted. To do this, holes are drilled through the wall through the insulation sheet: four at the corners of the sheet and one or two at the center. Dubels must enter a brick wall to a depth of at least 90 mm, in concrete - to 50 mm. They are clogged with a rubber hammer.
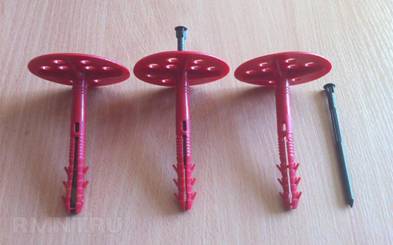
Plastic dowels
After warming on the wall, you can attach a drywall or reinforced film and trim it with decorative plaster.
But it is necessary without it in any way. After you need to blow over the installation of walls, and here comes a reasonable question - and from what do these walls do? Today I offer you several common options ...
Let's remember, what did the walls do before? Everything is simple - it's either brick, or concrete, or varieties of gypsum. All these technologies can be applied now, but is it worth it? Let's figure it out, all by points
Brick
Indeed, these walls are the most famous and used to be very common. Great advantages of such walls are good strength, as well as good sound insulation.
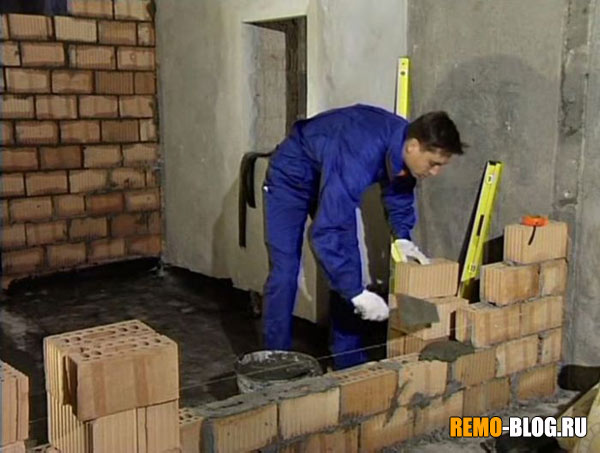
However, now it is rather problematic to make them and there are several explanations for this:
- You need to be able to put a brick, keep a level, you yourself can hardly, you need experience.
- We need cement, that is, it will be necessary to interfere with it.
- The complexity of delivery, imagine - if you were brought several hundred bricks, to the courtyard of a multi-storey building? You will block all traffic, but it's really difficult to raise them
- Brick after laying will need to "shtrobit" for wiring, and this requires diamond wheels. The work is complex and very dusty.
Concrete or GIPS
Now it is difficult to imagine, if you do not have walls in the apartment, and you want to pour them from concrete. Then you "my friend" is simply a sufferer. Such a difficult work I have not seen. You will have to make molds for the walls, and then pour in the concrete mix! The walls are of course very durable, but the labor costs are simply not commensurable. And it will be expensive, again, as you will drag concrete to high floors? If you interfere at home from cement and sand, you will have a construction site, and not a repair in the apartment. Paul "do" 100%. In Soviet houses, concrete walls were already in the form of slabs, they were delivered ready for construction and simply welded, and then cemented in places of joints. Now this technology is almost dead.
GIPS - now still lives, but for some reason it has not received wide distribution. As I suspect - because of its price. Modern forms of GIPSA factors, these are plates that are assembled as a designer.
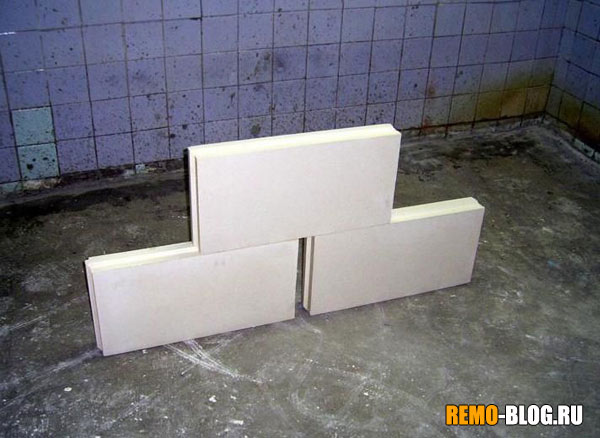
Produced from foamed cement, so very light. Personally, I have a wall because of it. I made such a developer, so I did not demolish them, they suit me. Now it is one of the most common types of material for interior walls.
The big pluses are lightness, good heat retention, large dimensions (there are pieces of half a meter in width and 30 cm in height), easy fixing (there are grooves like the designer in which you fill the solution and insert one into the other), good noise insulation of rooms.
However, there are also disadvantages, although only one is strength, you can pierce through the usual hammer (it's problematic to hang a kitchen), such walls are likely decorative. No, I certainly hung up both the TV and the kitchen, but I had to strengthen the bindings (I can write a separate article).
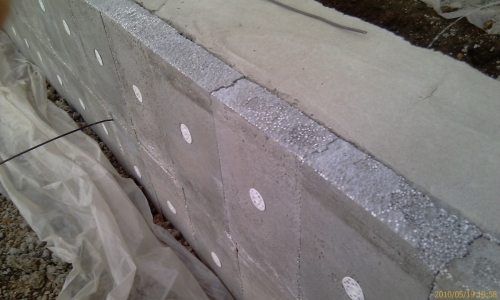
Concrete blocks
Almost the same as aerated concrete, but made of cement, there are also large sizes (50 cm X 30 cm).
Strong, some have grooves as designers, which facilitates their fastening, good noise insulation, are also attached to the "solution", you can hang anything (it will hold very firmly).
Minuses can be called - their weight (really heavy), complex delivery (one can not cope again because of the weight).
GWL and GCR
Combined into one item, because both materials are supplied in sheets and the technology of installing walls is the same. Now many make walls from these materials. You know, guys are almost always justified, because the erection of these materials is very "fast" and you can say "mobile". They ordered the sheets, they brought them to you, they were dragged straight from the car into the apartment (that is, you do not create any congestion on the road) and then the masters build such walls for 2-7 days. Very fast. However, everyone wants to share them a little:
- the most durable material than GKL, is moisture resistant, suitable for the bathroom. It does not crumble even from blows, it is installed on a special profile. The walls are really flat, with a small skill you can handle yourself with the erection.
There are small disadvantages - noise insulation of the wall and heat retention "no", it is necessary to lay a heater and noise insulation. Also, if you fasten the kitchen or drawers, you must necessarily get into the profile, otherwise they can just fall down.
(or gypsum cardboard) is the cheapest material (so many people buy it because of the price), but it is also the most fragile, in fact it is a pressed gypsum inside that holds two sheets of pressed paper from above and below.
![]()
The big drawback is his fragility, really breaking even with his hands, I'm already silent about hammers, etc. Not intended for the bathroom (immediately swells). Joints sheets, you need to carefully seal, special plaster, otherwise they can collapse. As well as GWL, it is necessary to insulate and to soundproof.
DSP slab
Now there are a lot of builders of frame houses, make the walls inside of this material from the DSP plate (). It is an environmentally friendly and durable material that consists of cement and wood converted chips. There are different thicknesses, ranging from 10 mm to 100 mm. Usually it is fastened as well as GVL - GKL, it can be used both in bathrooms and in usual partitions.
The downside is the price, weight and ease of installation, it's really hard to mount one.
These are the main materials from which you can make walls in the apartment. Many people can ask a question about, but I consider this material, yet for exterior decoration of the walls of the house, and not for internal use.
Read our construction site.
Heat comes from a private house, not only through the cracks in the windows and doors - most of the heat energy flows through the floor, ceiling and walls, even if they are finished with materials that are relatively good at blocking the entry of cold air. To ensure the effective preservation of a constant temperature inside the room, it is recommended to insulate its walls from the outside with your own hands - not only in the basement area, but also the surface of the whole facade.
Variants of thermal insulation of walls
You can warm the house not only from the outside, but also inside, but external insulation has a number of advantages. So, when choosing this method, warming not only protects the house from cold, but also the walls become less prone to aggressive environmental factors - first of all, humidity and fluctuations in air temperature.
There is a wide range of materials for warming the walls of a private house with their own hands, each of which is better suited to a particular situation and for certain operating conditions. You can use polystyrene foam or more practical extruded polystyrene foam, mineral wool or polyurethane foam.
Consider the basic technologies of insulation
As for the technology of insulation, there are three:
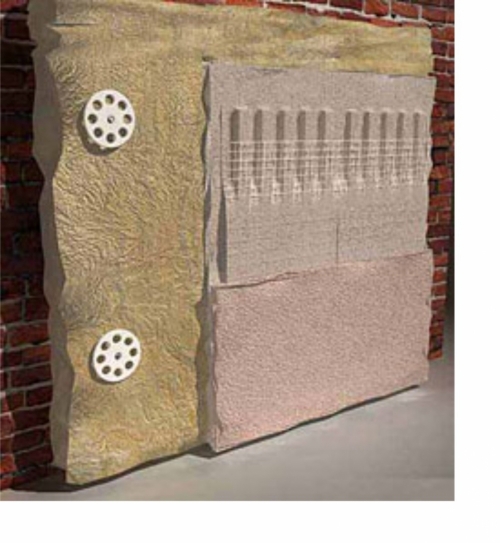
- the simplest method - gluing the insulation to the surface of the facade or socle, after which the thermal insulation material is covered with a layer of plaster for the subsequent decorative finishes walls;
- three-layer walls without ventilation - the adhesive solution is applied to the base, a heater is fixed on it, then a brick facial covering with the thickness of one stone is erected with observance of the gap;
- ventilated facade - a frame made of galvanized profile or wooden crate is installed on the wall, then the surface is covered with a layer of waterproofing, on which the heater is fixed, after which the entire structure is closed with decorative plates of various materials.
The methods differ in their reliability, total cost and complexity of the execution by their own hands. To any of them was carried out qualitatively, you need to carefully study the nuances of warming - in any case, the procedure for thermal insulation of the socle or facade is more difficult than finishing the floor or ceiling.
In addition, the method should be chosen based on the conditions under which work is carried out. In winter, the only option is the construction of a ventilated wall, since it does not use adhesive solutions that do not work out in the cold.
Nuances of a choice of a warming material
Each of the insulating materials on the market fully performs its functions, differing only in price and additional parameters, such as resistance to moisture and ignition. In contrast to the floor or ceiling, which can be insulated with your hands almost anything, exterior finish The walls of the building must be made using one of the following materials:
- plates of dense foam or extruded polystyrene, characterized by a small mass;
- mineral wool;
- polyurethane foam;
- slabs made of rock of volcanic rocks;
- cellulose wool (ecowool).
To the differences in materials, you can also add a parameter such as vapor permeability, very important, when the exterior walls and the basement are finished. Steam should be as free as possible to penetrate through the heater, so that the main wall does not begin to deteriorate ahead of time, and the interior does not condense with moisture. Because of this, when using EPS or foam it is necessary to ensure good ventilation of the wall, as these materials do not pass steam well.
Although any of the materials provides a sufficient degree of thermal insulation at home, the heat conductivity in them is different. This is due to the physical characteristics of the substances that make up the heaters. Depending on the value of these parameters, the thickness of the thermal insulation layer is chosen: the lower the thermal conductivity, the better material Keeps heat and the thinner can be a layer of insulation.
Nuances of selecting the required thickness
 The thickness of the plates of heat-insulating material, when the walls of the facade and the plinth outside the house are finished, should be selected not only based on the material parameters, but also based on the relevant building codes and rules. The best way to do the calculations will be a special project organization, but if the house is built entirely with their own hands, it is quite possible to pick up thickness of insulation yourself.
Calculating the amount of material to insulate the walls from the outside, you need to take into account not only the heat loss of the facade or the basement itself, but also heat leakage through windows, doors, floor and ceiling surfaces, especially if there is an unheated cellar. On the basis of all data, a decision is taken on the thickness of the layer of a material.
It may be that more expensive material will be preferable due to its efficiency and, accordingly, the smaller required quantity. So, do not stop the choice of foam, if you have to stack it in several layers, to provide the necessary thermal insulation performance - it is better to buy several times less amount of polyurethane foam.
Preparatory work
Before proceeding insulation of outside walls at home with your own hands, the foundation on which the thermal insulation material will be applied should be prepared so that the whole structure is reliable, efficient and durable.
If the insulation is not made during the construction of the house, the old wall finish from the outside should be cleaned, except when mounting a ventilated facade. Decorative material, a reinforcing layer of plaster and all the rest is completely removed up to the bottom - in the end there must remain a clean brick, wooden or foam concrete wall of the house.
The following stages of primary surface preparation are as follows:
- The surface of the facade or socle is leveled. If the difference in altitude is insignificant, you can simply cover the facade with two layers of a strong primer with a deep penetration. If the irregularities exceed 20 mm, it will be necessary to level the surface with cement mortar, which then must also be primed to protect it from damage. When building a ventilated facade, the wall can be leveled using brackets.
- Mounted lighthouse system. It is needed in order to lay the insulation layer on a regular basis. Due to this, the thermal insulation layer will not interfere with the application of plaster and the installation of a decorative coating. Lighthouses are installed on plumb lines and checked by level. Their upper plane will become the boundary of the insulation layer outside the walls. Beacons are made from wooden slats or aluminum profile and fixed on the base with the help of long screws or anchors.
After the preparation is completed, it will be possible to start laying the insulation with your own hands.
Installation of thermal insulation material
 In general, the finishes with this or that material are standard, but each of the heaters has its own characteristic nuances of installation.
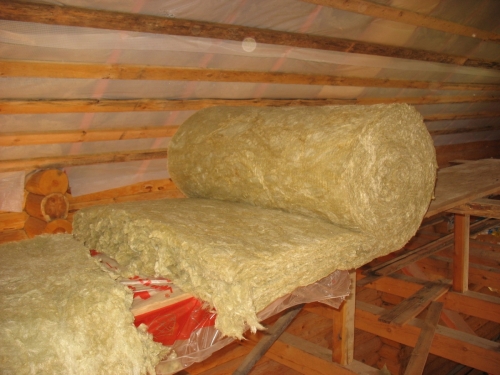
Filling of mineral wool
When decorating a ceiling or a floor in a room, special fastening of rolls of cotton wool is not required - it is often simply glued to a double-sided adhesive tape, and it fits perfectly. However, if the walls - the facade or the basement are insulated - there is a more reliable method of installation outside the house. In addition, cotton wool should be protected from weathering.
To keep the mineral wool, on the basis of their own hands mounted a frame of wooden slats. Dimensions of the battens are desirable to do so that the wool tightly entered the space between the racks - that is, the elements of the frame should be set in steps of a couple of centimeters smaller than the width of the roll insulation. Additionally, it can be screwed into the wall of the anchor to ensure a more reliable retention of the material.
If the outside wall is uneven, it will be best to use a special mineral wool, which consists of two layers of different density. Such cotton wool is laid by the hands less dense layer to the wall, it covers all irregularities and provides the most dense adherence of the heater to the base. Thus, better insulation is provided.
In most situations, further finishing can be carried out in any convenient way. For example, a layer of mineral wool can be covered with a special membrane that protects the thermal insulation from moisture, then covered with a reinforcing mesh of metal or fiberglass. After that, the wall is plastered and covered with the finishing material - siding, stone tile or facing brick.
This method of insulation can be used not only with mineral wool, but also with some other thermal insulation materials - basalt or cellulose wool.
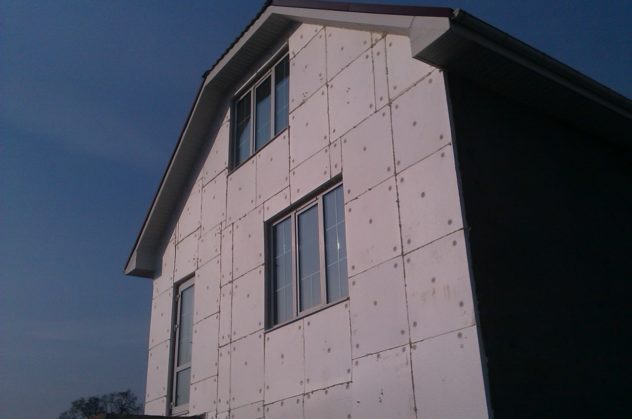
Fixing foam or extruded polystyrene foam
 The sequence of actions for the installation of polymer insulation boards with your own hands is as follows:
- On the lower edge of the facade or socle, a metal profile is installed, which is needed to level the first layer of material.
- Plates of styrofoam or EPS are placed against the wall. Orientation for leveling the upper plane of the heater are the plumbs that have been lowered from the roof or tied to anchors screwed into the walls at the ceiling level.
- The gluing of plates is carried out by means of special solutions - you can use both dry adhesives and polyurethane glue.
- The subsequent layers are mounted after the previous one is firmly attached to the base. Each layer must be displaced horizontally by one third or half of the plate. In addition, it is desirable to lay the slabs as tightly as possible to each other - for this, you can cut an angle on the side faces.
- In addition to the glue, plastic dowels should be used, which are strengthened at the corners and at the center of each element of the thermal insulation layer. To save fasteners, it is possible to fix two corners of adjacent foam plates at once with one dowel.
- Joints are covered with putty and are glued with mounting reinforcing tape or filled with foam or special foam (but not usual mounting, its use is not recommended).
- Before finishing finish layer of insulation is covered with a reinforcing mesh and a layer of plaster.
More often polymeric materials They are used for insulation outside the concrete or brick wall, the plinth, as with these surfaces this finish adheres best. Wooden houses are better insulated with cotton, because foam and similar materials will lead to decay of wood and the appearance of mold due to low vapor permeability.
Owners of private homes often ask themselves the question, what is the most effective insulation of the walls from the outside. Which is better to choose a heater so that the load-bearing wall structures do not spend the cold in winter and repel the heat in the hot summer. Many modern heat-insulating materials not only prevent heat loss during the cold season, but also protect the premises in the summer from the penetration of thermal radiation. The issue of thermal insulation of your home must be approached with all seriousness. On how good you make a heat insulation system for your home, depends how comfortable and cozy the house will be for its residents.
External wall insulation
Thermal insulation materials, types and characteristics
Previously, for insulation of the building structure used organic insulation in the form of sawdust, peat, etc. A significant drawback of these materials was flammability, high moisture absorption, susceptibility to putrefaction and mold formation.
At the moment, organic insulation for home insulation is practically not used. Now the construction market offers a wide range of synthetic thermal insulation materials that have the best technical characteristics.
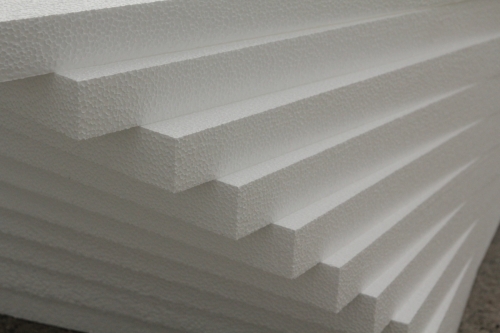
Styrofoam, its advantages and disadvantages
Most people, deciding the question, than to insulate the house from the outside, prefer polystyrene foam. This popularity of this insulation is due to its low cost and excellent performance.
Especially worth noting are the advantages of expanded polystyrene:
- lower, in comparison with mineral wool heaters, thermal conductivity (this allows the thickness of the insulation layer to be made smaller);
- affordable cost (expanded polystyrene is cheaper than mineral wool);
- ease of installation (this material is easy to process).
The disadvantages of expanded polystyrene can be called: less vapor permeability, in comparison with mineral wool heaters, and higher combustibility.
Styrofoam in spite of some of its drawbacks, is widely used for insulation of facades. The use of this material for the thermal insulation of the building costs three to four times less than the use of another insulation, in particular mineral wool.
Important! Due to low vapor permeability, EPS is not recommended for insulation wooden houses. The only area of its application is the warming of stone facades.
Styrofoam is very effective for warming brick houses. Foam polystyrene insulation with a thickness of only 80 mm makes it possible to reduce fuel consumption four times in the cold season.
Phnofolgirovannym warming material
Pretty Interesting a modern heater is a pnofolgirovanny heater. It is a layer of polyethylene foam, which is clamped on both sides with aluminum foil. Features of this material is low weight and low thermal conductivity (the thermal conductivity of this heater is 1.5 times less than that of basalt heaters).
The merits of this material can be attributed to the simplicity of installation, the heater is attached to the walls by a construction stapler. Of the disadvantages is worth noting the absolute vapor and gas tightness.
Insulated cork
Such a rather exotic insulation, like a pressed cork, is made from the bark of cork oak growing in the Mediterranean. This insulation is produced in rolls and plates, it has a very attractive appearance, it is environmentally friendly material. Pressed plug is used for internal insulation of walls, this material, thanks to its excellent appearance, performs the functions of decorative finishing. For external insulation of facades, you can also use cork slabs.
Mineral wool on a stone basis
A distinctive feature of mineral wool fibers is its ability, without melting, to withstand a temperature of more than 1000 °. Due to this, mineral wool prevents the spread of fire, and protects from the inflammation of the construction of houses built from combustible materials (for example, wooden houses). Heaters with high water absorption rates lose their thermal insulation properties, as water, getting into the heat-insulating material, fills the air pores, and increases the thermal conductivity of the insulation. Mineral cotton wool practically does not absorb moisture, so it remains dry and retains the properties of low thermal conductivity, even if moisture gets on its surface.
The numerous advantages of mineral wool also include high resistance to mechanical stress.
Thermal insulation materials made of fiberglass
To insulate the house from the outside you can use fiberglass materials. The main components used for the manufacture of fiberglass are cullet, sand, dolomite, limestone, soda, ethybor, etc. Raw material for fiberglass melts in the melting furnace at 1400 ° and is fed to the forward furnace, where the fiber-forming step takes place. On centrifuges the molten glass breaks down into 6 microns thick fibers. After that, the products obtained are impregnated with a polymer resin and fed to the conveyor, where it is formed into mats. From the mats, evaporate the remaining water and get a high-quality insulation.
Fiberglass materials have the best quality for thermal insulation of building facades, which include:
- Fire safety.
- Economical in transportation.
- Ease of installation.
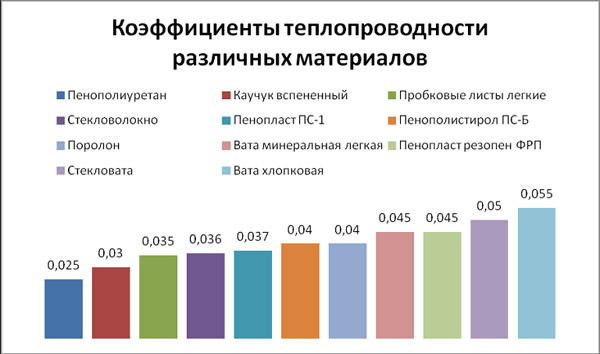
- Low coefficient of thermal conductivity (from 0.035 to 0.044 W / mK), thanks to the ability of glass fibers to hold air tightly, and, consequently, excellent thermal insulation properties. Thermal insulation of fiberglass can reliably protect in winter from cold, and in summer - from heat.
- Resistance to moisture. Due to its non-hygroscopicity (glass wool does not absorb water), the heat-insulating properties do not deteriorate when the material gets wet.
- Ecological compatibility. The insulation made of fiberglass does not emit harmful substances and is safe for health, it does not form mold and rot.
Glass wool - effective insulation
What is better for thermal insulation of walls outside: mineral wool or polystyrene foam
Mineral wool and expanded polystyrene are the most requested insulation for the thermal insulation of the walls from the outside. Installation of mineral wool slabs is similar to the technology of laying expanded polystyrene, in addition, these two heaters have similar specifications, so when they decide what is better to insulate the house from the outside, first of all, compare these two heaters.
When they want to cheaply conduct the insulation of the walls from the outside, in most cases choose polystyrene plates. This material is not only cheaper than mineral wool itself, but its laying does not require special skills or complicated tools, almost every owner can perform the installation of thermal insulation with the help of foam plates. But in the case of cheap foam plastic insulation of the walls from the outside, one should not discount that this material has a small mechanical strength. In addition, polystyrene is very fond of gnawing rats and mice.
For insulation of facades, manufacturers produce special types of vapor-permeable foam with a densified outer layer. But the cost of such material is not less than the cost of mineral wool.
Such insulation, as extruded polystyrene foam, is not suitable for insulation of walls from the outside, since it has zero vapor permeability. Using it for the insulation of facades leads to the dampening of the material from which the walls are erected. From the moisture on the surface of the walls appears mold and fungi. In the market you can buy permeable perforated extruded polystyrene foam, intended for outdoor insulation of facades. But their price is not less than the cost of mineral wool heaters.
When using expanded polystyrene for exterior wall insulation, it is better to purchase a material with atypyrene, these are special substances that prevent the burning of the material. Polyfoam with fire retardant gets fireproof properties.
Mineral wool is not flammable, well resists to mechanical influences has sufficient vapor permeability, therefore, for external wall insulation it is more preferable, but with the right device thermal insulation system, will not be bad to cope with their functions and foam plates.
The question of how to insulate a private house, can arise in two cases: the first - at the stage of designing a new house, the second - when a house has already been bought, which requires substantial modifications to be comfortable for living. In the framework of this article, we will describe what thermal insulation material can be chosen for a particular design, where to start warming, how to insulate all the structural parts of the house.
Thermal insulation materials for private houses
The modern market is saturated with various heat-insulating materials. When choosing which material to insulate a private house with your own hands, pay attention to such characteristics:
- Coefficient of thermal conductivity (hereinafter simply "λ", W / (m · K)). The lower it is, the better. More precisely - the smaller layer of this insulation will have to be used.
- Coefficient of water absorption (% by weight). Shows how much the material is capable of absorbing moisture into itself. Accordingly, the higher this index, the greater the likelihood that in some constructions this insulation will lose its properties in a short time. The smaller the given figure, the better.
- Density (kg / m3). Shows the mass of insulation, it allows you to calculate how much it weighs the structure and whether it can withstand such weight.
- Class of flammability. There are classes from T1 to T4. For warming living quarters, it is better to use materials of class G1, they cease to burn without a source of open fire.
- Ecological compatibility. In fact, this parameter may not be important for some. But if you care about your health and the health of your family, you can try to choose the most natural material that does not emit any substances into the air and does not contain synthetic impurities or binders.
- Durability material.
- Steam capacity.
- Complexity of installation.
- Soundproofing.
Materials from inorganic raw materials
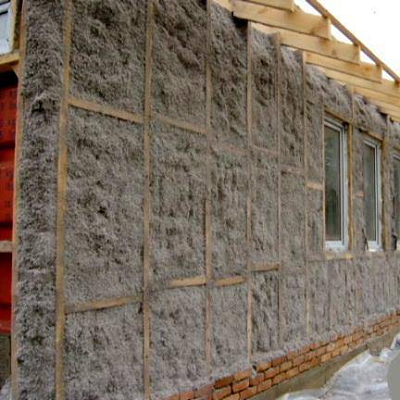
(λ = 0,041-0,044 W / (m · K)) is a fibrous material similar to cotton wool, obtained from various rocks or slags. According to the form of release it is in rolls or plates. Also there are products of different density, from 20 kg / m3 to 200 kg / m3. This allows you to choose exactly the type of cotton that is needed in this or that situation.
In addition, any cotton wool - well extinguishes the air noise and has amazing soundproof characteristics, in addition, it is vapor-permeable ("breathes"). It does not burn, but rodents can start in it.
The main and main disadvantage of any cotton wool as a heater is that it is able to absorb up to 70% moisture. And besides, having absorbed already 2%, it loses 50% of the insulation properties and will never dry completely, its use for the insulation of external structures: an unprotected facade or roof - just insanity.
Styrofoam or styrofoam(λ = 0.033 - 0.037 W / (m · K)) - a set of plastic balls, connected together by a press or non-pressing method, inside which the air is closed. Hot-molding is used to produce such gas-filled plastic. This material is produced only in plates, but there are different densities, from 11 to 35 kg / m3. Foam is a brittle material, does not withstand heavy loads, burns, while releasing toxic gases, and also destroyed by the action of sunlight.
In spite of the fact that the foam plastic is well insulated, while it takes a little moisture, it also has a significant drawback: it does not "breathe", which means that a serious supply and exhaust ventilation system will have to be installed in the house. Also, polystyrene still gains moisture with direct wetting. In this case, it becomes absolutely unsuitable for further use.
Or EFPS (λ = 0,028 - 0,032 W / (m · K)) are closed polystyrene cells with air. This material almost does not absorb moisture and does not allow air to pass through. Available in slabs, convenient for installation. The main advantage of extruded polystyrene foam in relation to foam is a great strength. At the same time, he also "does not breathe," burns and releases toxic gases.
Important! Producers say that some brands of expanded polystyrene and extruded polystyrene foam do not emit any substances even when smoldering or burning, in practice this is not quite so.
Here we have considered the most popular materials, which are recommended first of all by experts on insulation of private houses. If you are not satisfied with the prospect of living in a modern synthetic thermos, you can consider other materials listed below.
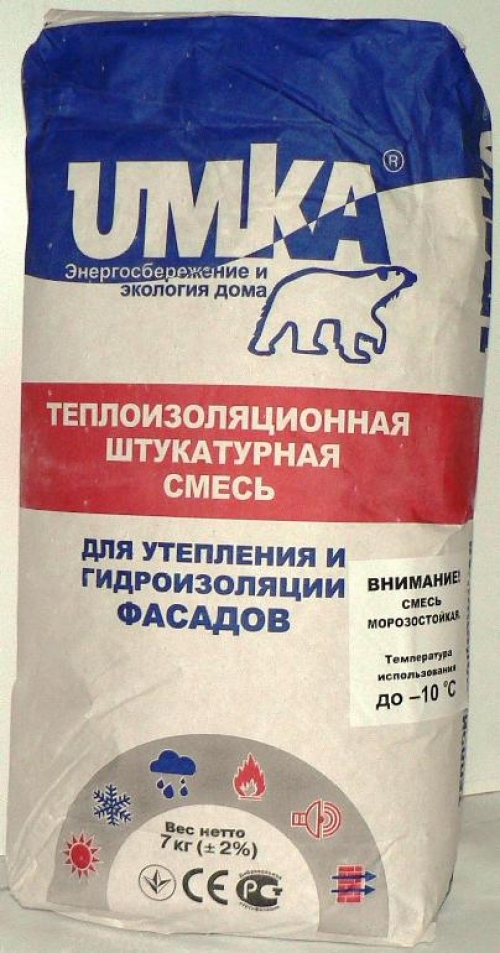
"Warm" plasters (λ = 0.065 W / (m · K)) are a mixture in which small balls (1 - 2 mm) of expanded glass, white cement and various additives, increasing adhesion, hydrophobizing, steam-forming and others are included. Balls made of foam glass give the mixture increased thermal insulation properties.
"Warm" plasters "breathe", do not let the moisture (serve as a waterproofing), do not burn.
In fact, this material serves immediately soundproofing, thermal insulation, waterproofing, while not afraid of sunlight, fire, moisture (does not leak), vapor-permeable, liable to repair.
Materials from organic raw materials - natural
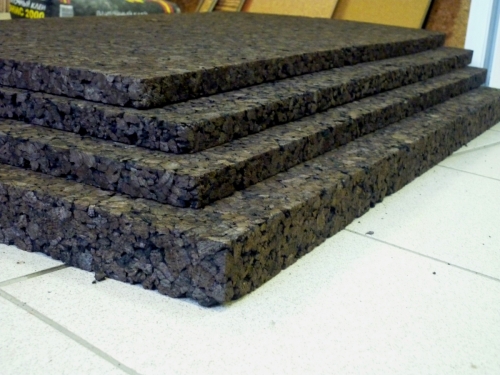
(λ = 0.045 - 0.06 W / (m · K)) are made from bark of cork oak (array) or recycled cork crumbs. The principle of manufacturing is as follows: the cork shredded to the state of powder is processed high pressure hot steam, then pressed in molds using a binder - natural resin, after hardening it will only be cut into slabs.
The cork "breathes", i.e. Passes air, it does not form mold and other mushrooms, but it ignites. True, it does not emit any toxic substances during combustion.
Cork heaters can cover roofs, ceilings, outdoor and internal walls and floors.
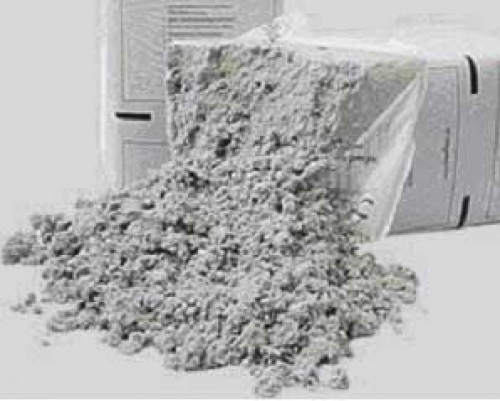
Ecowool or cellulose wool (λ = 0.032-0.038 W / (m · K)) is made from recycled waste paper without the addition of synthetic binders, the only thing is treated with fire retardants to reduce fire hazard.
Cellulose heaters "breathe", are resistant to the formation of mold or other fungi, but absorb the moisture well, and therefore require protection from water. Material in the form of cotton wool does not withstand mechanical loads, so it makes sense to use it for insulation of attics. Also from the paper produce rigid heaters, but with the addition of binders.
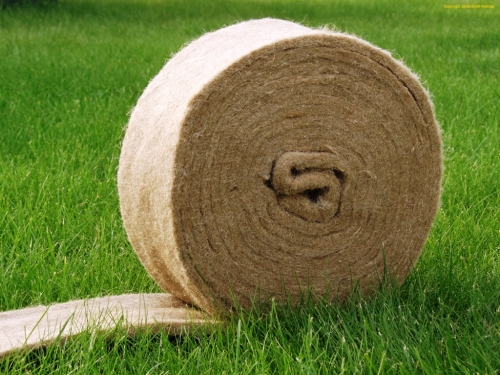
(λ = 0,04-0,05 W / (m · K)) serves as a raw material for the production of a variety of heat-insulating materials based on hemp fibers. The form of release can be different: mats, plates, rolls, individual fibers that can be used to seal cracks. To reduce fire risk, boron salts are added to the material. Despite the fact that the density of the material is 20 - 68 kg / m3, the hemp does not withstand the pressures.
Penka "breathes", is not afraid of the fungus, it is used to insulate roofs, ceilings, facades and walls.
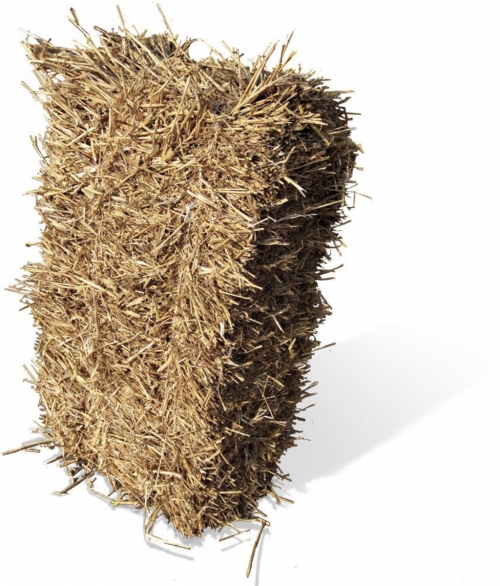
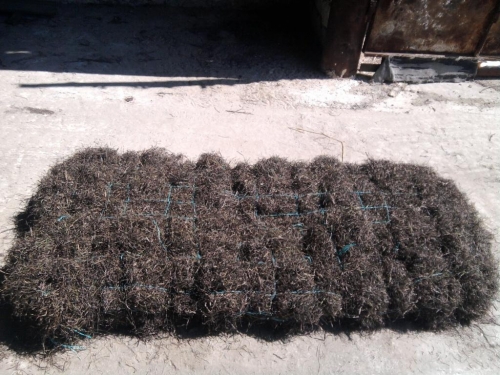
Straw (λ = 0,038 - 0,072 W / (m · K)) - a good insulation that can be used for the manufacture of light ceilings, walls and roofs. As a material, straw of rye, wheat, barley, oats is used. It is pressed and bandaged with a net, wire or cords. The density of straw insulation is 90 - 125 kg / m3, they can be plastered on top.
Straw "breathes," but it burns well. Therefore, sometimes it is treated with flame retardants.
Seaweed (λ = 0.045-0.046 W / (m · K)) are dried before becoming a heat insulating material, subsequently they are made of plate materials, loose or seaweed ladders. Thanks to sea salt, algae are not afraid of fungi and other mold. Density of 70 - 80 kg / m3.
Traps of seaweed do not burn, do not rot, they do not start mold and large animals (mice). The wooden beams, rafters or boards located under algae are always kept in a dry state, therefore they serve for a long time. Algae is used to insulate roofs, ceilings and walls.
How best to insulate a private house outside
We want to immediately clarify that the work on warming a private house is best done from the top down, i.e. start with a roof, then an attic, walls, floor and foundation. But for convenience we will divide all the works into external and internal ones. Warming of the house outside is to insulate the walls of the basement and the basement, as well as the facade walls. Please note that the material and its required thickness should be calculated, for this you can contact the design bureaus.
How to insulate the foundation of a private house
Significant heat losses occur through the foundation. This is due to the fact that the foundation walls are directly in contact with the soil and backfill, which freeze to a certain depth.
Due to the fact that the foundation walls are constantly in contact with water, it is necessary to select hydrophobic materials for their insulation.
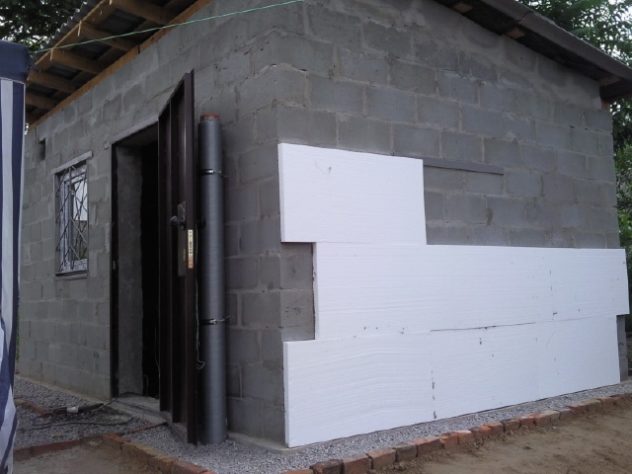
Suitable for: extruded expanded polystyrene (EPS), foamed glass,adobe(clay with straw), red brick with sexual (burned, with air bubbles inside).
The EPS insulation or frothed glass should be fixed to the foundation wall with adhesive mastic. Mandatory to the depth of freezing ground. On top of these materials from the ground does not need to protect, and in the basement can be covered with plaster on the grid or perform lining.
Natural insulants saman and others are actually a reverse backfill and attachments do not require.
How to insulate the walls of a private house
If you are interested in the answer to the question of how to properly insulate a private house, outside or inside, then you know, experts recommend insulating the walls of a private house from the outside, because internal insulation has a number of significant drawbacks. In the wall pie layer, the materials must be arranged in such a sequence that resistance to vapor permeation decreases from layer to layer during the movement of the vapor. Otherwise, the accumulation of water vapor will take place in the insulation.
Warming of the walls of the house from the outside can be done in various ways: a ventilated facade, a well, a plaster on top of the insulation.
It is a construction consisting of a carcass, insulation and cladding. The supporting frame is fixed to the wall with anchors, a heater (cotton wool or slabs) is inserted into it, a lining is fastened on top of the frame, which performs decorative and protective functions (from weather factors). Between the heater and the lining there is an air gap of 2 - 4 cm, it significantly increases the thermal insulation properties of the structure, and also serves to remove steam and excess moisture from the heater.
For ventilated facades it makes sense to use cotton wool heaters: stone wool, minivat, eco-wool.
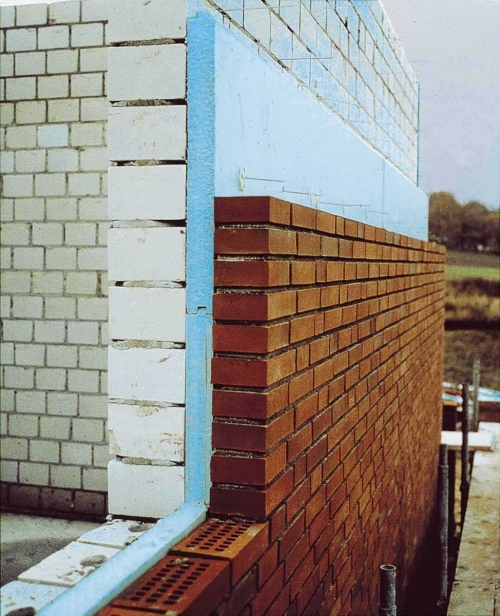
"Well" masonry is a pie: brick walls, insulation, facing brick. In connection with the fact that it is impossible to protect the heater from moisture in such a construction, one should choose one that does not absorb water: , vermiculite, expanded clay and others. This largely depends on the facing material.
"Wet" facade is carried out by fixing the insulation to the wall of brick, concrete or blocks, and on top of applying a primer and decorative layer of plaster on the reinforcing mesh.
For insulation under the plaster, you can use materials with a density of more than 30 kg / m3: any cotton wool (mineral, ecowool), expanded polystyrene (Styrofoam), extruded polystyrene foam (EEPS), straw, hemp, cork, seaweed. The thickness is calculated depending on the material of walls and thickness, climatic zone and other indicators.
The insulation to the wall must either be glued on, or fixed to the dowels. The reinforcing mesh is fixed on top, and plastering works are made.
"Warm" plasters can be used as a heater, and decorative coating. They are applied directly to the wall without additional insulation. This is one of the most environmentally friendly methods of insulation - suitable for modern eco-friendly housing with "breathing" walls. It can be plastered with facades, slopes, curved surfaces, cellars and basements, balconies.
How to insulate a private house from the inside
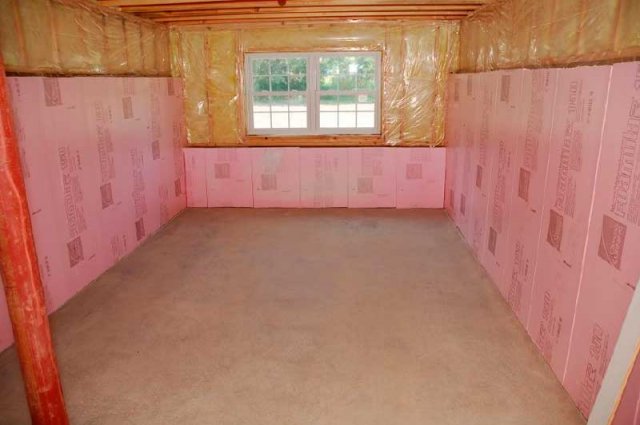
Internal work on insulation is to insulate the roof, attic, floor and ceilings. As it was written above, it is not recommended to insulate walls from inside. AT exceptional cases, after consulting a specialist, you can sew a cork or other natural material from inside the wall.
How to insulate the roof of a private house
Warming pitched roof it is necessary in the event that the attic insulation is not enough, or if the attic is operated. For this, a lath is packed between the rafters, to which a heat-insulating material with a density of up to 50 kg / m3 is fixed. Outside, from the side of the roof, the material must be protected from water penetration by a waterproofing film. From the inside, on the side of the room, is a vapor barrier membrane.
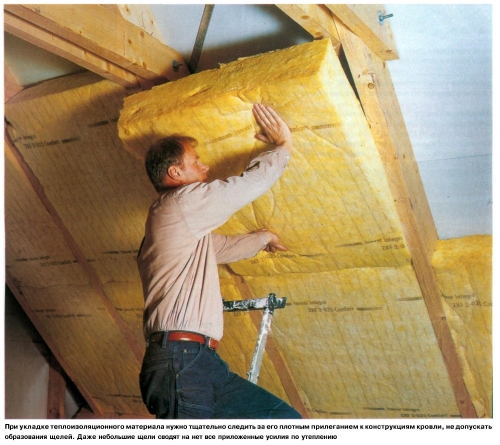
Important! The rafter construction in this type of insulation is a kind of cold bridge, as the thermal conductivity of the tree is still higher than the insulation. In order to eliminate this drawback, one more layer of insulation must be laid from the inside in such a way as to close the rafters.
As a heater for the roof, you can use cotton wool ( mineral wool, eco-wool), extruded polystyrene foam, seaweed, bulrush, hemp, straw, cork and other materials. When choosing material, pay attention that in the event of a leak, cotton wool will turn into unnecessary trash. Protection of insulation film is necessary in the event that the insulation layer is isolated from the room. If there is an attic with windows on the roof, steam protection is not needed.
How to insulate a loft of a private house
For a long time in the houses only an attic was warmed, not a roof. And that's why: the roof was made gable with such an angle that the snow lay well on its surface, windows were fitted in the attic, which could be opened and closed depending on the need, the floor of the attic was insulated. With the onset of frosts, the roof of the house was covered with a layer of snow - a natural insulation. If the outside temperature was -25 ° C, under the roof slope, i.e. In the attic, it fluctuated around 0 ° C. Warm insulation of the attic served to raise the temperature from 0 to 22 ° C in a residential building.
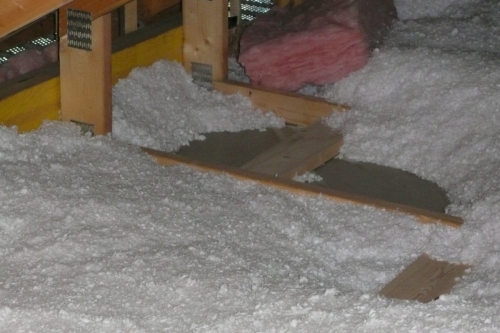
If you bought an old house or build an eco-friendly housing from natural materials, you can perform such warming of the attic: to smear all the cracks in the ceiling (from the attic side) clay, sprinkle from above sand. If the clay breaks for any reason, the sand will fill the cracks. Top with whitewash or powder dry lime, add to this mixture spent carbide for protection from mice. On top of this, fill loose thermal insulation material: chaff from cereals, straw, sawdust, algae traps, eco-watt.
A modern way to insulate the attic: lay a vapor barrier film on the floor of the attic, pour the cotton material over the top with a layer of about 200 mm.
How to insulate the ceiling of a private house
Insulate the ceiling does not make sense, rather it may be necessary to insulate the floor between floors or floors and attic. How to insulate the floor of the attic (the ceiling of the lower floor), is already described above.
Warming the floor between the floors is only necessary if the floors have different temperature conditions, i.e. The lower floor is heated, but the upper one is not there or vice versa.
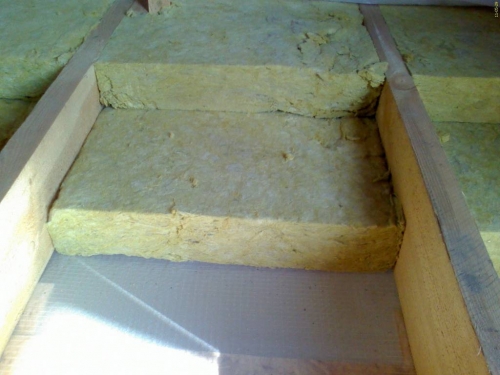
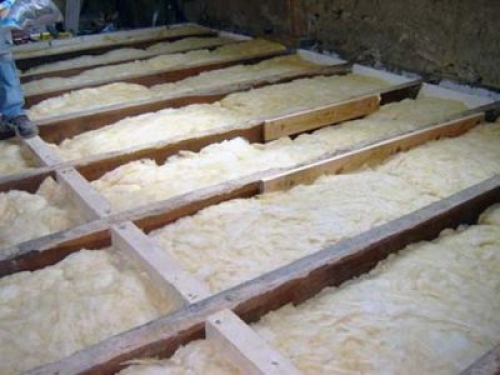
In the interstorey wooden floors the heater is laid between the lags. Can be used wadded insulation with a density of up to 50 kg / m3, hemp, eco-watt. In this case, it will also serve as a soundproofing.
If the floor is arranged on a slab, then it is necessary to use dense thermal insulation materials with a density of more than 160 kg / m3. It can be dense cotton wool heaters, extruded polystyrene foam, bung.
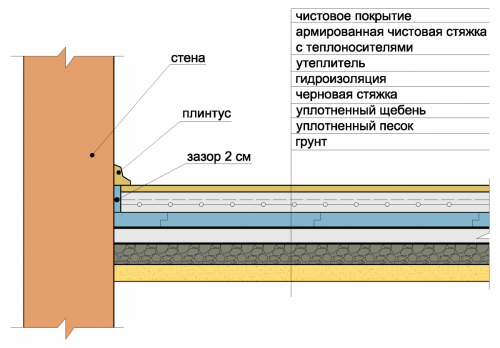
How to insulate the floor in a private house
Warming of the floor in a private house, executed on the ground, it is necessary to start with a padding. If the house is old, it is necessary to remove flooring, logs and perform excavation at the required depth.
Podsypka under the wooden floor on the ground should be this:
- The compacted soil.
- 5 - 7 cm of river sand, carefully tamped.
- 10 - 12 cm of crushed stone.
- Air space.
- Lags, laid on the beams of the house or supporting posts.
- Rough floor or waterproof plywood, nailed from the bottom of the log.
- Polyethylene film for waterproofing.
- Heater: wadding, hemp, seaweed, straw, bung(loose) or others.
- The rough floor.
- Floor floor.
To install a concrete floor on the ground after a layer of rubble, it is necessary to make a rough floor covering, then lay the waterproofing, the layer of insulation depends on climatic conditions of the terrain, the material must be very dense (more than 160 kg / m3) in order to withstand loads, finish coat.
As a heater for concrete floor on the ground can be used extruded polystyrene foam, expanded polystyrene (Styrofoam), cork.
In conclusion, I would like to note that before warming a private house, contact the design organizations to get recommendations and calculations of insulation for your region, taking into account the material and the thickness of the walls of the house. Do not try to do it yourself. It can happen that all the work is a nuisance: the insulation will get wet from the condensate, or the dew point will be in the wrong place.