The space under the roof in each private house is used differently. Some users prefer to store memorabilia there or arrange dressing rooms, but for others it is a full one, which is usually called an attic. The history of mansard floors is not one hundred years old. Many buildings are built with a residential undercover room, as it is economically profitable. After all, it is enough only to increase the slope angles and their height, and due to this it is possible not to build a full-fledged second floor, which would require a lot of effort and additional expenditure of funds.
Of course, attics have not only financial advantages over houses with low attics. Also, the merits can be attributed, then that significantly increases the amount of living space; With mansard windows and small balconies, it is possible to achieve an attractive appearance of the structure; the percentage of heat loss through the roof is reduced, so heating costs will be significantly reduced and much more. Separately it is worth noting that you can complete the attic even in homes where this floor was not originally planned and you do not need to hire heavy equipment or professional builders, you can do all your work with your own hands. We can say that the advantages of a residential building with an attic are obvious, but about what the options for finishing the attic are discussed in more detail.
Materials for finishing the attic
The choice of decorative design depends in most cases on user preferences and budget, but also take into account the planned assignment of space. After all, the attic can be not only a living room, a nursery or a bedroom (read in more detail:), but also a dressing room, plumbing room, kitchen and so on. Proceeding from this it is necessary to choose a concrete variant from numerous ideas. Decorative decoration of the attic with your own hands can be carried out using the following materials:
The listed products differ in their advantages and disadvantages, and they also have recommended installation techniques. To determine the question, than to trim the attic from the inside, it is worth knowing about the features of the finishes with each of the materials. The selected materials must have 7 basic qualities.
- High noise insulation characteristics.
- Low thermal conductivity.
- Aesthetic appeal.
- Easy maintenance.
- Repairability.
- Environmental Safety.
- Affordable cost.
It should also be understood that the quality of the lining directly depends on the characteristics of the selected material, but no less important are the issues of hydro, heat, steam and sound insulation of the roofing system. Sealing and insulation of the attic should be done immediately after erecting the rafters or the flooring of the finish coat on the roof surface. In addition, you should take care of the quality trim of the attic outside. Only after completing all the rough work, you can start decorating attic floor. So, the interior decoration of the attic can have three varieties - wood lining, plasterboard assembly with subsequent finishing with plaster, wallpaper or paint and lining with one of the composite products. Let's consider each option in detail. 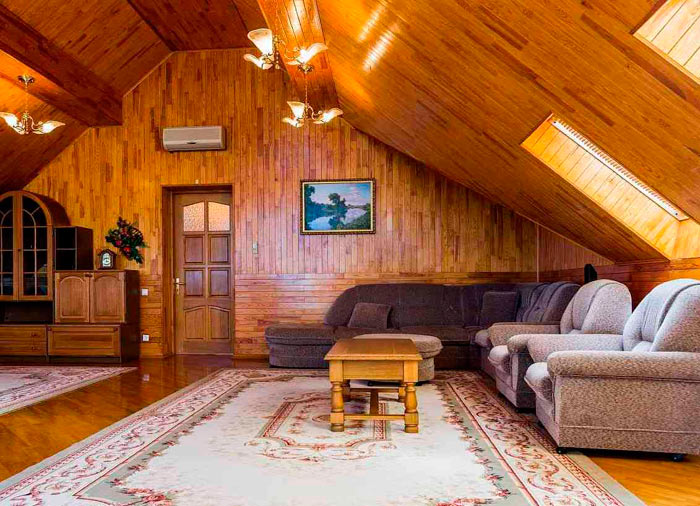
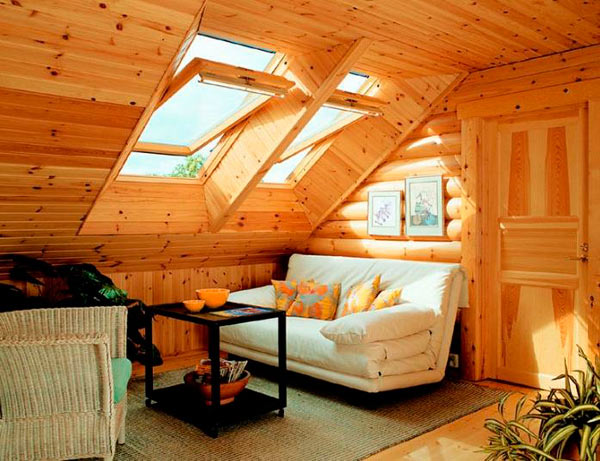
Decorating the attic with a tree
This method of decoration is suitable for lovers of natural motifs in the interior. Finishing made of wood is characterized by ecological safety, aesthetics and durability. It is wooden surfaces that can create a special microclimate in the room. Interior finish mansard products based on natural wood can be made of materials such as:
- wood paneling;
- panels made of wood;
- wooden wallpaper.
These materials are good for use on the ceiling and walls, and for the floor they are not suitable. However, if you use such a type of lining as imitation of a bar, then you can arrange flooring, but it will be better to apply for a interior of natural materials a parquet board. The finishing of walls and ceiling with lining and slabs requires a lathing, which can be made of wooden slats, with a section of 2.5x2 cm or from special metal profiles fixed directly to the rafter system. The optimum step of the crate is 40-50 cm, while it is important to make a frame around the window and doorways. On the bottom and top edges of the slats should not extend to the end by 5 cm. This gap is necessary for installing the floor and ceiling skirting. The base for finishing is required to hide surface irregularities, to create a strong frame on which even heavy materials will be fixed as reliably as possible, as well as to create a vented gap, due to which the wood will retain its high characteristics for a long time. 
Finishing the attic, both paneling and lining, requires, in addition to the main material, also the purchase of components. Such as moldings (connecting, angular, end, ceiling, starting) and skirting. The specific kit will depend on the configuration of the room. For fixing to the crate are used kleymery and screws. Before fixing the lining, it is necessary to determine how the strips will be located. In the case of their vertical orientation, the lath should have a horizontal arrangement and vice versa. The installation starts from the corner and first of all the angled molding is mounted, and then the board is inserted into it with the side on which the stud is located. Then the element is fixed with the help of the latent fasteners to the rails of the crate, that is, the knife is put on the protrusion of the groove and tightened with a screwdriver. After that, the second strap is installed in the same way. Important! if the room has high humidity, then do not overly tighten the wooden elements, the gap between the adjacent slats should be 1-1.5 mm. The identical installation procedure is performed to the end of the wall, as well as on other surfaces to be sheathed. In addition to the direct arrangement of the laths, you can choose other options, as well as choose a lining of different configurations, different in profile and size. 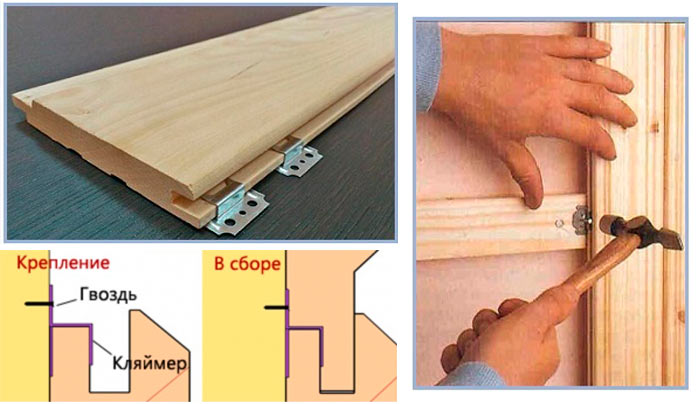
Video on the topic:
The modern idea of interior decoration is the use of wallpaper from wood. Unlike the panels and individual racks, wooden wallpaper is a large sheet of elements of coniferous wood glued to the base. The thickness of such a product is not more than 2 cm, the standard width is 120 cm, the minimum length is 200 cm, and the maximum is 6 m. To trim such walls and the ceiling of the attic, it is enough to glue them to the surface with special glue. It is worth noting that the planking of the attic with a tree allows creating an additional thermal insulation and a harmonious comfortable environment. Experts recommend using light shades of wood to visually increase the height of the attic and its size. 
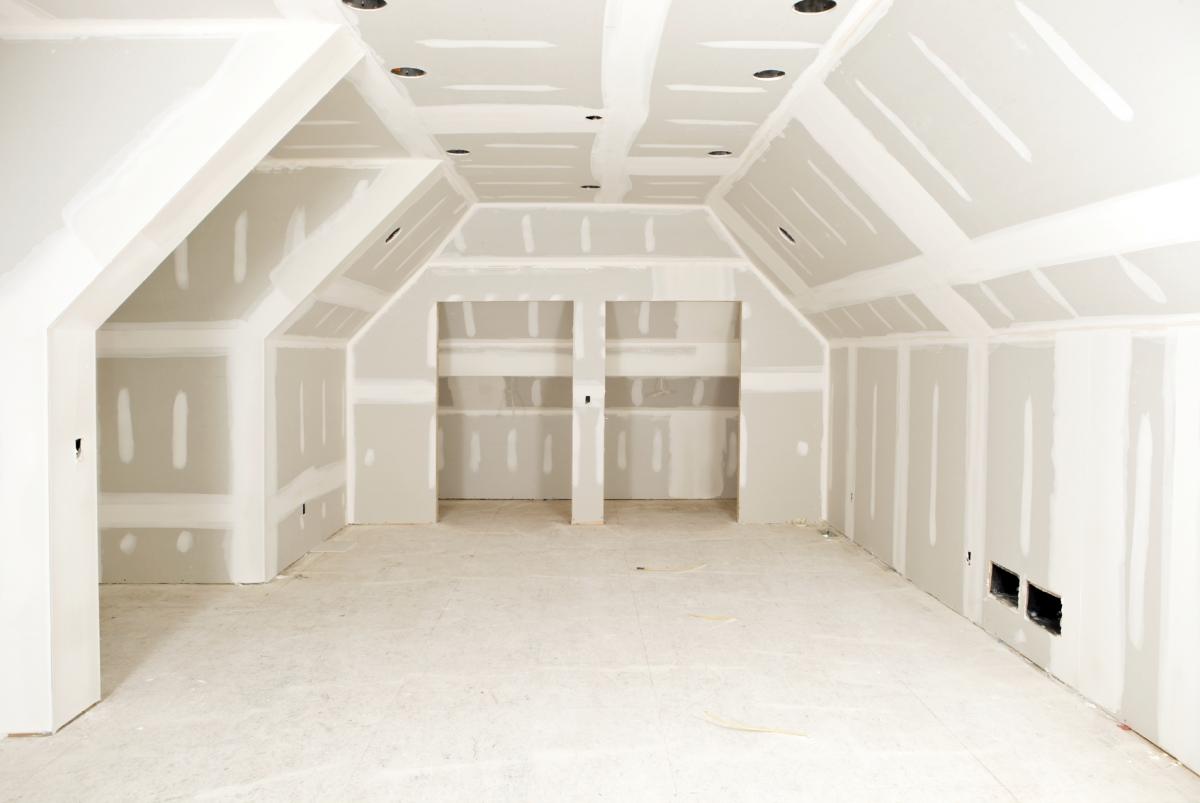
Finishing from plasterboard
Gypsum board or GCR is a material in which a gypsum core is located between the sheets of cardboard. Despite the apparent fragility, the interior decoration of the attic with such a product provides high strength and reliability. Drywall is not used as an independent decorative coating, but requires additional coating with paint, plaster, wallpaper or other similar options. In this case, drywall sheets can be mounted, both on walls and ceiling, and on the floor, using the technology of dry screed. It is worth noting that GKL has several modifications, characterized by such qualities as moisture resistance and fire resistance. Mounting of sheets on a ceiling and wall surface is made by screws on a skeleton from a metal profile. Also, to seal the seams you will need a special tape and putty. For the floor, the installation technology is somewhat different. First of all, it is necessary to lay a moisture-proof film on the ceiling, then pour a layer of expanded clay, compact and level it. On the expanded clay cushion sheets of plasterboard are laid out, and on top of them is covered the finish coat, for example, carpet, parquet or linoleum. The advantage of this method of flooring is that the structure does not practically burden the ceiling, but it creates an additional heat and soundproof barrier. 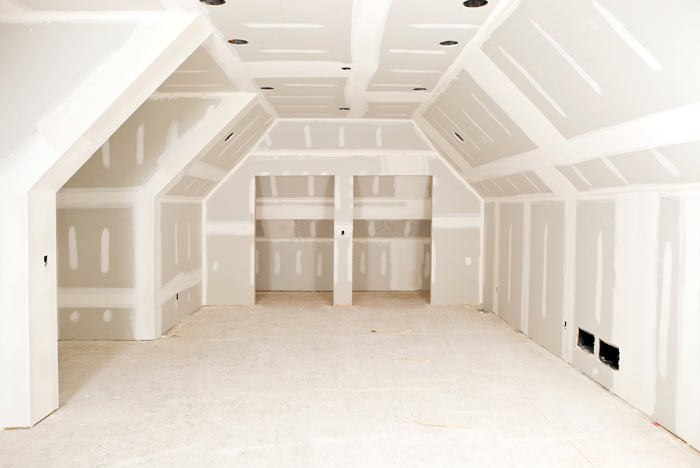
It is worth noting that the decoration of the attic floor with plasterboard, allows you to create not just rectilinear forms, but also the designs of a wide variety of options. After GKL is easily bent and processed, due to which any arches, columns, curved partitions can create each user with their own hands, without using specialized equipment for this. After the surface of the plasterboard is leveled with putty and dried, you can proceed to the finish with decorative materials. It can be acrylic paints, various variants of wallpaper or decorative plaster, read more:. Also from the GKL it's easy to make a suspended ceiling. However, this means should only be resorted to in the case of a large distance from floor to ceiling, since in a low room, the construction will only hide the space more tightly, and the situation will be rather uncomfortable. 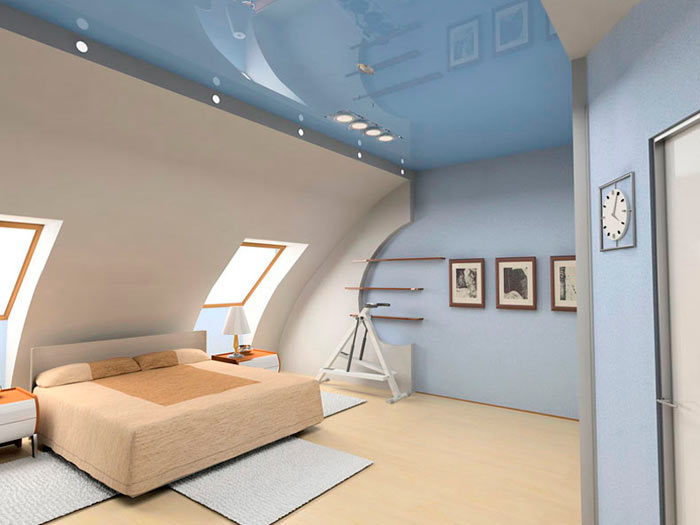
Finishing with composite and other materials
Such materials for the attic are quite diverse. To this variant it is possible to carry a facing from:
- plywood;
- MDF, particleboard, OSB;
- plastic panels HPL;
- lining made of plastic;
- siding vinyl or aluminum.
Depending on the chosen product, it can be both finish coatings, and the basis for other materials. The expediency of using this or that variation of the cladding will depend on the user preferences, the design idea, and also on the configuration of the room. For example, in the presence of a multitude of protrusions and semicircular arches, it is rather problematic to use materials with a high degree of rigidity, such as plywood, wood slabs, particleboard and the like. In this case, the use of more flexible products, in particular, a lining made of plastic, which can be bent at an angle of up to 160 degrees, is optimal. 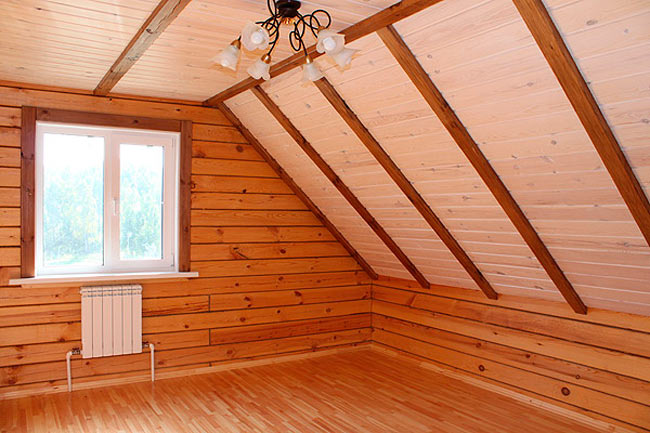
Planning to trim the attic inside one of the composite materials, you should thoroughly study the characteristics of each of them. After all, the operating conditions, as well as the purpose of the products may differ significantly. So, for example, the mansard floor in the country house can be sewed with siding, because it is a durable and durable material, easy to take care of. Many manufacturers even offer products designed specifically for the roofing of the attic with their own hands. The panels can be manufactured according to individual sizes, thanks to which the installation is done promptly and efficiently.
The panels from MDF, the upper layer of which were veneered with natural wood or bamboo, also gained great popularity as a finishing coat. After all, despite the fact that this is an extruded product, it has:
That is, this material can be called an analog of wood, but its cost will be much lower. Composite materials are assembled in almost the same way as panels or lining made of wood, that is, they require the installation of a crate. Of course, not everyone will be able to fully finish the walls with MDF panels, plywood or chipboard, because this style is more suitable for a house in the country or for a cabinet. In the event that the attic floor is given to a living room, it is optimal to combine composite materials with other types of finishes. For example, use slabs only in the lower part of the walls, and cover the remaining space with wallpaper or decorate with decorative plaster. In this case, the floor can be mounted from plywood, covered with parquet, laminate or linoleum on top, and stretch fabrics can be used as a ceiling. Also, the ceiling overlap with the beams looks original and stylish. It can be both light false beams, and massive beams rafter systems, zadekrirovannye in a special way.
For the decoration of walls and ceilings mansards use durable materials. It is possible to make the surface of the walls even, using sheets. After arranging the interior of the attic in any style to your taste. Drywall can keep heat indoors, better than plastic and other cheap materials. Finishing of this material withstands low and high temperatures, and it is possible to attach mirrors, hanging cabinets and shelves without much difficulty.
Installation: how to trim the attic with plasterboard
Drywall is ideal for finishing different rooms. It is not expensive. You have the opportunity to insulate the walls with additional materials that will be located between the walls and the plasterboard paneling. Make insulation from noise. This material is easy to install and does not require special care.
The attic may have increased humidity. You should consider this factor and purchase a moisture-resistant gypsum board for finishing.
First we do the preparatory work. The roof should not have any defects and let in water. Carry out roof repairs if necessary, so that in the future you do not worry about getting water in the attic. And you did not have to do the cladding again. This will save you time and money.
Check the condition of the beams. They should not be spoiled by external factors.
Before beginning the installation of the finish, you should impregnate the walls and ceiling with an antiseptic if the house is built of a wooden beam. After drying the room.
Rafting installation takes place in several stages. This method is common. If the room for decoration is small, and the distance between the rafters is not more than 75 cm, you can not use a frameless lining.
Step-by-step instruction:
- We buy sheets of plasterboard;
- We cut the sheets to fit;
- Attach the finish to a special glue;
- on rafters;
- We fix it with glue and screws.
Drywall should be 12.5 centimeters thick. If they are thinner, they can be bent in some places.
Internal corners are strengthened by a perforated corner. Then we take shpaklevku and close the seams and the place of fastenings of screws with rafters.
Finishing of the attic floor with plasterboard by hand
Many people use the skeleton method for finishing the attic. It is reliable and you have the opportunity to insulate the room with special materials. You do not have to additionally use heating devices together with heating systems. You can also make acoustic insulation if you live close to the roadway.
Stages of frame mounting:
- We make measurements of the room;
- We buy all necessary materials and tools;
- We make the installation of the crate;
- On the perimeter we mount the frame guides;
- Fasten the racks with self-tapping screws for metal;
- Fix cross-members;
- Pave the wiring;
- We lay the insulation in the cells of the carcass.
For finishing you need to buy gypsum cardboard, hardware and metal profiles of the required quantity.
Then we do the installation of the crate. We begin all from the walls. Its markings are transferred to the ceiling and floor. In this case, you should monitor the vertical position of the racks.
It is worth remembering: metal guides are fixed at a minimum of three points. The distance between points should not be more than a meter.
Racks are fastened by means of self-screws for metal in the guides of the frame structure. The distance should be 40-50 cm between them. The frequency of the cross bars should correspond to the length of the sheets of gypsum board after the cutting. Before plastering the attic with plasterboard it is worthwhile to conduct all necessary communications - wiring, heating systems. The cells of the frame should be stacked mineral wool. It is used as a heater. This material does not deteriorate under the influence of moisture and rodents.
If the humidity in the attic is large, it is worthwhile to tighten the entire structure with a water vapor barrier membrane for greater protection.
After covering the attic floor with plasterboard of the required thickness, so that the finish does not bend from impact. Thin sheets can be swollen during operation. Therefore, do not save on supplies, then you do not have to change the skin again.
GKL attic casing
The principle of plastering the attic is similar to the process of installing gypsum plasterboard in any other premises.
For this you need to purchase: drywall sheets (GKL), construction level and tape measure, punch, screws, metal profiles.
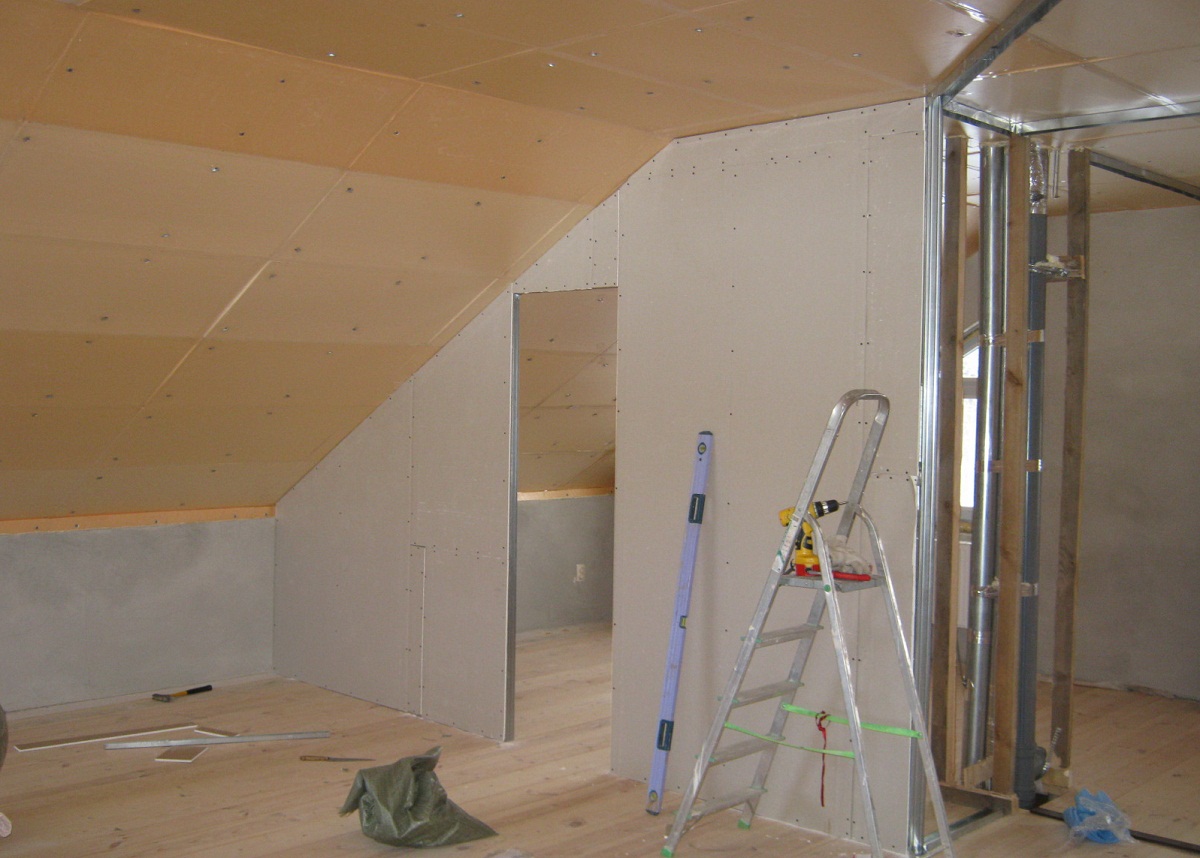
Gypsum board (GKL) has a gypsum core. All the planes of the sheet, except the end edges, have a cardboard finish. Such a material has enhanced properties, since it has special components.
For the decoration of the attic will suit sheets of drywall type GKLV. They are moisture resistant.
Sheathing of the attic floor proceeds in several stages:
- We are dissolving sheets of drywall;
- We fix their profile at a distance of 20-25 cm;
- First we make the paneling with solid sheets;
- Then we make installation of the cut sheets;
- We finish the finish.
Horizontal seams should be offset relative to each other by 3/3 the width of the sheet. If this happens during installation, replace the whole sheet with the edging sheet.
To trim the attic floor you can quickly and qualitatively. To do this, you need to have all the necessary materials, tools and follow the installation instructions.
The finishing touches of the attic floor
Before finishing finish it is necessary to complete the main job: seal up the seams, hide the hardware caps, strengthen the corners, primed and plastered the finished gypsum cardboard walls and ceiling.
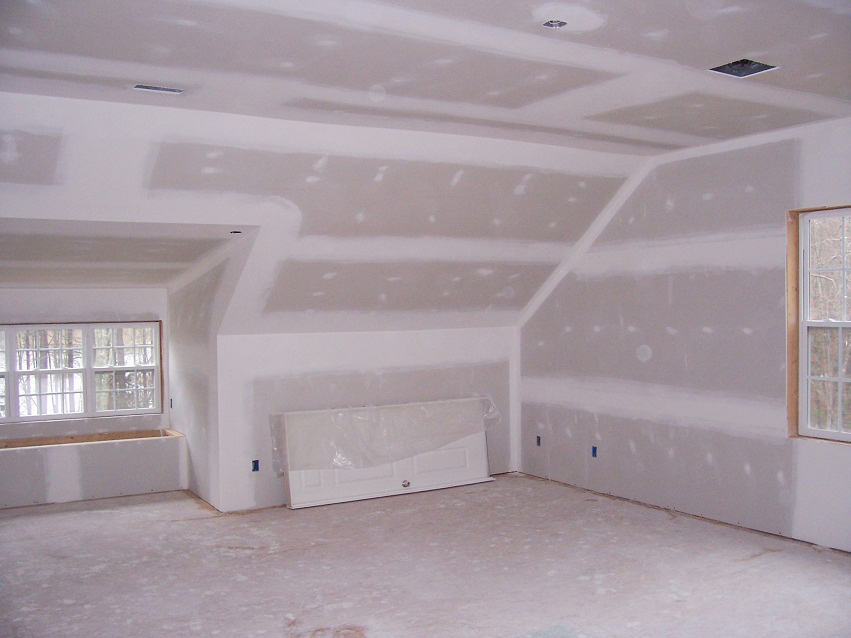
After puttying the walls you need to sand it to remove the excess putty, and make the seams invisible. So you can achieve a perfectly flat surface of the walls.
Priming the surface so that the paint falls easily on the plasterboard walls and does not absorb it. At the very end, we let the primer dry and start or paint with a roller.
You can independently equip the attic floor, using plasterboard sheets for finishing. This will give you smooth walls, hide all communications and be able to paste wallpaper. Finishing of the attic depends on your taste and style of the design of the room, which you choose from ready-made options or design yourself.
Finishing the attic with a tree, the best ideas of which will be presented, will help decorate the room. Mansard - an additional area, located in the attic of the house with pitched roof. It consists of two parts: flat and steep. Currently, this room is fashionable to transform into a living room. The most traditional material of the attic is a natural tree.
By itself, the interior decoration of the attic with wood gives the following advantages:
- additional heat insulation is created;
- there is a pleasant microclimate with a sense of warmth and comfort;
- the ecological compatibility and durability are noted.
The correct preparation for creating a future room
There are a lot of ways to build an attic and the choice depends on the following factors:
- general characteristics of the room (sizes, room shapes, home interior);
- characteristics of the material (price, availability, ease of installation, aesthetics, reliability).
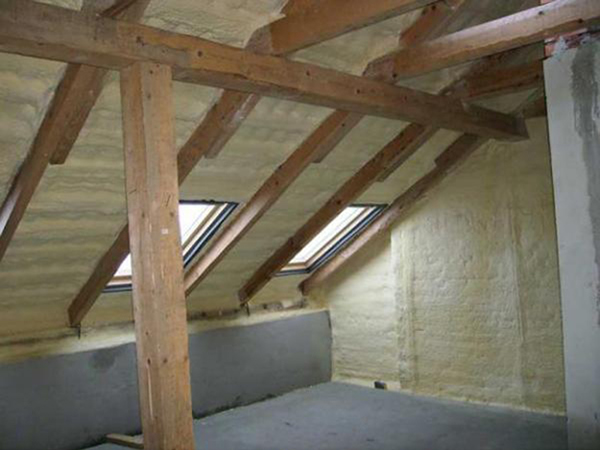
Whichever way is chosen for the decoration of the attic wooden house, it is necessary to make preparatory work. The implementation of simple recommendations will keep the room warm and dry. First, attention should be paid to the roof, for the absence of any leaks. Then - check the strength and general condition of the beams and rafters, they should be dry, without any mold and rot. This is very important: they will be attached to the finishing material. It is necessary to insulate the floor, walls, ceiling.
A particular kind of tree for wood trim can make the rooms visually larger or smaller.
For small premises it is necessary to choose trees of light breed (fir, maple), which will increase the internal space. Dark and warm shades (pine, larch) are suitable for high spaces and at the same time reduce the area of the roof slopes.
Board-lining as the easiest way of plating
So, the preparation of the premises is completed, now we need a good idea for the design of your room. The number of ideas is enormous. It all depends on the function that the room should perform, and what color combination it should be in.
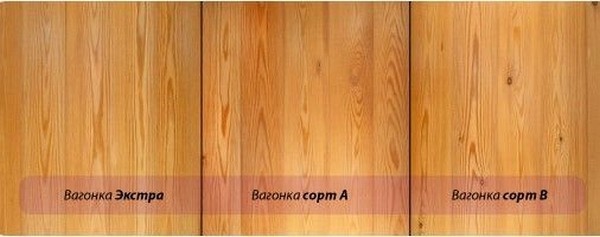
Lining - casing board made of natural wood of various grades with a groove-groove docking system. Average parameters: length from 5 to 6 m, width from 5 to 14 cm, thickness from 12 to 20 mm.
It is subdivided into 4 classes:
- "Extra" - wood of the highest quality without any defects;
- "A" - medium quality, roughness, fused knots, small cracks;
- "B" - quality is below average, there is curvature, the lower part of the groove is damaged;
- "C" - the lowest quality, the presence of cracks, knots.
Before installation, the board is treated with a protective compound and covered with varnish. Designed wooden frame with a section of bruskov 30-60 mm and a step of 40-50 cm. The fastening is made to the frame by staples or nails, they are hammered into the crest of the mounted element. The lining can be placed on the surface in different ways: horizontally, vertically and even herringbone, and also allows zoning of the room, painting each zone in its color.
Wooden panels, or a budget variant of wood trim
Wooden panels - fiberboards, pressed when heated finely dispersed mass, different sizes and surfaces. Withstand heavy loads. The composition is divided into:
- panels made of pure wood;
- MDF panels.
Properties and characteristics are similar, the difference is only in the design.
Mounting is done in 3 ways: with glue or mastic, construction clips or clips, on the mounting profile or nails. Before installation, you should:
- panel to withstand throughout the day in the room where the fastening will be made: this will allow them to adapt to the humidity and temperature of the room;
- to check the evenness of the walls by the building level and to make leveling, if there is a need;
- make markup under the panel.
The installation starts from the corner with a longitudinal groove to the next panel, the panel is installed as tightly as possible.
It is worth noting that at the moment a very popular combined panels for houses. They are made from several layers and tree species. The main layer is taken from valuable wood, the rest - from pine or spruce. The layers are securely fastened under high pressure and covered with wax from possible damage.
Growing popularity of decorative wood wallpaper
Wooden wallpaper - a wooden slats, tightly fitted to each other, of varying width and length. The average thickness is no more than 2 cm. They are made from different trees, each variety has its advantages, for example, larch wallpapers are moisture resistant, wood of African wood abash does not heat up. When choosing a bar on it there should be no points and other defects, they can lead to destruction.

Before starting the installation, the surface is thoroughly cleaned, then the battens are assembled using wood bars. The bars should be treated with a special protective compound. The cladding should be placed horizontally if the planks are positioned vertically, or vertically, if the planks are positioned horizontally. Self-tapping screws are suitable for fastening the crate. The distance between the bars should be observed from 50 to 60 cm. Self-tapping screws are also suitable for attaching wooden wallpapers to the frame: the fastening will be rigid and durable.
The choice of wooden wallpaper is huge. Using imagination and imagination, they can be combined, become an artist of your room, give it absolutely any kind and style. In addition to naturalness and ecological purity, the wallpaper will help create a fashionable, exclusive interior of the room.
More articles on this topic: 
The attic is, in fact, an attic space. From the ordinary attic it differs in that it is located in a building with a pitched roof, consisting of: one sloping, and the other - of its steep parts. They give the house an additional area that can be used for living. This design of the roof was developed by an architect from France named Mansar, from which the word "mansard" was formed. In those days, these rooms were the abode of students, poor creative intelligentsia, servants. And all because the attic was not insulated, and were poorly protected from humidity. But the situation has changed a long time: thanks to the development of the construction industry and the latest design developments, the attic space has become a full complement to the residential building. Now in the attic space you can arrange almost any room, even a kitchen and a bathroom. Naturally, this will depend on the ways of finishing the attic, and the choice of materials. But before you trim the attic from the inside, you need to consistently execute several preparatory work, about which we now tell you.
Preparation for finishing
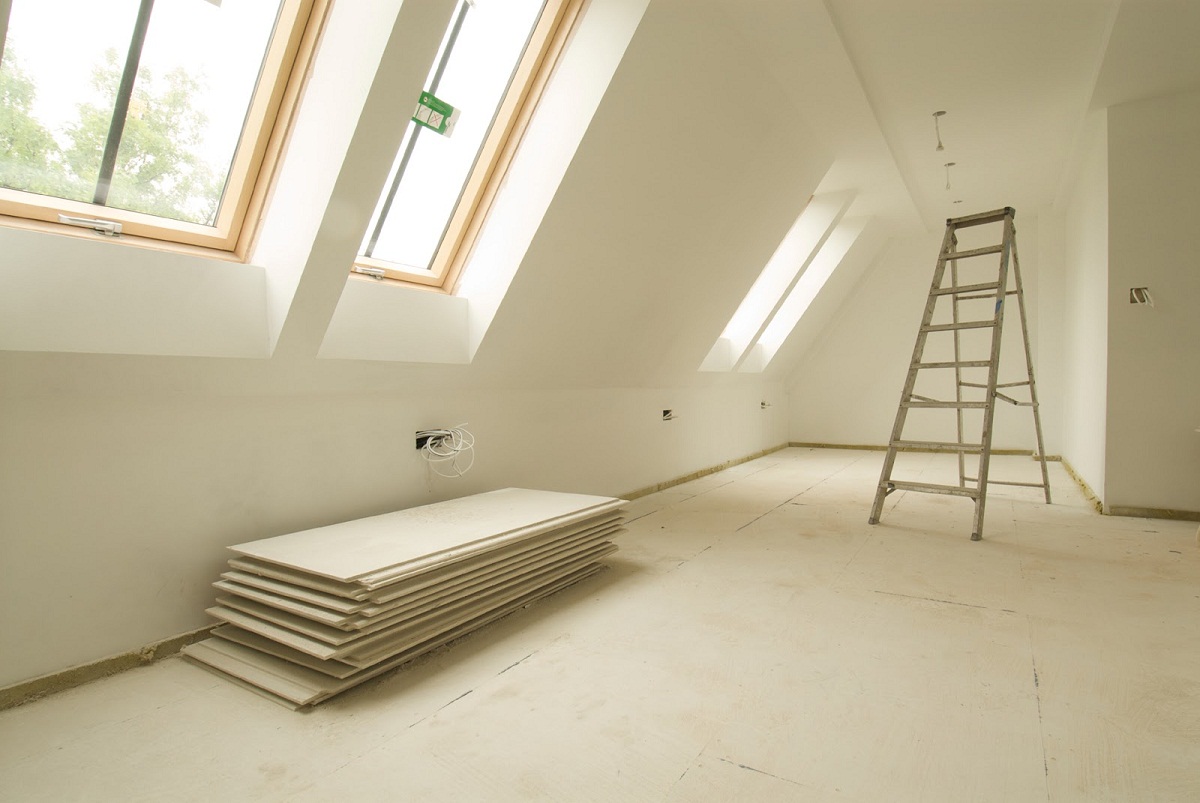
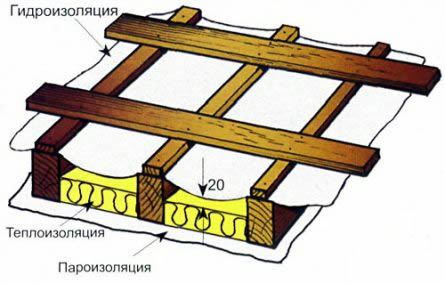
Qualitatively completed roofing of the building does not guarantee that the attic will be warm and dry. To achieve this, all its surfaces need to be insulated. The technology of these works will depend on whether the external thermal insulation roof during the construction of the house:
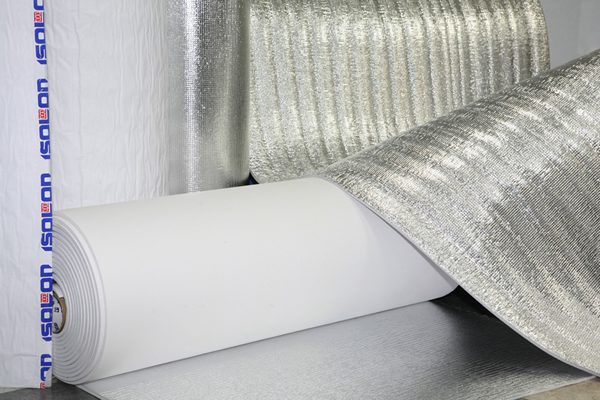
- If so, then it will be easier to heat the stingrays: you can simply sew them with fiberboard, lining or gypsum board, laying a thin layer of foam polyethylene or isolone under the skirt. It is better to use foil options, they prevent the formation of condensation.
- Well, if the roof slopes are not insulated, you will need to do this job from the inside. Then the insulation and finishing of the attic will require the consistent laying of several layers, the first of which will be a waterproofing membrane.
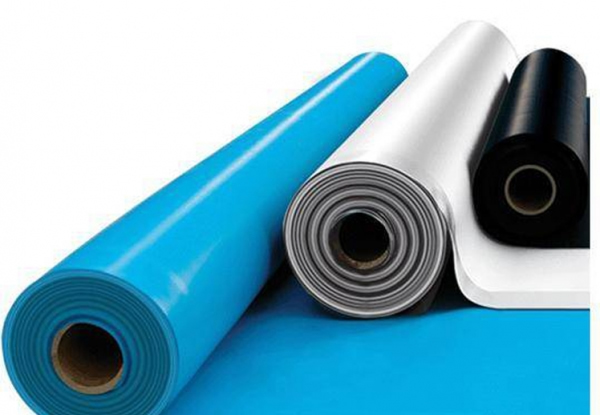
- The waterproofing film is fixed with counter-rails directly to the wooden roof lath. Only after this it will be possible to lay the heat insulation stand. To insulate the roof slopes, it is better to choose a soft, and as thick as possible, roll insulation.
- Plate materials for this are not very well suited, especially if the roof is a hipped roof or with a different complex configuration. They are better used for warming walls.
- The method of fixing the thermal insulation layer depends on the construction of the roof. If there is a small step between the rafters, you can choose a material whose width is slightly larger than this distance. Then the heater is tightly packed between the rafters and does not need additional fastening.
- When the distance between the rafters is large, for the fastening of the heater use bars with a small cross-section. In this case, first a wire is fixed between the rafters, fixed with self-tapping screws, and a heater is already laid on it. It's best to watch a video on this topic.
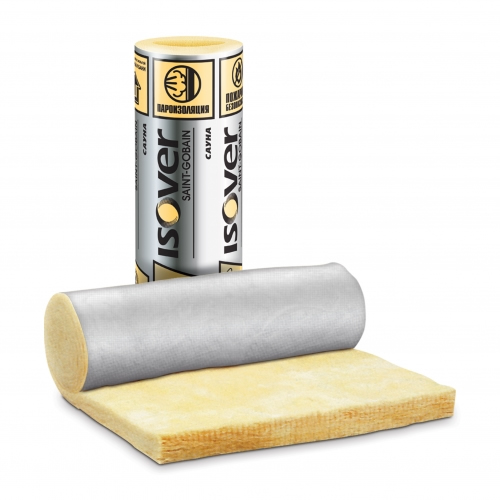
- If you use ordinary mineral wool, then on top of it you will need to glue a vapor barrier film, and only then fix the entire structure with bars. It is much easier to use material with a ready vapor barrier layer.
- Warming the attic walls, you can do without a waterproofing layer, but only if you use materials made of foamed polyurethane as a heater.
- Mineral wool has the property of getting wet and rotting. Polyfoam for this purpose is better not to use, because it is easily ignited, and at combustion it is quite toxic.
- Very good, if there is a gap between the waterproofing and the heater, which ensures the ventilation of the heater. Doing your own work, do not forget that all the wooden elements of the construction must be treated with antiseptic composition.
- If your house was made with external thermal insulation of the walls, then the front of the attic will not need to be insulated. But the floor is still better to insulate, especially if the attic is a dormitory.
- For floor insulation it is better to apply loose insulation: expanded clay or crumb of expanded polystyrene - it's very convenient, and a penny price of the material allows you to save a lot of budget.
- The floor is covered with polyethylene film, the wooden logs are mounted, and the insulation is covered in the resulting cells. From above it is poured with a liquid cement mortar, in which the reinforcing mesh is heated. On the Internet there is a more detailed instruction on the device of such sex.
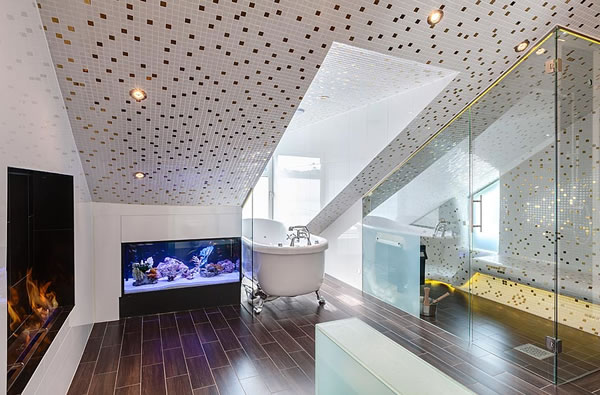
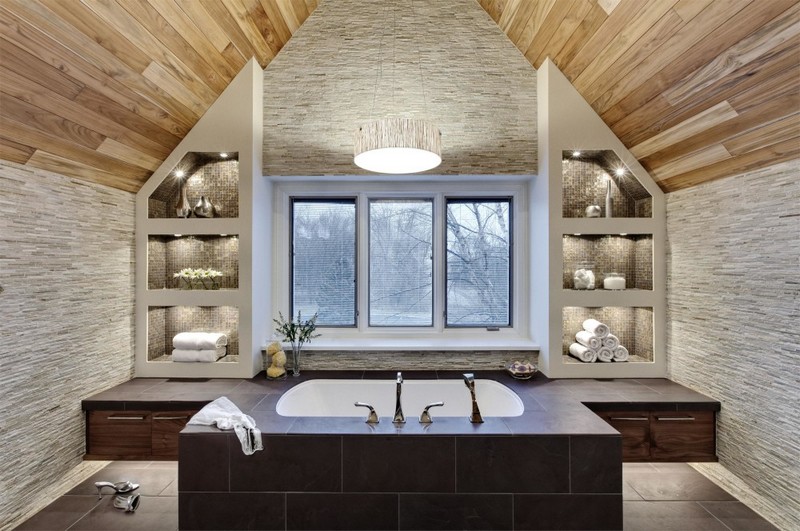
When the solution seizes, you can make a screed, and the floor will be ready for further finishing. This method of floor insulation creates excellent sound insulation, as well as reliable waterproofing of the room. You can arrange in the attic even a bathroom or kitchen, not being afraid that the water will flow down. Example of finishing the attic floor under the bathroom in the photo above.
Decorative mansard decoration
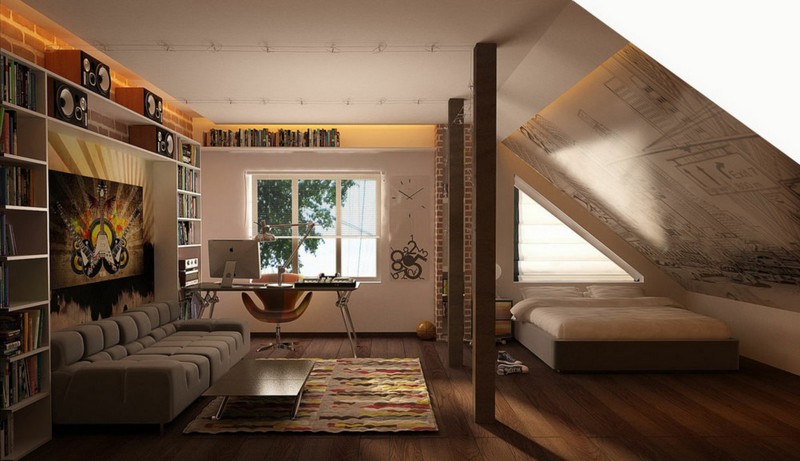
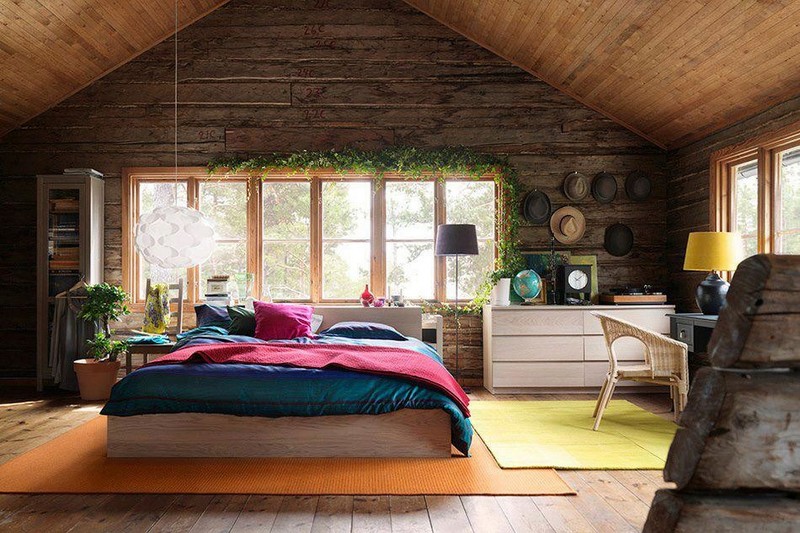
Naturally, the interior decoration and insulation of the attic depends on how you will use this room. Most often, in the attic space a living room is arranged: a bedroom or a nursery room, although there are exceptions.
Wood in the attic trim
Reflecting on the question: "Why is it better to trim the attic?" - you start sorting through all the possible options. And the first thing that comes to mind is a tree. Most likely, this association arises because the load-carrying roof structures are made of this material.
- In addition, the woodwork of the attic creates additional thermal insulation, as well as a unique microclimate, woody flavor. With remarkable properties of natural wood, no other kind of finishing materials can argue - it's a fact.
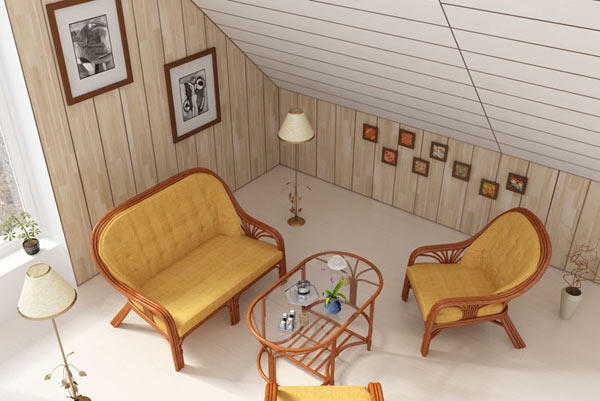
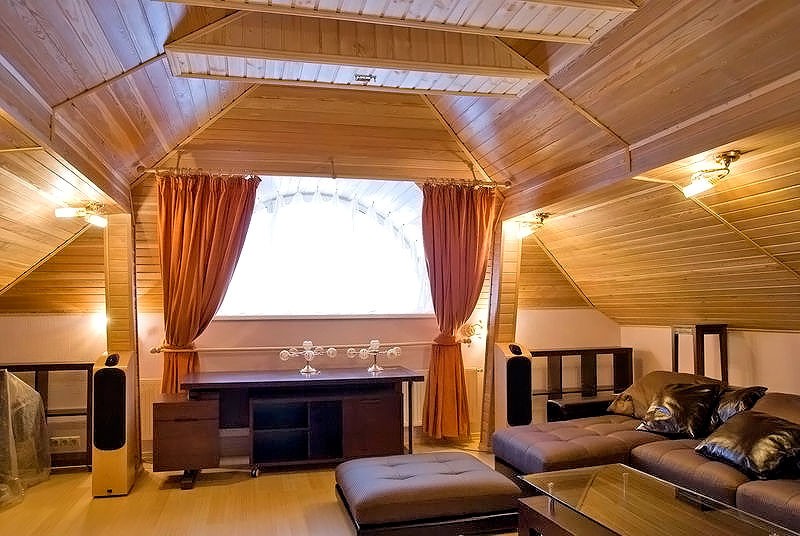
- Board-lining, which, more often than not, is used for finishing works, is the simplest version of plating. There are five types of profile of this board, and several sizes. Its installation can be done in various ways.
- The layout of the board on the surface can be horizontal or vertical, diagonally, in a circle, a herringbone. This creates a certain pattern, and the monotonicity of the surface is broken.
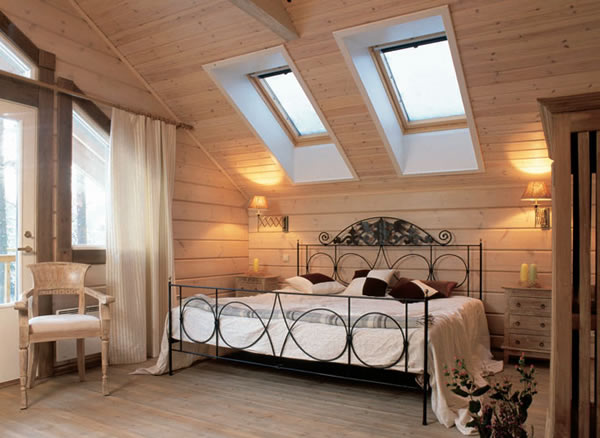
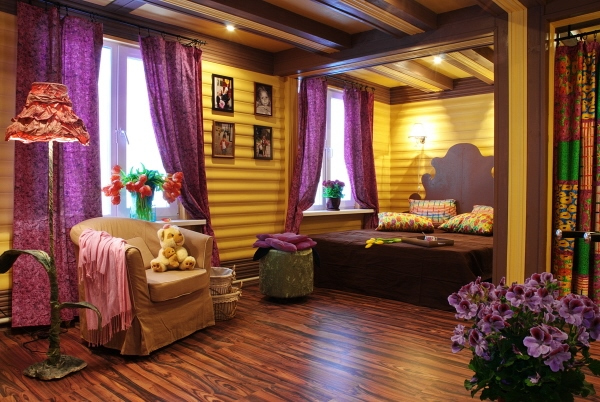
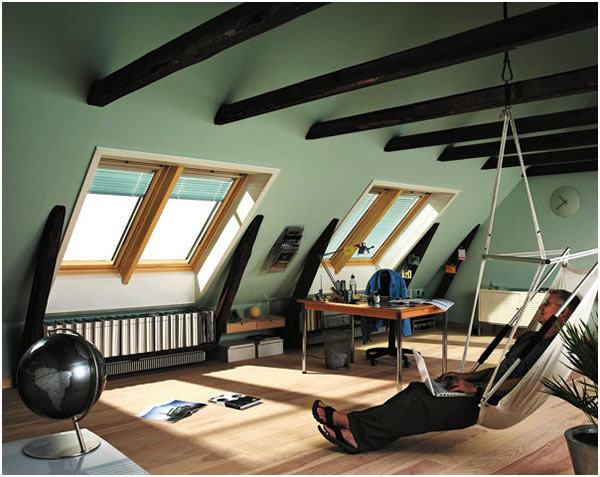
- Using the lining as a finishing material, you can zonate the attic by painting each zone in its color. The picture above is a very good example of such an interior solution. A significant role in this play and the columns with a beautiful finish.
- The decoration of the attic with wood can also be done in another way - using wood panels. They can be made both from an array of wood, and represent a set of rack panels from the same lining.
- These can be MDF variants coated with wood veneer or bamboo. how a budget option, laminated and veneered panels made of fiberboard are used. Wooden panels are good in the decoration of walls, and for the installation of suspended ceilings.
- The attic is finished with MDF panels if this room is used as an office or a room for playing sports. In sleeping rooms, such a plating is not done - the interior will be associated with some office. Therefore, they are combined with other types of decoration, for example with wallpaper, decorative plaster and painting.
Few people know that the construction markets have a new finishing material - wooden wallpaper. They are a set of panels of profiled wooden elements glued to the base. For the production of these wallpapers, wood of predominantly coniferous species is used. Their thickness does not exceed two centimeters, with a width of 1.2 meters and varying from two to six meters in length. Such panels are glued to the wall, like conventional wallpaper, and allow you to quickly and beautifully trim the room under a tree.
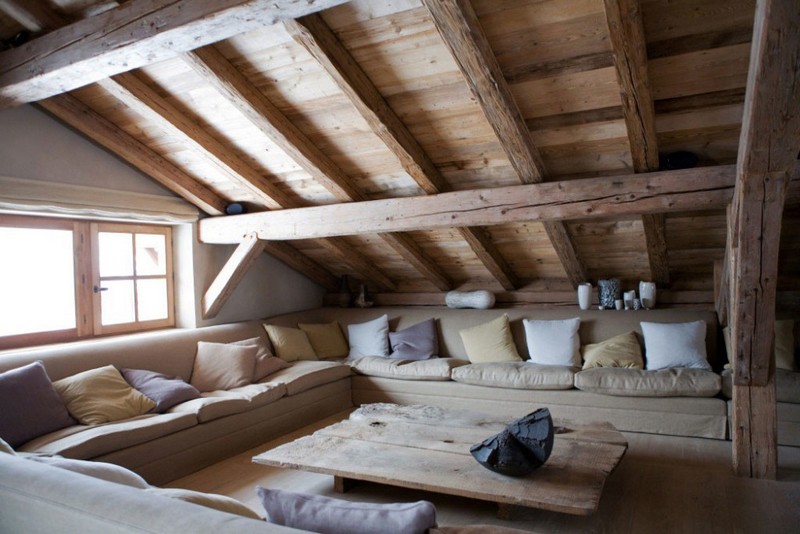
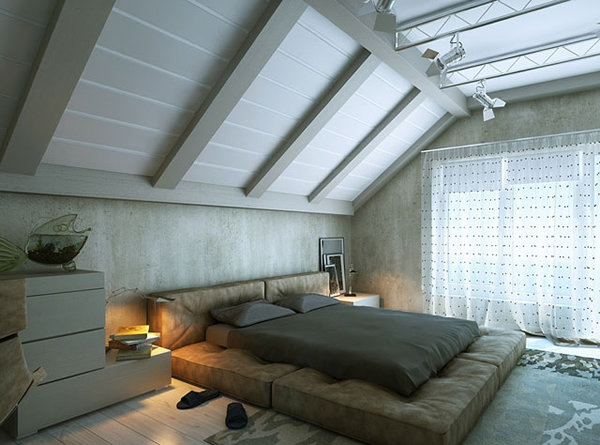
Ceiling beams
The main decoration of the interior of the attic can be and ceiling beams. Depending on the design of the roof, these beams may be bearing, rather than hollow, false beams, which are used in the premises of the ground floor.
So:
- This role can play and rafters - it is enough to carefully zadekorirovat. The above examples of finishing the attic floor, using ceiling beams, clearly show how beautiful and original it is.
At the same time, decorative decoration of walls can be the simplest - all attention is attracted to the beam structures, which necessarily have a contrasting color, in relation to other surfaces. An important role in such an interior is played by the original ceiling lamps, which are in harmony with the beams.
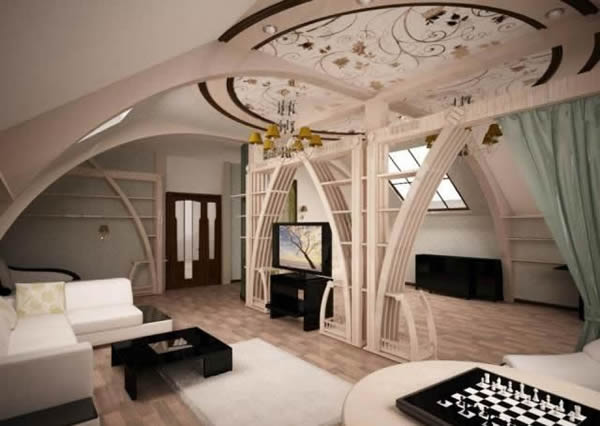
Plasterboard structures
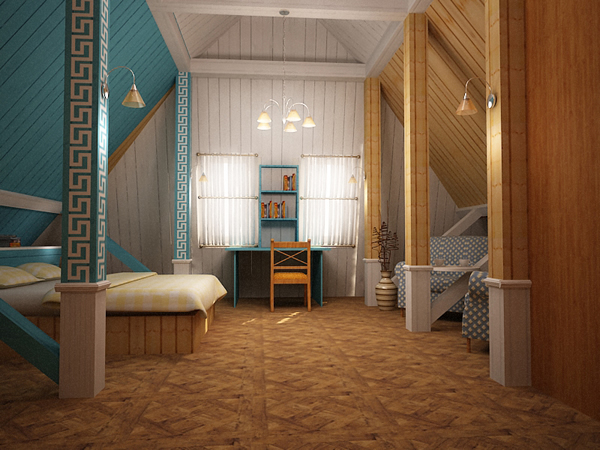
As we have already said, in the attic space there is nothing that could prevent the implementation of any design: partitions, columns, arches, suspended ceilings. The main thing that was spacious. Divide the room into zones by using any of these elements.
So:
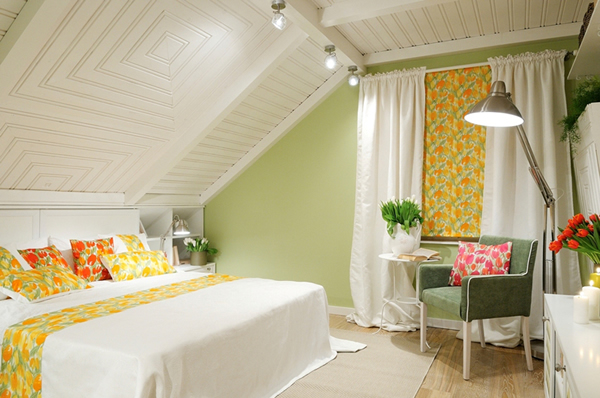
- Fine finishing of mansards, lined with plasterboard, can be a surface painted with acrylic paint, pasted wallpaper. Often the attic has a good height - this is what most apartments in multi-storey houses so lack.
- Sometimes it even needs to be hidden, so the suspended ceilings from plasterboard can have several levels and deviate from the base surface not by 10-12 cm, but much more.
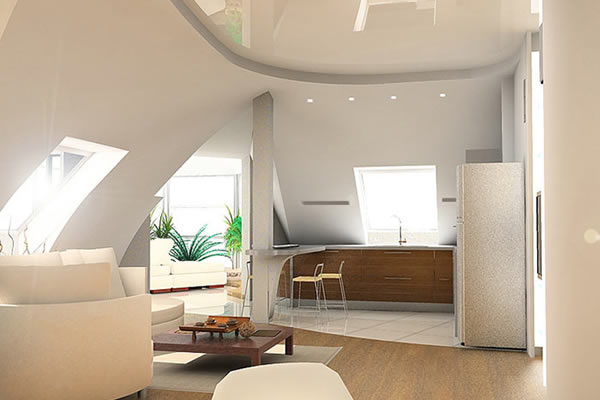
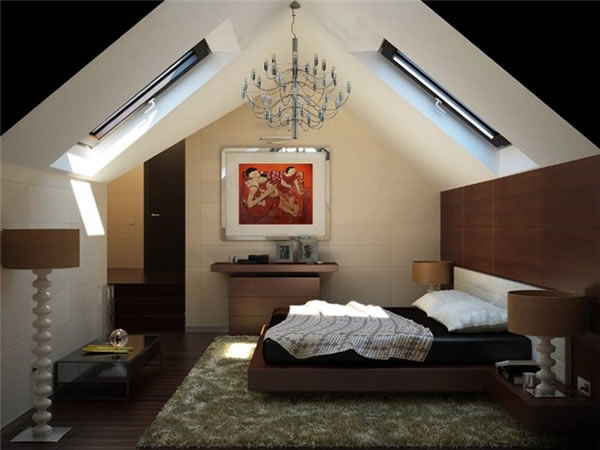
- In the design projects, in the attic there are even stretch ceiling. On the upper photo, the walls of plasterboard and the stretched glossy ceiling of milk color, create a beautiful interior of the living room. This is facilitated by good daylight attics.
- Not all attic rooms have enough windows. If there are no windows in the roof slopes, and there are only small windows on the pediment walls, in terms of lighting, you have to rely more on lighting equipment.
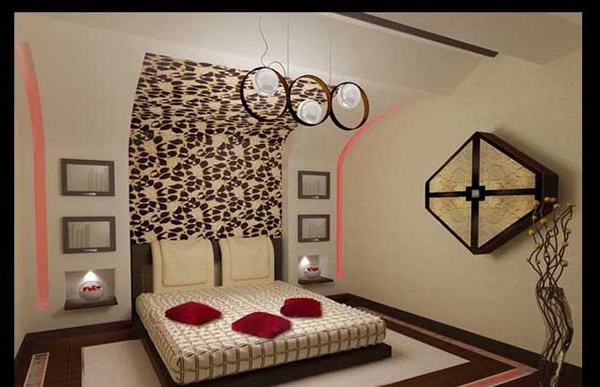
That is why the finish of the attic is clean, done mainly in light colors. Only some elements of the interior can be dark. On the example from above is a very popular technique for finishing the wall, as a continuation of the ceiling. It looks like this: along the head of the bed, which stands with the butt to the wall, paste a strip of wallpaper with a thick pattern. The pattern is usually in contrast with the light surface and visually draws the room in height.
Other types of finishing
Designers constantly give out ideas that may seem unusual. But the design is different. And often, for the interior of the attic, apply those materials that are designed for external finishing facades.
So:
- This includes such materials as vinyl and aluminum siding, different kinds composite panels, plastic panels HPL. Some manufacturers even offer complete options designed specifically for the attic.
- Such sets are made for a specific object, according to preliminary measurements - this is called individual design. In this case, the finish of the attic is an assembly of a certain design, which is done quickly, and without excess dirt.
- The walls of the attic, lined with HPL panels, look especially well. These anti-vandal facade panels made of plastic high pressure, have extraordinary strength, dielectric and thermal insulation properties, and practically do not absorb moisture.
- The production of this material is carried out simultaneously with the pressing of the upper decorative layer. As a result of this technology compact, non-porous hygienic panels are obtained, having a strict geometric shape.
There are options with two-sided finish, and different. So the surface design can be created by simply turning the panel one way or the other. We told you about the most interesting options for finishing the attic space, but the choice, of course, only for you.