After the walls are erected, the question of choosing an effective and practical roofing material becomes urgent. The most economical is the corrugated board. In the modern market, there is a wide range of such products of quite high quality. However, attention should be paid not only to the quality of the material, but also to the quality of the fastening of the profiled sheet. Correctly laid corrugated board will adequately transfer the negative effects of the environment and save the garage from all kinds of leaks during rain or snow. The most important thing is, before starting the installation, understand the technology of laying and study the features of corrugated board. In this article, we will look at how to cover the roof with a corrugated board with your own hands.
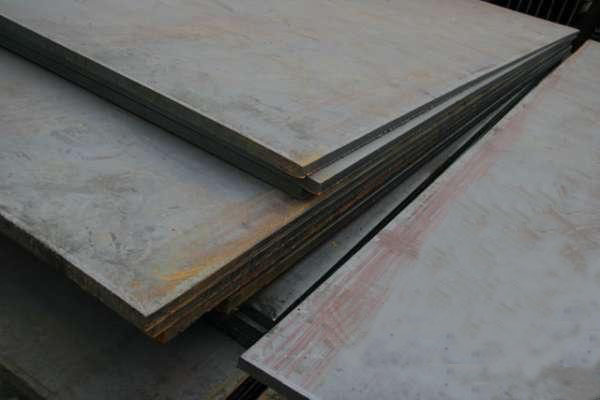
Profiled flooring is made of galvanized steel or materials based on it, since they give the roof a special reliability. The excellent stiffness of the sheet is provided by its pre-rolling.
Profiled sheeting has very high strength and is suitable in almost any operating condition. The most important thing in choosing a material is to know that the roofing and wall types of the profiled sheet can differ from each other in their performance characteristics, therefore it is not recommended to replace the roofing profiled flooring with a wall board. Despite the fact that in recent years very many use corrugated board for the construction of production areas, pavilions and awnings, its priority is still the roof of buildings and structures.
Stages of work

The technology of mounting corrugated board can not be called a complex process. Naturally, the basic principle of fastening the profiled sheet on the roof is strict and clear compliance with all existing rules, norms and standards. In addition, in the process of work should take into account the individual features of the roof itself, and, of course, their own wishes for the construction of the future roof. It, due to its technical features, should have a slight slope of a few degrees, with its presence, the roof will reliably protect the premises from heavy precipitation and other leaks. In this case, the galvanized profiled sheet is an excellent material, which allows to significantly reduce material costs.

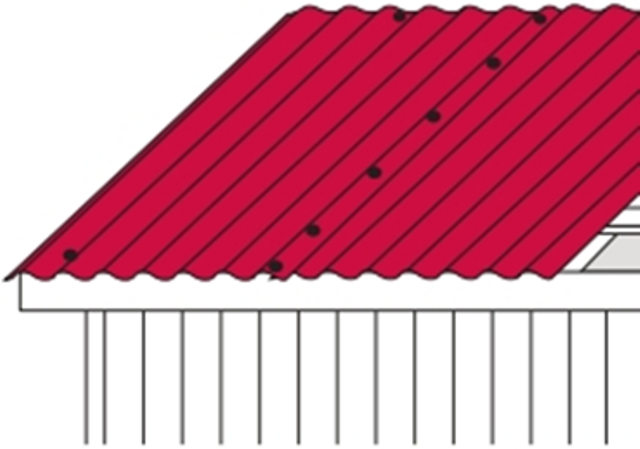
How to properly cover the roof with corrugated board? Installation of the profiled sheet is carried out, as a rule, with the help of special screws for the roof. They are great for working with wooden surfaces. Roofing screws have a neoprene gasket and cut into the material with a mini drill, which is on the tip. Here, unlike slate, it is very important not to forget that the material is better to fasten exactly on the curve of the profile. Also it is necessary to remember that the gas and water vapor barrier laying must be supplemented by a reliable and high-quality under-roofing system.

Before the beginning of installation, the primary task is to raise the corrugated board to the roof. It is recommended to lift it one sheet at a time, using special lags installed from the ground to the edge of the future roof. In windy weather, it is better to refrain from work, as in such weather conditions the probability of material damage is high.
Among other things, you need to check:
- level and the maximum deviation of skates (it should not exceed 1 mm of a millimeter for each meter of length). If there is an excessive deviation from the horizontal, there is a possibility that the profiled sheets will not fit together with each other.
- rectangular roof slopes. To do this, you need to measure their diagonals, and make sure that the deviation does not exceed 2 centimeters.
Safety precautions and precautions

- Moving along the corrugated board is recommended in soft shoes, neat steps. It is necessary to step into the deflection of the wave and only to the location of the crate.
- Screws when laying the corrugated board must be screwed into the deflection of the wave.
- Care must be taken to repair the damage and chips, as well as the sections of the sheets in place of the slices, in order to avoid damage to the integrity of the coating.
- To prevent cuts of hands on sharp edges, installation of profiled flooring must be done in special gloves.
- Do not use sheets of corrugated board, without removing from them a pre-protective film, it can stick to the polymer coating.
- If there are contaminated areas, they must be washed with a soap solution or cleaned with a special soft brush.
- Strictly forbidden to use in the process of laying "Bulgarians". Sparks, inevitably arising during the operation of the angle grinder, will burn the coating of the corrugated board, which in time will lead to active corrosive processes.
Instruments

- Lever shears used for cutting sheets up to 0.6 mm thick, regardless of direction.
- Cutting shears. Used for manual cutting of sheets and should be completed with replaceable knives.
- A drill bit designed for cutting steel up to a thickness of 0.8 mm. Angle of roof slope from corrugated board


It is one of the most popular roofing materials. Its advantage is distinguished by the breadth of the range with a wide range of prices, as well as a number of other advantages - environmental friendliness, durability, external appeal, ease.
To make profiled roofing in the country is the easiest. But, with the right choice of the appropriate category, it will perfectly suit both for the solution of the architectural design project, and for creating the roof of the industrial building.
How to choose the right corrugated board?
When choosing proflista as the main criteria, use the type of building, the possibility of financial costs, the angle of the ramp, the requirements for strength.
Select Material Type
Important! A separate group consists of corrugated corrugated board, perforated, with embossing, used for decorative decoration of the roof. The technical characteristics of such a material depend on the quality of the raw materials.
Categories of profiled sheeting
In addition to the type of material, pay attention to the marking of categories. For the decoration of the roof are the following:

Important! In addition to the wave height of 21 and 44 mm, other types are used, whose range of parameters is from 8 to 35 mm. These types of profiles are more suitable for creating a light roof.
Important! When choosing the material of these categories, consider the conditions for creating a crate-no more than 80 cm.

Important! The price of the roof overlap with the corrugated board depends entirely on your design requirements and the selected material.

Tilt angle
Pay attention to the table below. 
Make a choice of material, based on the material category's compliance with the angle of the roof slope.
Other selection criteria
When buying, check the quality of the material. Pay special attention to the absence of defects in the form of chips, irregularities and scratches, the accuracy of the parameters, matching the shade of the sheets. 
Preparatory work
The volume of preliminary works is labor-intensive and often takes longer than the process of installation of roofing material. The two main tasks of this process are to create a solid framework for the roofing deck and preserve the integrity of the material.
Main stages
- Transportation of corrugated board
- Acquisition of all necessary materials and tools
- Creation of a flooring and waterproofing layer.
Important! Before proceeding with the work, familiarize yourself with the scheme of roof overlap with corrugated board.

Profile Sheet Transport
In order to avoid damage during transportation, taking into account the dimensions of sheets of corrugated board, observe the following recommendations:

Materials and Tools

Important! Self-tapping screws for attaching profiled sheets must meet special requirements:

Creating a frame - crates
When overlapping the roof with corrugated board, you very carefully treat the process of installing the crate. The quality of the work done will depend on the degree of reliability and strength of the roof.
Sequencing:
- Use a weakly diffused method or solid.
Important! To increase the strength of the frame, perform a 2-ply construction from the sparse and solid flooring of the battens.

Important! The territory of the ridge, valley, chimney, ventilation and fire openings should be solely based on solid technology.


Mounting of the profile sheet of the main roof surface
Perform the installation of the corrugated board, observing exactly all the conditions of the instruction. This approach will ensure the reliability of the design and a long period of operation.
Sequencing:

Important! Lift only one element at a time.

- Remove the protective film.
- Wear protective gloves.
- Install the first roofing sheet, starting from one of the ends.
Important! Observe on every piece of corrugated board the location of the gutter - below.

Important! After drilling, remove the resulting metal dust with a soft-bristled brush to prevent rust.

Important! If the length of the sheet does not correspond to the length of the slope, first install the bottom fragment. In the future, follow the direction of the overlap.

Important! If the thickness of the material is small - drill a hole with the tip of the screw (it is specially sharpened). If you choose a thick corrugated board - make the preliminary holes with a drill, then screw in the fasteners.

Install by observing the overlap of 100-150 mm. Fasten to the corrugation and the ridge strap. The fixing step is 20-30 cm. Important! The installation of the skate strap starts from the side opposite to the frequent effects of wind and precipitation.
Important! Be sure to install snegozaderzhateli to avoid emergencies, damage the facade of the building and prevent health damage.
Video roof overlap with corrugated board
Watch the video attached below. This will help you to understand in more detail the entire process of installing corrugated board.


It is possible to cover the roof with profiled sheeting even if there are no professional skills of construction. It is important only to comply with the technology of work and try to avoid common mistakes that can affect the result.
Choice of corrugated board
The advantages of this material are obvious:
- light weight: roof overlap with corrugated board does not require reinforcement of the existing rafter system, building structures and foundations;
- a reasonable ratio of the cost and durability of the material: if properly installed, the roof can serve more than 15 years;
- aesthetics: profiled sheeting with polymeric colored coating allows creating an attractive roof;
- practicality: simple galvanized sheets are an inexpensive solution for industrial buildings and outbuildings.
It is extremely important to choose a material with the necessary strength characteristics. In addition, it must be borne in mind that as a roofing material should be used corrugated board with a capillary groove, which contributes to the effective drainage of rainwater when installing overlapping sheets. It is not recommended to save on the material - from a cheap profiled sheet made of poor-quality steel, the capillary groove is easily deformed under loads and becomes useless. Such a roof can not be cleaned without damage from snow in winter or to be repaired if necessary.
Galvanized sheet is the cheapest version of the roof, but it can not be called attractive. High demand uses profiled sheeting with a protective and decorative polymer coating. It is important to determine the requirements for the strength and durability of this coating. If it is intended to use a corrugated sheet for mounting on a roof with a large angle of slope, it is possible to use a material with a polyester coating, since with such a roof the snow rolls down under its own weight and reduces the risk of damage to the coating during cleaning. For roofs with a smaller angle of inclination, it is recommended to purchase a corrugated board with a much stronger outer layer of Pural or PVDT (polyvinyl difluoride), but in this case the roofing with corrugated board will cost more.

How to avoid material damage during transportation
Profiled sheeting made of steel sheet by the method of cold profiling, as a roofing covering possesses the necessary strength and ability to withstand high snow and wind loads. But the sheets, individually, are highly susceptible to mechanical damage.
Transport and lifting of material to the installation site should be carried out by taking certain precautions to prevent accidental damage to the corrugated board.
Before coating the roof with corrugated board, the material should be delivered to the object. In doing so, you must follow certain rules of transportation. Deformation of the roofing material in the process of loading and unloading works or transportation will lead to the need to replace it and, as a result, to a rise in the cost of the roof. To make a reliable roof covering, you should use a 0.5 mm profiled sheet made of high-quality steel.
Basic transportation rules:
- Such material is transported by piles stacked on a solid, solid base, for example, on wooden logs, the length of the log must exceed the width of the sheet.
- When preparing for transportation, the load placed in the machine must be securely fastened with slings to avoid friction between the sheets and adjacent objects - this can lead to spoilage of the protective coating.
- The recommended speed of the vehicle when transporting corrugated board is no more than 80 kilometers per hour.
If the loading of the profiled sheet at the point of purchase is usually carried out by professionals using special equipment, then unloading at the site is often carried out manually by hand. To properly cover the roof with corrugated sheet, you should carefully move the sheets one by one. It is advisable to carry each sheet together.
It is strictly forbidden to bend the corrugated board or move the sheets by drag! The deformed sheet is almost impossible to return the original geometry, and it becomes unsuitable for mounting. Damage to the protective and decorative layer leads to a rapid onset of the corrosion process during the operation of the roofing.
The rise of the corrugated board to the roof should also be carried out correctly. The technology of the work is as follows:
- do not lift material in windy weather - this can lead to damage;
- from the ground to the roof it is recommended to stretch the lags, along which the sheets are raised;
- only one sheet can be lifted.

Considering how to correctly cover the roof with corrugated board, it can be noted that two people can execute the work quickly and efficiently. At the same time lifting the material to the roof is much more convenient and easier to carry out the threesome. With the technology of the installation of the coating can be found in the thematic video.
How to avoid damaging the material during installation?
How to properly cover the roof with corrugated board? If you want to mount the roof of a fairly large area, that is, during the fastening of sheets you will have to walk on already laid material, first of all it is necessary to take care of shoes. It is required to put on shoes with a soft sole that will not slide over the metal and will not damage its protective polymer layer. Step on the roofing material is possible only in those places where the sheet lies on the crate.
If we cut the roof with profiled sheeting, then we should choose the right tool for the assembly work. The installation of this roofing material does not require the use of complex expensive equipment. It is enough to have:
- screwdriver;
- scissors for metal, capable of cutting steel thickness of up to 0.6 mm;
- hacksaw for metal with small teeth;
- electric shears or electric jigsaw.

It is not recommended to use electric welding or gas welding when installing the corrugated board, since in this case the probability of damage to the protective coating of the sheets is high.
To avoid corrosion on the ground cut sheets of corrugated board, it is desirable to immediately finish the ends of the material with an anticorrosive primer.
Features of fixing corrugated board
In the question of how to cover the roof with profiled sheeting, special attention is paid to fasteners. To reliably attach the sheets to the crate, it is best to use galvanized self-tapping screws with a drill bit on the end. The size of fasteners is 4.8 × 35 mm. Each screw must be equipped with a special neoprene gasket, which protects the attachment from moisture. Self-tapping screws must be screwed into the wave in the lower part adjacent to the crate. When fastening the ridge, the screw is screwed through the top of the wave. Producers of corrugated board often offer self-tapping screws with hats painted in the color of the selected roofing material, which increases the aesthetics of the finished roof.

When installing a corrugated board with a polymer coating, it is especially important to ensure that the shavings formed when the fasteners are screwed do not damage the outer protective layer of the material. The chips must be removed immediately. If left in place of fastening, it will quickly start to rust, and will serve as a source of corrosion, in addition, the presence of sticking chips will prevent the neoprene gasket from sealing the attachment place.

You can not fasten the corrugated board to the crate with aluminum rivets or nails! This type of fasteners can not provide the necessary stability of roofing to strong wind loads.
Considering how to cover the roof with corrugated board, it can be noted that the strength and durability of the roofing depends to a large extent on the correctly chosen step of the battens, sufficient vertical and horizontal overlapping of the sheet material, the use of special laths protecting the roofs from the atmospheric influences and a number of other factors.
The main stages of the installation of the roof from the corrugated board are described in detail in the video material.
Author Pavlov Yuri
Nikolayevich
In the list of weighty pluses of profiled roofing steel, the simplicity of laying is justified. One large metal sheet immediately overlaps a considerable area. The number of fastening operations and alignment of the elements has been reduced. True, the size of the cover can not be unequivocally attributed to the number of advantages, for example, with the arrangement of slanting ridges of roofs with four slopes. So that they do not cause any difficulties, it is necessary to know how a four-pitched roof is made of corrugated board, how the correct laying is made on its plane.
Profiled roofing steel is produced in the form of corrugated or undulating sheets with a polymeric protective and decorative shell or without it.
It is made of cold rolled metal, hot-dip galvanized, which provides the material with a stable resistance to atmospheric attacks.

In the line of profiled sheet from different manufacturers, there is a conditional division into the bearing, wall and roof categories. However, the arrangement of roofs can be applied by anyone who likes the owner of the house, if it is not too concerned about the difference in the cost of load-bearing and roofing options. Note that the material for corrugated roofs is smaller, the weight is lighter and the price is more attractive.
For the arrangement of the roofs with a profiled sheet, all types are produced that greatly facilitate the carrying out of roofing work. Within the limits of production from one manufacturer they are absolutely similar to those used in the laying of metal roofing. Because in fact, both roofing representatives - this is the same material, differing only in the presence or absence of a transverse profiled step.

By analogy with the metal along the right or left edge of the panels of the corrugated board, a drainage chute is arranged. It is designed to drain moisture accumulated in the joints of the coating. During installation, the extreme wave with the gutter must be under an adjacent sheet of material, and its direct opposite is to cover the same trough of the adjacent element on the other side.
The installation of the coating is carried out with the overlap of one or two corrugations of the stacked panel on the element already located on the slope. The number of overlapping longitudinal depressions depends on the angle of inclination of the ramp and the bearing capacity of the material. When calculating the material for the arrangement of the roof, it is necessary to take into account how much the corrugation is recommended to perform an overlap.
The connection of individual panels to a common large-sized roofing sheet is made into the convex protrusion with short screws that do not go deeper into the crate. But to her metal roof is fixed with a groove in the wooden parts through the concave part of the corrugation. The fastening elements are made in a tonality corresponding to the color of the roofing, and are equipped with elastomer washers, which ensure tightness at the junction point.

The profilist is delivered to an object of the required length, declared by the customer when making the purchase. Cutting at an angle is not performed by the supplier, it is made before laying on the construction site. In order not to overpay for surplus, before acquiring material it is recommended to make a roof project or at least draw a sketch on a scale.
Designing a roof made of corrugated board
Mounting of corrugated board on hip and hipped roofs is made with a significant difference from stacking sheets on a structure with two ramps. The fact is that the large-sized elements of the coating require cutting and are installed in a special order:
- For tents. First marks the central axis of the starting sheet and the ramp along the crate. Then the fitting of the axes is carried out, during which the cutting lines are marked. All subsequent sheets are tried and cut after the fact on the site.
- For hip. The first sheet is set so that its edge coincides with the extreme edge of the right or left leg of the ridge run. The starting sheet has no slanting cuts, it is set to the full height of the roof. Only the panels adjacent to the oblique hip ribs are cut.
In the arrangement of the hipped structures, the material for all four skates is cut according to the same scheme. In the case of hip roofs, the roofing on two end ramps is cut and laid in the manner used in the arrangement of the hipped roofs, and two long ones with partial prizezkoy.

When drawing up a project or a sketch of the roof, for calculations before purchasing the material and for developing your own roofing plan, it is necessary to take into account that:
- The number of sheets is calculated from the width of the base of each ramp.
- The height of the sheet is determined according to a predefined pattern. It should be positioned so that it completely covers the hip rib.
- The calculations do not use a common, but useful width of the corrugated board when stacked with an overlap in one corrugation. If two corrugations go under the overlap, the estimated useful width will decrease by one more wave.
- Sheets on triangular slopes are decomposed from the center, on pentagonal slopes - from the extreme point of the ridge run.
- The optimal arrangement of the panels of the corrugated board minimizes the number of roofing parts, the width of which is less than half the sheet. This is too weakened the roof because of the large number of attachment points per unit area and seams.
Without fail, the height of the profiled panels should be increased by the width of the overhang over the cornice. This is the bottom edge of a sheet with a width of 3.5 - 5.0 cm, extending beyond the frontal board.

During the design period, it is necessary to determine whether the holders will be installed before or after laying the coating. In the first case, the so-called long brackets are used, the installation of which is necessary before the installation works. In the second case, short hooks are fixed, fixed on the front board, their fastening can be performed at any time.
During self-design, it should be decided whether the system needs a thermal insulation system. The thermal insulation device significantly affects the material consumption and the construction of the rafter system, because the roofing cake:
- Cold roofs include only one layer. This waterproofing, arranged from a classic film or anti-condensate material with a pile, absorbing excess moisture under the roof and parting with them during the ventilation period.
- The insulated roof includes three layers: steam, heat and waterproofing. On the side of the operated premises there is a vapor barrier film protecting the heater following it from domestic fumes. On the outside, the insulation is protected by a waterproofing carpet.
Roof pie under the corrugated board is arranged with one or two functional ventilation circuits. Their number depends on the waterproofing material chosen for arrangement. It is important to remember that as a waterproofing under a metal roof with a polymer coating, it is not possible to use variants containing bitumen.

The first ventilation circuit is laid between the heater and the waterproofing carpet, if it uses classic polyethylene or fleecy anti-condensate material. If a diffusion diaphragm is used, it is not necessary to form a vent channel above it. it spontaneously releases excess moisture outside when stress occurs.
The second ventilation circuit is constructed between waterproofing and metal roofing without fail. Regardless of the material chosen for its installation, the direct contact of the corrugated board with the water repellent carpet should be avoided, in order to avoid the appearance of condensation first and then corrosion of the rust foci.
The minimum value of the ventilation gap is proportional to the area of the skates. For example, if the land area is 50 m², then the total area of ventilation ducts for this slope should be 0.5 m². The last value should be divided into two in order to distribute the ventilation gap to the inflow and outflow zones. In gable roofs, these values are equal, for the four-slope structures some difference is eliminated by installing an additional aerator.

Preparation of the rafter system
It should be noted that profiled roofing steel is laid on both wooden and metal truss structures. The device of a metal frame is characteristic for non-residential objects, most often for domestic purposes. The frame can be welded or collapsible with bolted connections. The rafters are the channel or corner, the gratings are a square pipe or a U-shaped profile.
The roof over residential houses is not to be built on metal truss systems. More suitable wood, and independent masters with it is much easier to work with. Therefore, we will disassemble the profiled sheet on a wooden base, as the most common option.

The roofing system and lathing can reasonably be considered a reliable basis for mounting profiled sheets if:
- The step of installing the rafters is no more than 1200 mm. The optimal interval is from 600 to 900 mm.
- The rafters are made of a bar with a section of 50 × 100 or 50 × 150 mm, depending on the wind and snow load characteristic of the region.
- The cross-section of the crate is chosen depending on the distance between the rafters and the steepness of the roof.
The resins for the corrugated board are installed with an equivalent step. Reduce the distance between them only in areas that require amplification: along the perimeter of the cornice eaves to a width of 50-60 cm for the subsequent installation of snow holders, in the valleys, along the ridge run of the hip roof, around the roofing passages.
If the rafter system does not have sufficient parameters to ensure the reliability of the foundation for laying the profiled sheet on the gable roof, it is strengthened by increasing the section of the crate or reducing the pitch between the sills.
![]()
The algorithm for constructing a roofing pie
The construction of the roofing cake is made in the traditional way, observed when installing any insulated roofs. It should be remembered that before the device of the waterproofing carpet along the perimeter of the four-slope construction, a drip must be installed - a folded corner of the plate made of thin sheet steel, designed to drain condensate.
Sequencing:
- The device is a vapor barrier. The roll material is fastened with a stapler to the rafters, with an adhesive tape. Rolls out horizontal strips, stacked with an overlap of 10 -15 cm. If you plan to install the OSB sheathing, plywood or GVL panels, a crate is built over the vapor barrier on the rafters.
- Stacking insulation. In the cells formed by the rafters, the insulation is made of basalt or glass wool. The material is cut in such a way that the width of the heat-insulating element is approximately 1 cm wider than the distance between the rafters for laying its gates.
- The device of waterproofing carpet. Water-repellent material is laid from the outside of the rafters with horizontal stripes, glued together with adhesive tape. The laying begins at the eaves, continues to the top or ridge run. To the rafters it is temporarily fastened with a stapler, then it is fixed by gratings.
The hip and insulating films are laid with overlapping through an oblique ridge of 15 - 20 cm. Along the line of the ridge ridge of the hip roof, the insulating interlayers must have a rupture. On the oblique ribs do not suit the gap.

If the thickness of the warming layer is equal to the width of the rafter, it is recommended to use a super-diffusion polymer membrane as the waterproofing. It does not require the formation of a ventilation gap between themselves and a heater, is able to rid the material of condensate.
When using a classic or anti-condensate fleecy waterproofing, there should be a gap between it and thermal insulation. The width of the channel is 3 to 5 cm. It is formed by means of a bar-shaped crate with an equivalent size of one or both sides attached to the rafter legs from the outside. Then, over it, waterproofing is carried out and the crate is reinstalled, to create a second level gap - between the coating and the waterproofing carpet.
Do not spend energy in the bargain over time on the device ventilation duct can be in case the thickness of the thermal insulation is less than the width of the truss at least a minimum of 3 cm.
The construction of the roofing pie of the construction without insulation is much easier and much faster. All the actions consist in laying the waterproofing on the rafters and installing a remote bar of the crate over it. After that, it remains only to install the cornices, then cover the corrugated board with a four-slope roof, correctly fix them, fix the ridge elements.

Marking and cutting of metal coating
To mark the pruning of panels at an angle, it is recommended to stock up with a simple homemade device, which from folk craftsmen was called "devil". To produce it, you need four pieces of a 25 × 100 mm board or a suitable sized bar. The two blanks will be approximately 1.1-1.2 m long. The second pair can be of similar length or slightly larger.
The process of manufacturing an elementary device for marking:
- On the desktop or a free flat ground, lay out the trimmed boards in the form of a rectangle or square. Naturally, they will be located in two parallel pairs.
- Between the left or right edges of the horizontal elements of the device being constructed, we form a distance equal to the working width of the roofing panel. Most often this is 1.1 m.
- We check the pairwise parallelism of the details of the future device. After checking, we fasten them with hinged joints so that they can be displaced relative to each other in parallel pairs.
For marking with the help of "devil" to the installed and fixed on the roof sheet apply the panel to be marked. The homemade tool is placed on the oblique edge of the hip to indicate the line of the forthcoming cut. Mark the panel, move it to a place convenient for cutting and cut it.

The profilist can be cut with a sharp circular saw, the technical capabilities of which include the function of cutting thin sheet steel. At small volumes of work for removal of surplus material the jigsaw or roof scissors will approach. Use the Bulgarian in cutting metal roofing is unacceptable.
During the work on cutting the coating with a polymer sheath, it must be ensured that it is not damaged by small chips. If scratches or cuts of the coating are detected, they must be covered with repair paint.

The fine sharp parts of the cut material must be carefully removed from the panel with a soft brush before installation. Persistent dirt should be cleaned using a soap solution. Cropped edges of sheets, at least on the side of contiguity to the hip and ridge ribs, are recommended to be treated with varnish or repair composition.
Laying of the profiled sheet on the hip ramp
Fastening of the profiled sheet to the triangular plane is accompanied by fitting and opening each sheet. Before their installation, the perimeter of the roof is equipped with a cornice strip, mounted to the crate.

Work on marking panels is carried out in a strictly defined sequence:
- On the first sheet we mark its central axis, on the Mauerlate of the ramp it is its middle.
- We establish the first sheet, combining the marked centers of it and the Mauerlat, we check the horizontality of the lower edge of the panel.
- We fix the first sheet with one screwdriver at the top.
- Install adjacent panels, one of which is superimposed on the edge of the sheet with a capillary groove, the second is slid under it from the opposite side.
- Align the block of three panels relative to the horizon and with each other.
- Temporarily fix each of the newly installed sheets with one self-cutter at the top, trying to arrange the fasteners outside the required part in the stowage.
- We mark the cutting lines.
After completing the marking, remove the temporary fasteners and cut off the surplus material from the panels. Then we return them to their place, set according to the scheme described above, we fix again only at the top of the central sheet and align the block before the final fixation.

First of all, the sheets are fastened together in a single roofing cloth with 4,8 × 19 mm self-tapping screws, screwed in every 50 cm, which are attached to the lower part of the corrugation. After the connection, the block is aligned again with respect to the horizon and the edge of the cornice and is fastened to the resins. For this, self-cutters of 4.8 × 38 mm are used, which are installed in the profile recess in each second recess.
Fastening to the cornice is made in each profile groove, in the middle of the sheet fasteners are distributed evenly so that on 1 m2 of the cover there are 5 fixing points.

In the end of the laying of the sheet covering, skate elements are assembled with the pre-packing of the seal along the edges of the drills. In the arrangement of trapezoidal rays, the first to install the straps on the hip fins from the bottom up, then the ridge with plugs is mounted on the ridge ridge.
Video about the principles of laying corrugated board
The sequence of work on laying corrugated board on the roof:
Roller about the first experience in self-laying of corrugated board:
Folk tricks in the arrangement of roofs from the proflist:
To the result of uneasy works did not disappoint and did not require impressive investments for alteration, it is necessary to know how to properly cover with a corrugated board an architecturally complex object - a gable roof. The material presented by us will render an effective help to independent roofers. Compliance with the described rules guarantees success.
How to cover the roof with a corrugated board with your own hands
If your house needs a roof that has an attractive and refined appearance at a relatively low cost, the roof made of corrugated board - cold-rolled galvanized steel sheet coated with colored polymer materials - is what you need.
Advantages of profiled steel sheet:
- excellent performance: resistance to weathering, solar radiation, mechanical strength, corrosion resistance,
- low specific weight (from 5.5 to 9.5 kg / m 2), so low load on the rafters and crate,
- roofing material can be selected by texture and color for the design of the building,
- relatively low price with high aesthetic qualities.
Which corrugated board is suitable for roofing
![]()
Any of the grades of corrugated board (universal, bearing or wall) is suitable for roofing, but for laying thin wall material, almost continuous crate will be required. For a conventional battens in steps of 65-100 cm, it is preferable to use a stronger and harder corrugated sheet. The most commonly used material with such indicators:
- brand H or HC (carrier and universal),
- thickness of the profiled sheet from 0,5 to 0,7 mm (strong and light at the same time),
- the height of the corrugation is 20-75 mm (provides the possibility of elastic deformation of the roof),
- the presence of a capillary drainage groove,
- color coating, suitable for the existing or projected exterior of the house.
The price for corrugated board depends on several indicators of the material.
What you need to cover the roof with a profiled sheeting yourself
![]()
A simple saddle or gable roof of a summer cottage, a summer kitchen or a garage can not be covered independently with one or two assistants and some skills in working with a screwdriver and an electric jigsaw. A broken gable roof of the house with an attic will also be able to work independently. Will help in this.
If the roof skeleton is more complex configuration, you should invite experienced professionals to cover the roof with corrugated board. The price of the work will depend on the complexity of the roof and the area of the skates.
How much material will be needed?
Calculate the amount of material for a saddle or gable roof, knowing the size of the ramps, it will not be difficult. If the length of the ramp is 12 m or less, the width of the ramp should be divided by the width of the material, the resulting number of sheets should be increased by 15%.
For more complex roofs, you can calculate the corrugated board for roofs online according to special programs. The programs allow not only to determine the amount of material as accurately as possible, but also calculate the slope of the roof, the dimensions of the overlap, determine the best variant of the location and attachment of the profiled sheet.
Tools and fasteners for work

The work will require measuring and cutting tools, fastening materials:

Features of laying the roof of the proflist
Doing the work is best done by the four of us, so it will be much faster. Two people can also cope, but alone it is very difficult to work with long sheets of corrugated board.
- The minimum angle of the roof slope is 10 °. With a smaller value of the angle of the slope, water can fall under the material.
- The standard length of the profiled sheet is 12 m. If the length of the ramp is smaller or larger, the sheets will have to be cut off.
- To protect the corrugated sheet from corrosion, it is necessary to make a waterproofing and vapor barrier on the crate.
Edging for profiled sheeting

An important stage in the installation of roofing from the corrugated board is the organization of hydro and steam insulation to protect the metal from corrosion when water vapor enters.
Do this in two ways:
- laying the vapor barrier on the rafters under the crate and waterproofing (roofing paper) over the crate under the profiled sheeting;
- organization of a ventilated roof, creating a ventilated space between the layer of waterproofing and roofing material. To do this, along the rafters, false roof rafters are installed along the rafters from the bars, lathing is done on them, a layered pie is obtained: rafters, waterproofing, false rafters, lathing, profiled sheeting.
Important! All elements of the crate must be impregnated on all sides with an antiseptic compound for the tree. This will extend the life of the roof.
The boards of the battens are laid in steps of 0.5-1.0 m by attaching them with nails or self-tapping screws to the rafters. The thicker and stronger the corrugated board is used, the greater the distance between the boards of the crate. So, for example, for a profiled sheet of brand SN35, the step of the border is 0.5-0.6 m, for SN44 - 0.65-0.75 m. The distance of more than 1 m between the boards should not be done.
Having made the crate, you need to check the diagonals of the ramp and align the ramp along the verticals, horizontals, diagonals. This will greatly facilitate the work on laying the corrugated board for the crate.
The order of laying the corrugated board with your own hands

- Profilists lay, from the bottom up, starting on the ramp from the end of the building, from left to right or right to left - it all depends on which side of the sheet the manufacturer made a capillary groove. When laying the material, the groove should be covered with a wave of the next sheet.
- The size of the overlap of profiled sheets horizontally and vertically depends on the magnitude of the angle of the roof slope. At small values of the angle of inclination of the slope, the sheets are laid with an overlap in two waves along the vertical, at high values - in one or half a wave.
- The overlap horizontally skate not less than 10 cm. The first row is laid with a flight 30-50 cm above the overhang (the distance depends on the design of the drainage system). The joints between the profiled sheets are sealed with a special tape. The sheet of the second row is laid with an offset along the butt half the width.
How to lift sheets on the roof

If 2 or more people work, it is easy to pick up sheets. They are stacked on a frame of 5-6 bars in bundles of 5-10 pieces and on sloping boards, attached to the crate, tighten the rope up.
On the crate to ensure that the sheets do not roll down, nail one or two bars from below and lay a pack of sheets of cover. So it is much more convenient to work than to serve one by one, although this method is also used.
How to fix the corrugated board on the roof correctly

The sheets are attached to the crate by screws with washers and sealing gaskets. The number of them is not more than 6-10 pieces per 1 sq.m. flooring. On the slope, the screws are screwed into the lower ones, and on the ridge - into the upper waves of the sheet.
If the material is thin, the screws are simply screwed with a screwdriver, they easily pass right through without damaging the coating. On thick steel plates in places where they are fastened to the lath, it is advisable to pre-mark and drill holes for the screws with a drill.
Important! It is necessary to accurately align and properly install the very first sheet, it will depend on the quality of the whole work.

The first sheet is first fixed in the middle with a single screw and carefully level the overhang from the eaves and the vertical position of the crate. After that, it is fixed with a second screw.
To the upper and lower boards of the crate, the material is fixed by screwing the screws into each deflection of the wave, into the central planks - through the deflection.
The second highest row is placed with the sheets shifted to the right or left half of the width. Cut profillist electric saw, a hacksaw for metal or electric jigsaw with a file for metal. Do it on the ground.
Attention! You can not cut a profiled bulgarian. This will destroy the polymer coating. For cutting, you should use scissors for metal, and cut the sections with paint.
Horizontal joints are also sealed with tape. Screws on the overlap are screwed into each groove of the wave. The rubber sealing washer should protrude 1-2 mm around the perimeter of the screw head, this indicates that it is not pinched and not tightened tightly.
Installation of the ridge on the corrugated board

Ridge additional elements to the roof of the corrugated board produce
- simple in the form of a sheet bent at an angle with a shelf width of up to 30 cm,
- with a semicircular edge,
- with a U-shaped rib and shelves of the same size.
To install the skate on the roof of the corrugated board, the last row of sheets should be aligned in the upper part along the end and lay in one horizontal plane. The order of installation is as follows:
- on the edge of the last row of sheets, lay a tape or strip of ridge seal,
- parallel to the axis of the ridge fasten the bars,
- to the bars self-tapping screws in the upper corrugation after 20-30 cm, fasten the elements of the ridge, starting from the side where the wind most often blows,
- the ends of the semicircular skate are closed with special plugs,
- The U-shaped skate is attached to a bar, which is specially installed under it on the ridge of the roof.
A roof made of corrugated board will delight you with its beauty and arouse a sense of pride in excellent work done by yourself. The money saved on this can be spent on making an original weathercock that will decorate the house.