Laying tiles on the walls and floor in the kitchen, in the bathroom or in the toilet is one of the best solutions. It is easy and quick to clean, resistant to various solvents and prolonged exposure to sunlight and water vapor. Implementing the installation of tiles with your own hands is not so difficult, observing the basic rules outlined in this article.
Tiling by own hands: preparation, technology, grouting
Tile is quite expensive material, that's why it is laid for long-term operation, and the styling itself, if you decided to do it yourself, must be done correctly and very carefully. To facilitate your work, you need to properly prepare the surface on which it will fit.
Surface preparation
Laying tiles should be conducted on an even and firm surface - the main rule of preparation. If the preliminary plastering of the surface on which you are going to lay it, is unreliable, sometimes peels, then it is necessary to clean the surface to the brickwork and perform the leveling plaster again.
In the event that the wall, which you are going to trim with tiles, is wooden, then it requires considerable preliminary preparation. Such a wall is first glued with a roofing material, on which a metal grid with cells measuring from1x1mm to 30x30cm is mounted (it should be 1-1.5 cm away from the wall). Then the wall is covered with a cement-sand mortar, and carefully leveled. To ensure better adhesion of the tiles to the wall, incisions directed to opposite sides are made over the raw coating.
Checking the verticality of the walls
 If the surface under the tile is strong enough, then it is necessary to check whether it is even, that is, its geometric parameters. To check the verticality of the walls, you need to use a plumb line or a level of 2-2.5 m long. If there is no such level or ready plumb bob you can make it yourself, attaching a heavy load to the cord.
To check the verticality of the wall, fix the plumb line under the ceiling, parallel to the wall and determine how much our wall deviates from the vertical. Or he applies a building level to the wall and look at the position of the bubble in the corresponding window. If the bubble in the middle is good, if not - set the level vertically and estimate the deviation of the wall from the vertical.
In the event that the wall deviates from the vertical by a few millimeters or more, it will have to be leveled with plaster. Ceramic tiles material is not plastic, the lagged corner can not be pulled out in any direction.
Checking the angles and the plane of the walls
In order to check the internal corners of the room with a building square, we measure the mutual perpendicularity of the walls. If the angle is greater than or less than 90 °, it is also necessary to make leveling plaster.
Then we check the walls for irregularities: bumps or holes. We do this with a water level of at least a meter or rule. If the deviation from the plane is a few millimeters or more by one meter, then it is better to align the wall.
Checking the floor horizontality
The same applies to the preparation of the floor - it must be flat and horizontal. If it is tilted in any direction, a gap will be obtained between the tiles laid on the wall and the floor.
Regardless of whether you put the tile on a concrete slab, cement screed or on an already existing floor, this surface should be smooth, thoroughly cleaned and primed.
Aligning walls
In the event that the walls are uneven, then they need to be leveled, for which the following tools are needed:
- capacity for kneading the solution;
- drill with a mixer, for stirring;
- water level;
- trowel and grater (when using a cement-sand mortar);
- several spatulas (when using ready-made dry mixes - one large (about 1 m) for applying the composition to the wall, and others - auxiliary ones, smaller in size, to place the composition on a large spatula and other operations, their length may be 10-20 cm);
- rule.
When using a cement-sand mortar for leveling the wall, trowel it on a small part of the wall and in a circular motion of the grater rub it until a smooth surface is obtained.
When using ready-made special mixtures, prepare them according to instructions on the package, stirring with a drill with a mixer. After that, we apply a uniform layer of this material to a large spatula (with the help of a small one) and stretch it with a small pressure on the surface of the wall.
Aligning the walls is done until a sufficiently flat surface is obtained, controlling the work with a water level.
Aligning uneven walls by beacons
If the walls are very uneven and you need to plaster a large surface, then you can perform plaster on guiding light rails.
Light beams are attached to the wall vertically and set the further thickness of the layer.
The length of these rails, usually the standard - 3 m, and the height of the profile is different - from 5 to 10 mm. The height of the profile is selected depending on what the difference is the wall - the more irregularities, the higher the profile.
Mayak raki cut off the height of the wall and attach it to its edges. Fastening of racks on the wall is carried out with the help of a solution, which is applied to each profile in several places with a distance between them of about 0.5 m.
The profile (rake) is pressed against the wall until a solution comes out through the side openings. For faster fixation of profiles, you can use building gypsum (alabaster). It is not expensive and it can be easily found in building stores. Gypsum hardens for just a couple of minutes.
Control of the verticality of the installation of the rail is controlled by means of a plumb or level.
After fixing the side rails, drive along each of them several nails at different heights and pull the cords along which we install all other profiles on the wall (at a distance of 1-1.5 m from each other).
When the solution firmly fixes all the slats, remove the nails with the cords and proceed to the plaster of the wall.
When plastering the mortar is thrown in small pieces along the slats, and then remove the excess by the rule of the appropriate size, in the direction from the bottom up. For this work, you do not need to have special skills, the main thing is to properly install the slats and carefully level the surface.
Floor leveling
Laying of tiles on the floor is also carried out after when its surface is horizontal and level. Otherwise it is necessary to perform its alignment, which can be performed in different ways, depending on the material of the floor and the availability of funds.
If a cement-sand mortar is used to level the floor, this process differs little from the leveling of the walls by plastering.
Leveling the floor with self-leveling compounds
When using self-leveling mixtures, the order of work is somewhat different. A solution for leveling the floor from such mixtures is prepared according to the manufacturer's instructions, which are usually placed on the package.
Before the beginning of such work, if there are microcracks on the floor, it is desirable to lay a waterproofing on the floor, and to increase the adhesion of the mixture to the substrate - treat the substrate with a primer.  After that, the perimeter of the room is marked with a horizontal level. This can be done using a special laser or conventional water level. The laser level is convenient and modern, but not everyone can afford it, but a simple water level can be made even with your own hands from a thin hose with small transparent (glass or plastic) tubes on the edges. It's better if the tubes are notched. The hose is filled with water and allows you to set the same elevation marks at all necessary points and planes.
Thus, we put marks on each wall, on which we install pendulum racks on the floor. In principle, a self-leveling mixture can be poured without beacons, but the slats will serve as a good guide.
The space between the slats is filled with a prepared compound, the excess of which is leveled and stretched with the help of a rule or a rakley. To remove bubbles on the surface, we use a needle roller.
Fill and leveling in the direction from the far wall to the door.
Preparing the wooden floor
If the tile needs to be laid on wooden floor , then in no case can it be done on old, loose boards. They must be dismantled and put new, a thickness of at least 30 mm. The boards must be impregnated with a special composition that protects against decay, mold and fungi. From the top on the boards we arrange a horizontal waterproofing. After that, at an altitude of 0.5 cm from the surface, a construction net is laid, which is poured either with a cement-sand mortar or special ready-mixed mortars.
The choice of tiles and mixtures for its styling
Before you go to buy a tile and the necessary materials for laying it, you need to determine the area of the walls or floor that you need to lay out.
All the measurements are done carefully, slowly, all diligently writing down. The amount of tiles required for laying should be 10% greater than the surface area of the wall or floor to account for waste, especially if the row does not fit a whole number of tiles.
The required amount of the mixture can be determined from the table on its packaging, depending on the area of the masonry and the thickness of the layer on which the tile will be laid. The thickness of the layer in turn depends on the dimensions of the ceramic tile itself.
Tile Selection
When choosing a tile it is necessary to remember that there are two types of tiles for the place of its laying: for walls and for floors. The difference between them is that the one that is designed for the floor is thicker, stronger and, usually, has a rougher surface.
Also, the tiles are different in quality. It is best to buy a material of higher quality (grade 1, not 2 or 3 sorts - there will most likely be differences in color and size) and one lot, since different batches may differ in shade or size.
Buy the required amount of tiles better with a small margin, in case of its breakage when cutting or other.
Together with the tiles it is desirable to immediately purchase and all the necessary curbs, decorative tiles with a pattern, etc.
Selection of adhesive mixture
 For laying tiles, it is better to choose dry building mixtures that were made specifically for this purpose. They can be easily found in any construction shop. In this case, do not forget that for the bath you need to choose glue for wet rooms, and, for example, for laying tiles on the street you need to buy glue for outdoor work. Just be sure to pay attention to the maximum thickness of the plaster layer, which is usually indicated on the package.
Ready-made adhesives or mastics for laying tiles require less time and labor, but they are suitable only for sufficiently flat surfaces.
Cement-sand mortar
You can use the old "economical method" of laying tiles - using a cement-sand mortar.
Cement-sand mortar and now remains the most simple and reliable composition for laying ceramic tiles of any kind and on any surfaces. His portions depend on the brand of cement and the quality of the sand, but usually they are made from 1 part of cement and 3 parts of sand.
Technology of laying tiles with your own hands on the wall
![]() Before you start laying the tile, you need to prepare a glue or mortar. For this, pour the prepared mixture into the water in small portions and mix it with a mixer. It is advisable not to pour out all or too much mixture at once. The resulting mixture should not be too liquid, as this will lead to its swelling from the walls and at the same time the mixture should not be too thick, as it will be quite difficult to lay the tile on the wall.
Before you start laying the tile, you need to prepare a glue or mortar. For this, pour the prepared mixture into the water in small portions and mix it with a mixer. It is advisable not to pour out all or too much mixture at once. The resulting mixture should not be too liquid, as this will lead to its swelling from the walls and at the same time the mixture should not be too thick, as it will be quite difficult to lay the tile on the wall.
Beginning of tiling on the wall - from the first or second row
 Laying the tiles on the wall begins in the direction from the bottom upwards, i.e. first lay out the bottom row, then the next and so on.
In order for the tile rows to be even, before laying the bottom row on the floor horizontally, according to the level, the rack is laid. The lower row of tiles is laid on it.
The second option is to start laying the tiles on the wall from the second bottom of the row. For this, a metal profile for the drywall CD-60 (wide) is pre-attached to the wall. The profile is leveled and set so that its upper shelf is at the bottom of the second row of the tile.
To determine the position of the bottom of the second row of tiles, it is necessary to lay off the height of the tile plus the thickness of the seams from the floor and place a mark. If the floor is not level (not horizontal), it is necessary to postpone this distance at its highest point. The profile must be fixed by following this mark. In this case, it must be fixed strictly horizontally, to ensure a high-quality laying of the tiles on the wall.
On the corners of the wall, the slats are also nailed - vertically, by plumb. At the level of the second and all subsequent rows of tiles, nails are driven into these corner slats and a nylon cord is stretched between them. The horizontality of the series is monitored on it.
At the end of the entire surface, the slats are removed and their place is filled with tiles.
When laying tiles from the second row using a metal profile, after finishing the laying of the upper rows of the tile, the profile is removed and the first row of tiles is laid in its place.
Application of adhesive composition or mortar to the wall
 In the process of work, the adhesive composition is applied to the tile or to the wall.
In the first case, the solution with a notched trowel is applied to the lower surface of the tile and it is applied to the wall. This method is usually used when laying tiles on a cement-sand mortar.
In the second case, the adhesive mixture is applied to the wall with an ordinary spatula, it is leveled with a denticle, and ceramic tiles are laid on it. This method is most often used when laying tiles on glue mixtures.
Laying tiles on the wall
 The tile is slightly pressed against the wall, so that the adhesive composition is evenly distributed throughout its surface.
The same operation is repeated with the next tile and insert between them plastic "crosses" that regulate the thickness of the seam between adjacent tiles. Usually the thickness of this joint is 2-4 mm. If the gap between the tiles is not made, then under temperature expansion the tile may crack or flake off the wall.
Laying tiles in the vertical and horizontal directions must be constantly monitored with a level.
When laying ceramic tiles on cement mortar, it must first be soaked in water. Otherwise, it will immediately absorb water from the solution and it will cease to be plastic and tile laying will be difficult or impossible. When using glue mixtures in soaking is not necessary.
Than to cut off a tile at stacking?
 Sometimes it becomes necessary to cut off a piece of tile - if an entire number of tiles are not placed in a row. To make it best with a special tile cutter, and if it does not, then you can do it with the help of the "Bulgarian" - a special cutting circle for the tile. To do this, you must first measure how much you need to cut off the tiles. Then denote the line by which the cutting is performed taking into account the thickness of the slot - it can be different depending on the thickness of the used cutting wheel. To make the cut even, you can use a homemade line of hardwoods.
Methods of placing tiles on the wall
The location of the tiles on the wall can be in many ways:
- diagonally;
- inanimate ;
- seam in seam.
The first method - diagonally, the most time consuming and expensive - will have to cut all the tiles that are adjacent to both corners of the wall and the tiles of the upper and lower rows.
Method vzrazbezhku (in staggered order, with dressing seams) is much easier - in this case, you will have to cut only adjacent to the corners of the wall tiles.
The location of the tile seam in the seam can be symmetrical and asymmetric. In the first case, put the tile in the center of the row, and from it already lead the lining to the left and to the right.
With an asymmetrical arrangement, the first tile is laid in one corner, and a horizontal row is led from it to the opposite corner. In this case, cut only the tiles adjacent to one corner.
The latter method is the simplest, besides giving a minimum of waste.
Tiling your own hands on the floor
 Laying the tiles on the floor is carried out in the same sequence. The direction of laying rows - from the far corner to the door. To check the correctness of the laying, the thread is stretched too, so that the rows go out smooth, parallel to each other and there is no displacement.
The horizontality of the laid tiles and the entire row is controlled by the level. If the size of the room is large, a level of longer length is used or it is placed on the rule applied to the floor.
Adhesive composition with a notched trowel is applied to the entire surface of the tile, and with a wooden or rubber mallet or handle of the trowel we seat it until it is at the level of the cord. If it happens that the tile falls lower, then it must be torn off and add more mortar under it.
If the tiles on the floor are laid on the heater, then on it before laying the tiles it is necessary to lay and fix a special mesh. After fixing the net, the surface must be primed for better adhesion of the adhesive mixture or solution.
Joint between wall and floor
The joint between the wall and the floor when laying the tiles can be done in several ways:
- seal joint with sealant;
- use a plastic corner for internal corners;
- use strips of ceramic tiles;
- use a plastic skirting board;
- use a ceramic skirting board.
Sealing of the joint sealant
 Sometimes the joint between the wall, laid out with tiles and the floor of the tile is not closed, but closed with a grout for grouting or silicone sealant. Especially this method is suitable if the joint "wall-floor" is flat, strictly horizontal and the tile is laid entirely, without cropping.
Use for the joint of the wall and floor of the plastic corner or plinth
When laying tiles on the floor and the wall, the joint between them can be covered with a plastic corner for internal corners. This is quite simple, economical and, on the other hand, an aesthetic way of finishing the joint. The color of this corner is best, to choose the same color as the grout color for the seams between the floor or wall tiles.
Also, in order to close the joint of the tile floor-wall, you can use a plastic skirting board, picking it up by the color of the tile. Such a plinth can be attached with liquid nails.
Strips of ceramic tiles
 Earlier, sometimes, instead of a plinth, cut thin strips of ceramic tiles were used, which was laid on the floor. Such strips of ceramic tiles are laid at an angle of 45 ° to the wall and floor (then their edges must be cut at the same angle) or vertically, along the wall. You can use this way, but this design of the joint of the wall and the floor is not as aesthetically pleasing and beautiful as a finished ceramic skirting board.
Ceramic plinth
Ceramic plinth for finishing the joint wall ceiling, when laying tiles, you can choose the appropriate texture, shape and color. This is certainly a more expensive option, but also the most aesthetic.
Tile and plinth of one collection will be harmoniously combined in color, texture and size. Such a skirting board has a height and length that is combined with the dimensions of the selected ceramic tile. The length of the skirting may be larger for the length of the tile. This visually sometimes looks even better, since fewer joints are obtained.
The plinth can be of any shape. Its color can coincide with the color of the wall or floor, and can contrast with them. In order to make the skirt joint at the corner look more aesthetically pleasing, usually use shaped corners. They are not so expensive, but they look very nice, because they repeat the profile of the baseboard.
Joint between wall and ceiling
The joint between the wall on which the tiles are laid and the ceiling can be closed in several ways, using for this:
- plastic corners;
- baguettes of polyurethane;
- ceramic cornices;
- open smooth seam.
Plastic corner
Use plastic corners in order to close the joint between the tile laid on the wall and the ceiling-the most economical and simple option. To do this, you can use flexible plastic corner,which can be glued to a regular silicone sealant.
Also for this purpose, you can use a plastic corner, which is used for internal corners when laying tiles. Its installation is carried out simultaneously with the laying of the upper row of tiles - the corner is pressed against the ceiling, and the upper edge of the tile is put into its groove. Then the tile is pressed against the wall.
Especially this corner is convenient to use in case the top row has to be cut in height. At the same time, the upper edge is closed by the groove of the corner and if even when cutting the tiles there are small defects, they will be closed.
Baguette made of polyurethane
To close the joint of the wall with the tiles and the ceiling, you can also use baguette of polyurethane . It is quite plastic and soft material - it can be bent even on an uneven wall so that it fits snugly. It can be glued with polymeric universal glue or liquid nails.
Ceramic cornice
 The third, more expensive option - the joint of the wall and ceiling can be closed ceramic cornice. In this case, even when choosing ceramic tiles for walls, you need to select the appropriate tile for the eaves. This option is most desirable, as the tiles and cornice from one collection are perfectly combined in color, texture and size. Such a cornice usually has a height that harmoniously combines with the dimensions of the tile, and its length is equal to the width of the tile, or more than one and a half to two times.
Do not close the flat joint
If the joint of walls and ceiling is horizontal and fairly even, it can not be closed, but sealed with silicone sealant. In this case, the upper row should be made of whole, not cut, tiles.
All these methods differ in appearance, longevity and value and how to choose - it's up to you.
Corner elements
You can also decorate the external and internal corners of the walls when laying the tiles in various ways: 


1. Use "trim" walls for decorating the corners. For interior and exterior corners, plastic corners for tiles, which make the appearance more attractive and have the name of "trima". For internal and external angles they have different shapes.
2. Decorating the corners of the walls when laying with the help of trimming tiles - while gently pruning the tile at an angle of 45 ° or a straight joint at an angle of 90 °.
3. The use of decorative curbs. As a relief corner element you can use decorative borders (large or thin - "pencils"). The edge turns out to be three-dimensional, figured and well combined with the wall.
4. Use of special corner elements. When you need to get a smoothly rounded edge, use a special corner element. In this case, the whole construction looks like ceramic furniture.
Joint of bath and wall
For the joint of the bath and the wall, finished with ceramic tiles, you can use the usual decorative border.
 You can find in specialty stores special joint kitbath with a wall, which consists of a skirting board, two outer rounded corners, trimmed parts for an ideal joint skirting in the interior corners and special glue. Such a set is usually designed for a standard bath and can be made in different colors (up to 12).
If you do not find such a kit, then the junction of the bath and the wall can be made ceramic or plastic skirting boards or leave a seam in 2-3 mm.
From the front, the bath can be closed with a special plastic panel (screen for a bath) or a stationary wall (brick or frame - shell) on which the same ceramic plate is laid, as on the walls.
If the bath is laid with a wall with a tile, it is necessary to leave an opening for access to the drain and pipes. It can be covered with tiles, planted on magnets (so that if necessary they can easily be removed). Seams between tiles in this case are not sealed.
In the place of adjoining tiles with a bath, for waterproofing, it is possible to smear with a transparent sanitary sealant.
Other options for sealing the joint between the bathroom and the wall
Sometimes there is some distance between the bathroom and the side walls.
If the distance between the edge of the bath and the wall not more than 1.5 cm, then you can use a quality sanitary sealant.
If it is - 3-6 cm, it is possible to apply a gypsum-fiber or glass-magnesium sheet. Small strips 3-4 cm wide (2 cm longer than the length of the end of the bath) are cut and layered glued to the side of the bath. Then, the ends of these strips are lubricated with a tile adhesive composition on top. At the same time, it is necessary to ensure that the glue level coincides with the level of the side of the bath.
If the distance between the bathroom and the wall - 7 and more cm, then it is possible to fill this distance with a construction made of the same materials on a framework of conventional standard metal profiles for gypsum board.
After laying the tiles on the walls around the bathroom, the space between the plane of the tiles on the wall and the sides of the bath closes ceramic skirting boards or strips the same tile as on the wall.
These are cut ceramic tiles, a width of 0.5-1 cm more than the distance from the bath to the tiles on the wall and are cut from both sides at an angle of 45 °. After stacking such strips of tiles, a "border" is obtained, which looks quite good, sometimes better than any decorative plastic corners and plinths, which in time can darken from water.
Laying tiles on gypsum board on a grid
In some cases it is necessary to perform the laying of ceramic tiles on plasterboard. The usual laying of tiles can lead to warping of surfaces from gypsum board. To avoid this, it is necessary to reinforce the surface on which the tiles will be laid with plaster polypropylene mesh. The grid can be glued with universal mounting glue or PVA glue and fastened with additional staples using a stapler. After fixing the net, the surface of the gypsum board must be primed.
After when the primer dries, you can start laying ceramic tiles. Tiles should be laid in layers of four to five rows with interruptions for grasping - about an hour. When laying the tiles on the grid on the entire surface is finished, grouting the joints do not earlier than 24 hours before the adhesive mixture is dried.
Grout
 After laying the tile is done and after the glue composition has dried or the cement slurry hardens, it is necessary to clean the tile from the glue (mortar) that has got on it and fill the seams with a special mixture for grouting the seams of the required color with a special rubber spatula. Compositions for grouting joints between tiles can be in the form of dry mixes or ready-made solutions and they are easy to find in building stores. Remains of the trowel should be cleaned with a damp cloth or sponge.
Laying tiles on the wall and floor - video
The choice of tiles for walls is huge: a variety of colors, a variety of textures and variability in size. Square tiles of medium size are universal - it is equally good for both large and small bathrooms, regardless of their style. But now the rectangular tile is more in demand - with it there are less "seams" and more variants of a layout. After all, a rectangular tile can be laid horizontally, vertically or in a mixed fashion (combining horizontal and vertical packing). Which way is better?
Horizontal or vertical tile laying: is it so important?
Is the effect of the layout on the bathroom interior significant? Yes, but only on the condition that the "seams" contrast with the tile or alternate tiles of different colors. So, if the tile is light and the trowelling is dark, the direction of the tile becomes obvious and has some influence on the perception of the room.

Top seams are not contrasting, so the way of laying does not attract attention

The seams are contrasting, so the tile position and the variant of its combination work for visual extension
If the seams are almost invisible, the difference in horizontal and vertical laying is almost imperceptible.

Stitches in tone tile

The position of the tile is not emphasized

Similarly
No effect, in fact, does not have a large rectangular tile with a small difference between length and width (close to square). With any method of laying such a tile, its rows will look approximately the same.

How does the tile layout affect the interior?
Horizontal tiling with clearly visible seams visually expands, but reduces the room. Vertical, on the contrary, narrows the bathroom, making it higher.


To enhance the effect, you can include in the plan of the cladding accent inserts from tiles or decors. For example, create one or more horizontal bands to visually expand the bathroom. "Lift" the ceiling will help vertical bars.

The tiles are laid vertically, the wall is decorated with longitudinal stripes. This, of course, added bath height and narrowed it. Please note: the bathroom is very wide, but looks like a trailer

If the bands were transverse, the bathroom would seem a little wider

This bathroom seems wider

In addition, the inserts allow to mitigate the effect of the tile arrangement. For example, if vertical positioning is selected, one or a pair of horizontal rows need to be accentuated. Theoretically, vertical tile laying should narrow the room, but the horizontal strip will smooth out this effect. As a result, the bathroom will not appear low or narrow.

The same principle works with the opposite scheme: the tile is laid horizontally, but several vertical strips are introduced. There is an increase in volume in two directions: height and width.
Visually widen the bathroom combined laying tiles by the type of panel (dark bottom - light top or vice versa). With such a cladding, the tile positioning option will no longer have such a significant value.


What to choose: horizontal or vertical tile laying?
Horizontal styling is more pleasing to the eye, because it is perceived as more natural. After all, we are used to the horizontal arrangement of bricks, building blocks, logs, etc. But again, if the grout is non-contrast, the focus on the tile position is not focused.
Horizontal positioning of rectangular tiles allows you to lay it on the type of masonry, that is, uncontrolled. This gives the interior an originality.

If the room is quite small, and the tiles are rather long, the horizontal styling will look ridiculous because of the many "flaps". It is better to lay it vertically and use a grout tone in tone with the tile.

If you put horizontally here, in each row there will be only one whole tile and cut. This, of course, is ugly. Vertical stacking in this case is the only correct solution.
Quite narrow tile-dies are always placed horizontally, without options.
For the lining of the screen under the bathroom it is desirable to find a tile of this size, so that it does not have to height. Here, the way of laying is subject to the principle of practicality, and not a visual adjustment of proportions.

Have you ever wondered which version of stacking would be better: vertical or horizontal? It is believed that vertical stripes add height to the room, and horizontal - it extends it. In this article, we will try to figure out, by examples, which tile design in the bathroom will look best.
Quick navigation for article
Introductory information
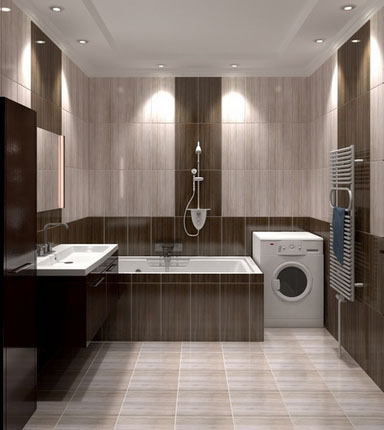
For the experiment, take a 3D model of a square bathroom with a combined bathroom, its dimensions will be 2.4 * 2.4 meters. Ceiling height is 2.5 meters. The photo shows a view from the door.
As an example, the lining is made by Italian Cerdisa tiles, the Perlage collection. The wall tiles measure 20 * 50 cm, and the floor tile - 33 * 33 cm. The layout is made taking into account the seams of 1.5 mm.
Compare design options
Vertical and horizontal laying
The first example shows the difference between the vertical and horizontal laying of tiles of the same color. Does it seem that on the left photo the bathroom becomes higher, and on the second - wider? Perhaps there is a difference, but insignificant.
Change the color of the tiles to white. The difference between the two photos became more pronounced, due to the fact that seams were now visible. They are perceived by us as guides, and divert attention to ourselves, as a result of which there is a feeling of stretching the room in height or length. The more contrasting seams there are, the stronger this effect will increase.
Try to achieve an increase in space by adding 3 horizontal rows of white tiles. This time the tile on the right picture clearly increases the width of the bathroom. At the same time, both options were laid out in a horizontal layout.
But most of all, the effect of this effect will be seen if we compare a vertical monochrome tile and a horizontal layout with a contrast guide. In this example, the advantage of the second option became obvious, especially when designing in a small bathroom. But besides this, you can see one more technique that helps to increase space - this is using a light color.
In practice, many tilers do not like the vertical layout, because when laying it is impossible to avoid narrow undercutting of less than ½ tiles. They are always conspicuous, look ugly and disrupt the effect of symmetry.
With a horizontal layout is easier - it can be removed and get rid of the narrow undercut. How best to do this has already been written. If it is short - it is necessary to count, how many whole tiles will climb on a wall and subtract one piece. Begin the stacking from the center and get at the edges 2 uniform cuts that will not be narrow.
Judging from the point of view of perception, people are more accustomed to seeing horizontal coloring than vertical. All vertical guides disappear after the bathroom furnishings.

Color selection
Everyone knows that light colors visually increase space, and dark ones on the contrary narrow. In the following example, you can clearly see the effect of this rule. To make this clearer, you can compare the black and white colors, but with the orange color it is clearly visible.
Now let's see what happens if we make a dark contrast guide horizontally. The positive effect of the horizontal guide and the negative of the use of a dark color will blend into a heap, and in the end you will not get any visible result.
Vertical inserts
With horizontal lines, everything is clear - they greatly help to enhance the bathroom interior, but can you achieve a similar result when using vertical inserts from the decor?
The first example shows a very small effect of a visual increase in the height of the ceilings. First of all, this is due to the short length of the vertical insert in comparison with the long horizontal belt. But the effect is still there, and you can see it if you compare the vertical layout with the vertical insert and the usual horizontal layout.
On the right photo the bathroom seems higher. If you compare it with the top photo with orange horizontal and vertical layout, then the option with the insert of the decor adds height to the room. The strength of this effect depends on the contrast of the insert.
Change the color of one wall to white to highlight contrasting seams. In addition to visually increasing the height of the room, this reception has well distinguished the decor and attracted attention to it.
Now let's compare 2 white interiors - with a vertical guide and without it. As with the design of the orange bath, the right picture looks a little higher (the total length of the insert is small). But unlike the orange variant, due to the contrast of the seams the result is more obvious.
To see this even harder, let's compare the horizontal layout and the vertical layout with the insert. The interior on the left looks stretched in width, and on the right - in height, although the actual dimensions remained the same.
And the last example is to place the decor horizontally on top. It attracts attention because of contrast, emphasizing the height of the room, due to which it seems visually higher.
Conclusion
There is no particular difference if you use only one of the methods described. As you can see, the usual change of layout from vertical to horizontal is not enough.
If you want to increase the interior width, additionally make a belt of light tiles along the perimeter of the bathroom, which will be torn only at the doorway.
If you want to raise the ceiling - place a vertical line of decor, or make a contrasting horizontal line at the top of the walls.
The most practical version of the design of tiles in the bathroom: from below and from above will go the stroke from a dark background, and in the center will go a light background. In this case, the upper stroke should be narrow (1-2 tiles), and the lower one should be at least 1/2 row above the bathroom. 
In order not to get too boring interior, all solid white background tiles are replaced with a decor or a dark background, except for a wall with a doorway. Practically - because it does not get narrow scraps over the bathroom, you do not need to trim the decor, the dirt is less visible in the darker color. At the same time, this combination will stretch the room well and will not ruin you for buying a large amount of decor.
So, a square bathroom of a standard size (combined with a bathroom, a ceiling height of 250 cm and a size of 2.4x2.4).The Italian factory Cerdisa produces an excellent ceramic tile, actually in our experiment will be used tiles from the collection of Perlage. This is a rectangular tile with a size of 20x50 cm orange and white. And here on the floor is laid outsquare tiles 33n33 cm in size.
1) Vertical and horizontal laying of orange tiles.
So, on the left photo there is a bathroom with a vertically laid tile, it seems to you that visually this bathroom seems slightly higher than the one pictured on the right - the tile is laid out horizontally. However, these differences are not significant, so we will conduct the next experiment using white tiles.
2) Vertical and horizontal arrangement of white tiles.

The difference between these options is already more noticeable, it is especially evident how much wider the bathroom looks with white horizontal tiles. And it's all about the seams. On a white background, a more noticeable contrast is obtained, which means that the seams have become guides. Thus, in the bathroom with a vertical tile, the seams go to the height, and in the bathroom with the horizontal tile, they are spread out on the sides, i.e. in width. Thus, the stronger the contrast, the more obvious the visual effect.
3) Guides in contrast.

On the photo from the left is a bathroom with a horizontal orange tile without contrasting guides.But on the right photo the tile also remained vertical, but there was a contrast, which, undoubtedly, makes the room wider.
4) Horizontal contrast or vertical styling.

As you can see, there is a bathroom with a vertical tile on one photo, so the room seems stretched out. On the second photo there is a bathroom with horizontally laid tiles and a contrasting guide from white tiles. Undoubtedly, the right room is visually, it seems much larger. The stern of the contrasting guide to the extension worked and in itself a lighter color - a white tile on an orange background.
5) Bright increases the space.
Let's check this statement and compare the photos.

In practice, the bathrooms are the same, but in our experimental photos the white tile bathroom seems a bit more orange in color.
And now draw a horizontal guide from the orange tile in the white bathroom.
6) Contrast guides in dark colors.

So, in the bathroom with a horizontal white tile in the middle laid a guide from a dark color. What happened? If to compare with a bathroom from a white tile, it seems that the rooms are absolutely identical in size. This happens for the following reasons: white color and guides in fact increase the visual space, but the dark color on a white background visually narrows the space. So these mutually exclusive facts led to the identity of the experimental spaces.
7) Vertical tile and vertical guide.

In the photo there are two bathrooms with a vertical styling, but, the right bathroom is decorated with a curb, which is also located vertically and not in the center. Visually, it seems to us that such a room is a little higher. However, if you compare the result with a horizontal guide, the result is not so significant. And the fact is that the vertical curb occupies a smaller space in the bathroom.
8) Vertical stacking with the guide in comparison with the horizontal packing.

In comparison there is a bathroom with a horizontal styling and a bathroom with a vertical styling and a curb. Result:the bathroom on the right photo with the guide clearly looks higher. To strengthen this effect, the guide should be made even more contrast, for example, white.
9) Contrast enhancement.

So, the stronger the contrast, the greater the result. In this case, in one of the bathrooms there was a replacement of the tiles on one of the walls with a contrasting guide along the vertical. By increasing the contrast and adding white color, the bathroom on the right figure is unambiguous, it seems visually greater.
10) White tiles against a vertical border.

The bathrooms are minimal, you can say,that they are identical. Again, the advantage of white in the interior played into the hands.
11) Horizontal white tiles in comparison with vertical (guide).

Here the result is ambiguous, because Bathroom with horizontal tiles - wide, and with a vertical guide - high. So the result is in both pictures.
12) Border at the top of the bathroom.

By placing the border at the top of the bathroom we visuallyemphasize the height of the room. Actually the photo with experiment is proof of this.
Conclusion:
Vertical tiling makes the space higher, and horizontal laying makes the room wider. The same rule applies to ascertaining guides. To emphasize the height of the room in an even greater degree, the decor (curbs) should be placed in the upper part of the bathroom.
More about the tile and the bathroom:
(26
of votes., on average: 4,77
of 5)
Apartment design
The variety of tiles for wall structures is very wide, there are a lot of colors, textures and dimensions. Tiles that have a square shape and averaged dimensions are quite multifunctional - it fits perfectly, both in spacious and in small bathrooms regardless of their design.
However, at the moment the rectangular shape of the facing tile is more popular - with its application, fewer "seams" are formed and more variety of patterns. Since a rectangular tile can be arranged both vertically and horizontally, it is also possible to combine a variant (a vertical layout is combined with a horizontal one). Which method is preferable?
Vertical and horizontal tile laying
Can the method of layout affect the design of the bathroom? Yes, but only if the intermediate seams stand out against the background of the tile or alternate tiles of different shades. For example, if the tile is black and the trowel is white, the direction of the layout becomes obvious and to some extent affects the visual perception of the room.
In the case where the seams are barely discernible, there is virtually no difference in the vertical and horizontal layout.
 how to lay the tile horizontally or vertically
No impact, produces a large tile close to a square with a minimum difference in width from the length. With different ways of laying out a similar tile, it will look approximately the same.

How does the tiling method work on the interior?
Vertical layout of tiles with contrasting seams visually makes the room higher, at the same time narrowing it. The horizontal, on the contrary, expands the bathroom, making it lower.
To support the effect, often add to the scheme of decoration accent inserts from tiles or other decor. For example, make one or more horizontal rows for visual expansion of the bathroom. To make a ceiling above vertical inserts can.
![]()
In addition, the strip allows you to smooth the effect of the layout of the tiles. For example, if the preference is given to the vertical direction, several horizontal bands need to be contrasted. As a result, the vertical layout of the tile will narrow the room, but the horizontal insert softens the effect. At the same time, the bathroom will not become narrow or low.
This rule also works with the reverse scheme: the tile is laid horizontally, but one or a pair of vertical inserts is added. As a result, the perimeter is enlarged, both vertically and horizontally.
Visually increase the bathroom combined layout of the tile similar to the panel (white top - black bottom or back). With this finish, the way the tiles are positioned will not have a strong effect.

Choose: vertical or horizontal tile laying?
Horizontal tile laying is more familiar to the eye, because it looks more natural. Since the standard horizontal brickwork is familiar. However, if a grout is not used, then attention is not drawn to the location of the tile.
The horizontal location of the rectangular tile may allow the use of a standard brick layout with offset seams. This will bring a highlight to the interior.
 horizontal or vertical tile laying
If the room is quite small, and the tile is sufficiently elongated, the horizontal styling will look unimportant due to the large number of "pieces". It is better to arrange it vertically and apply a grout that fuses with the tile.
The narrowest fragments fit only horizontally.


To finish the screen under the very design of the bathtub, it is better to choose a tile of such dimensions so that it does not need to be trimmed in height. Here the method of laying is subordinate to the rule of practicality, and not the visual component.