The lining of the surfaces is carried out in several interrelated stages, each of which requires a special approach. Careful execution of all technological procedures is a guarantee that it will be possible to obtain a reliable coating that has excellent properties and environmental friendliness. The material is ideal for all kinds of work.
Lining - it is a board (of different thickness), which is made of different types of wood. The material got its name because of the original place of use. Namely - wagons of trains, the internal surfaces of which were lined with small wooden slats, which created an excellent microclimate. Currently, the product from the tree returns to its former popularity, which slightly decreased when plastic and MDF variants began to appear.
 The modern construction market offers a wide range of types of lining
 It should be borne in mind that the cladding of the walls with a lining requires a weighted approach. Therefore, it is important to pay attention to the product at the stage of its acquisition. Pay attention to the following points:
- Correctness of storage of the purchased goods. Packages should be stored horizontally on the substrate.
- The humidity level of the warehouse should be within the limits of the norm.
- It is not allowed to find products in the open space, under the rays of sunlight.
Also pay attention to the expiration date on the label.
 All information on storage and shelf life of the lining must be indicated on the packaging of the material
 Such precaution is necessary in order to level out possible risks. The fact that work with the lining is carried out only after it is fully convinced that the material meets all standards.
On a note! Acquire the product should be with the necessary margin, which is equal to ten percent. To get the exact number of elements, preliminary calculations are carried out, and a circuit is also drawn up. It is important to take into account that the width of each fragment is measured along the inner depth. That is, it is necessary to subtract the depth of the groove (10-12 mm).
 Buy material is necessary with a margin of 10%
 Material Handling
After buying the right amount of products and fasteners, the question immediately arises: how to properly wall the lining? But this is not a priority. It is necessary to know that the material needs to be pretreated, because in the industry nothing is done except production. Therefore, the following manipulations are performed:
- Coniferous wood grades need to be completely degreased. Removes all stains of resin. The boards are washed well with acetone (25% solution is needed). Next, carefully wipe with rags, previously soaked in water. After all actions - the products are dried.
- To obtain the same shade of the surface, each fragment is treated with a pre-prepared mixture. It consists of hydrogen peroxide and acid (oxalic). The solution is prepared based on the wood species.
- All damage, even minor ones, is sealed with putty. It is better to choose a mixture of wood. It can be purchased at the store or cooked by yourself.
- If you want to change the shade, then apply a stain or other special impregnation that preserves the texture of the tree.
 Processing lining allows you to extend its life and change the color of the material
 Of course, you can find products that will be pre-processed, but their cost will be significantly yours.
On a note! Pre-processing can not be skipped. This will be a gross violation of the technology of lining the lining surfaces.
There are two main options that allow you to glaze the surface of the clapboard: glue and frame. The first requires a perfectly flat plane. Therefore, the preferred method is that which involves the erection of a crate. In addition, it allows you to create additional space for warming the room.
 The erection of the carcass provides additional opportunities for warming the room
 To fix the lining to the wall you will need:
- Tool. In this case it is necessary to prepare: a drill with various nozzles, a level (plumb bob), a hammer, pliers, electric jig saw or a hand saw.
- Reiki for the frame. For this purpose, a solid wooden bar, the cross section of which is 30 * 60 mm, perfectly fits. Immediately prepare the substrate. They are used to align the racks.
On a note! If the surface has a significant slope, the exposure of the wooden beam will prove to be a rather complicated procedure. In this case, a metal profile is used.
- Fastening: self-tapping screws, dowels, carnations, kleymers; if required, additional elements for the frame (hangers).
It is necessary to know that before the lining is done, even if a skeleton method is used, preliminary surface preparation is required. The procedure is simple, is that the old decorative layer is removed, and all defects are well covered. In addition, priming is carried out.
Creating a roofing
The rim is carefully attached to the wall. The order of placement of the rails is determined by the selected scheme.
 The scheme for the creation of the lathing for the lining
 - The bar is treated with refractory impregnation and mold protection. Wooden sheathing suggests that the wall will be dry.
- Reiki should be perpendicular to the decorative boards.
- Between the slats set a single distance, whose pitch is 40-50 cm.
- Be sure to leave a space between the ceiling and the floor. This is especially important for wooden houses that are subject to permanent shrinkage.
- The smoothness of the carcass installation for the cladding with wooden lining is carefully checked. To do this, apply the building level and plumb bobs.
- If an empty space is formed between the wall and the rack, then it is filled with prepared dies.
 Empty space between the rod and the wall is filled with wooden dies
 On a note! The rim allows the walls to be trimmed with an additional layer of insulation. It is fixed directly between the posts.
Choosing a fix option
Immediately determined with the method of fixation. After the cladding can be done by different methods:

 The installation of the lining for the Kleimer makes it possible to make the fixtures invisible
 The necessary fasteners are selected based on the specific situation. At present, the kleimers are becoming increasingly popular.
Fastening of decorative material
Fastening of the lining starts with the fact that the material is brought into the room and left for two days. This time is necessary for the product to fully acclimatize. If you perform the installation immediately, then there is a high probability that the warping of the elements will begin - the structure is deformed. Work is carried out only at a positive temperature and humidity, which is not less than 60%.
 Pre-lining is brought into the room and left for two days
 The general procedure is as follows:
- Often, the mounting of boards is carried out in horizontal order. Therefore, the first element is installed below so that the stud looks up.
- The fixation starts from a corner that is far from the main entrance to the room.
- The first board is well checked by level, taking into account the horizontal and vertical plane. If even small deviations are allowed, they will become very noticeable when the upper panel is fastened.
- The first fragment is fixed. Once again, the possibility of deviations is checked.
- Next, the following items are installed, which are first penciled, and then fixed.
But how to decorate the wall with a lining vertically? The procedure does not differ from the previous version:
- Elements are placed from the far corner. The first fragment is exposed and fixed.
- The following elements are inserted into the groove and fixed. It is important to check that the joint is fully connected. To do this, lightly tap the rail on the edge.
- For this method, a wider rack is used. It creates a beautiful surface with fewer joints.
With experience, the walls manage to be finished in one day (even taking into account the frame). When the unit is fully completed, decorative elements are attached: corners and plinths. The surface is well impregnated with stain and varnished.
Finishing the house outside
 Finishing the house with a lining outside
 The lining of the house with a lining outside - almost completely repeats the internal work. The procedure is divided into three stages: marking, erection of lathing and facing. But there are some nuances:
- At each corner of the house must be installed on two racks.
- Window and door openings are framed by a profile (beam).
- For work, a quality board is used that does not have drop-off knots.
- Fixing is performed through.
- The elements are fixed with a groove down. This helps to prevent accumulation of precipitation.
If you understand the basic rules and thoroughly study the chosen method of fixation, then the work is done rather quickly. The result will serve as a surface that will bring in the interior the comfort and warmth of natural wood and will please its beauty for many years.
The wooden finish of the house makes it more cozy and warm inside and out. However, this can be expensive. Therefore, materials that mimic a tree are more often used. Excellent with this consult flooring. It can be mounted on ceilings, exterior and exterior walls of the house and even doors. There is a wide range of this material. The process is so simple in execution that the wall cladding by hand lining will not cause difficulties.
Classification
There are different types of forcing according to the type of material from which it is made.
Wall paneling made of wood
It can be safely called the classic of the genre. There is a huge number of different subspecies of wooden lining, which differ in the variety and breed used to make the tree.
It is an environmentally friendly material that can be chosen for facing any surface. There are other positive qualities, such as environmental friendliness, ease, ease of installation. However, when choosing a material, it is worth remembering that there are disadvantages:
- the influence of natural factors on the external state (temperature drops and high humidity deform the material), which requires special treatment;
- need for thorough care.

Wood paneling is often used in a bath
Molded board made of plastic
This option is considered to be budgetary. They can trim the ceiling and walls. Has a beautiful appearance. It is mounted without seams. The disadvantages can be attributed to the fact that such a lining is short-lived, can fade and turn yellow, it is easy to break down, especially in the cold. However, all the shortcomings of the material are offset by its low cost.

Plastic lining is better for indoor use
Lining of metal
It is made of thin sheets of steel and aluminum, which are covered with protective materials. They differ in color and texture (there is the possibility of selecting a lining imitating a tree).
Aluminum lining is characterized by a long service life. Most often it is covered with facades of houses.
Steel lining is budgetary, but short-lived. If you damage the protective coating, then irreversible corrosion begins, and the thin material will quickly rot.

Metal paneling is ideal for facing facades
Table: classification of lining according to cross-section
| Name | Description |
| Standard | Equipped with a system of spike-groove (the spike of one board is put into the groove of the other). Spikes in the carcass are slightly shorter than the grooves. This is necessary so that when the tree is completely dry, its deformation does not begin. Standard lining has good sound and heat insulation. With the correct there should be no gaps between the bars. |
| "Calm" | It is also called "collective farmer", Russian, classic or simple. It differs from the standard species only by rounding the bevelled corners. High demand for "calm" is due to the high quality of the lining and neat appearance. |
| This lining has a longer groove, which gives the surface a slightly different appearance. Production takes place in European countries, Russia and Belarus. | |
| Softline | "Soft line" in English is a soft line. In the name its main distinguishing feature is encrypted. Speaking of appearance, this is a kind of mix of "calm" and lining, where there are rounded bevels and an elongated groove. |
The ceiling rack, block house, floor board and imitation of the timber also often refers to the subspecies of the lining. This is because these materials are produced and fastened in a similar way or similar.
Photo gallery: different types of material by section
 When installing such a lining between the slats, there will never be any gaps
 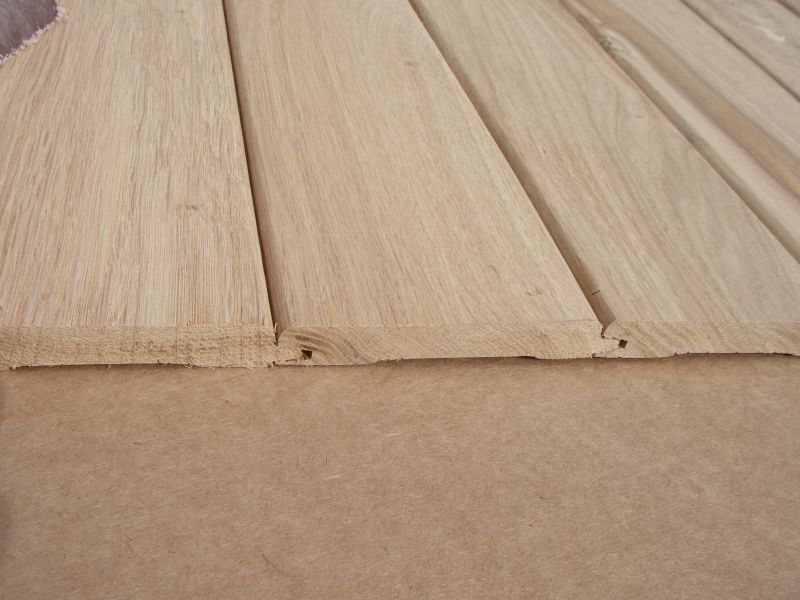 Differences of the lining of the calm from the standard is only in the presence of rounded bevels
  Euro lining is made in Europe, Russia and Belarus
  Combines the features of the lining and "calm"
Table: Classification
| Class | Description |
| A | The material is of good quality, sometimes on the surface you can see knots that do not fall out. Several resin cracks on the surface or blind slots are also the norm for this class. Suitable for finishing living quarters. |
| AT | On the bar length of 1.5 m can be 4 knots, but no more, resin pockets and blind slots in a small amount. Not recommended for finishing living quarters. |
| FROM | The material is of poor quality. They are often lined with outbuildings. In such slats, knots may fall out, there are through slits, the color is different from the standard one. |
| Extra | This lining is perfect. On the bars there are no knots and other flaws. |

Knowing the division of the lining into classes, you can choose the perfect one for covering the walls of the house
Table: classification of wood material
The lining is made of hardwood and coniferous wood. Each of them has certain characteristics, which can be suitable for this or that place of facing.
| Wood species | Description | |
|
Hardwoods wood |
Oak | Resistant to the appearance of decay, mold and fungus. Durable and flexible. The color varies from pale yellow to dark brown. It is almost impossible to polish the oak to an ideal smoothness. High price. |
| Linden | Very good for plating of living quarters. It is also suitable for facing the bath, because it gives off a pleasant smell, and it does not heat up from high temperatures. Has an aesthetic appearance and low density. With the passage of time turns yellow. | |
| Aspen | It is very easy to process. By its properties, it is in no way inferior to lime-tree vagonka. Excellent keeps the form. Suitable for plating the surfaces of housing and bath. In the latter case, when interacting with high temperatures, aspen does not dry out, and cracks do not appear on it. | |
| Alder | In the composition of wood a large percentage of tannins. The characteristics are similar to oak, but it is easier to process. An expensive and rare breed of wood. | |
| Ash | The strength of the tree is slightly worse than oak, but visually aesthetic. It has a rich texture. Easy to process. Expensive. Has a dense and elastic texture. | |
| Coniferous tree species | Cedar | The noble beauty of the material is quite expensive. Has a pleasant healing aroma. Soft and ductile material, which is easy to process. |
| Larch | Has a very high density. Due to the gum in the composition it is moisture-proof and is protected from decay. When exposed to high temperatures, it becomes very hot. It smells good. Difficult to process. | |
| Pine | Budget and common version of the cladding. From the wood of this breed comes curative aroma. It's easy to process | |
| Spruce | Its loose and soft structure very poorly tolerates moisture. But this is an excellent option for facing the internal walls of living quarters due to the excellent thermal conductivity. Has a nice pine smell and aesthetic appearance. When treated with special tools, the service life is significantly increased. |
Preparation for wall covering at home
The first stage of facing a log or brick house is the preparation of walls and material:

In advance, stock up on all the necessary tools and materials. You will definitely need a hammer, a building level, a puncher, a screwdriver, a tape measure and a jig saw.
What type of fastening to choose
Typically, the lining is equipped with a spike-groove system, which allows the laths to be fastened securely to each other. However, the material must also be fixed on the crate. This can be done with staples, kleimers, screws and nails. The mount can be placed open and hidden. In this case, you need to ensure that the entire structure is well fixed, and the lining is not damaged.

Fastening should not damage the lining
Klaimers

Kleimer - the most complicated type of fastening lining
Кляймеры as much as possible qualitatively will fix a lining. But it is important to choose the right size for nails. It is selected depending on the thickness of the grooves. Often sets of Kleimers already have nails.
Video: how to fasten the lining with the help of kleimers
Mounting pistol with staples
The staple fires from the pistol into the groove of the board and securely fix the lining to the frame part. But it's very difficult for beginners to do this from the first time.
Decorative Screws
Boards a quality board, while not losing the aesthetic beauty of the material.
Nails and screws
Both of them must be fastened on the diagonal. So, the rack is clamped into the groove of the previous strip of material, and the cap presses it to the base.
Calculation of materials
Example calculation of materials for a room with dimensions of 5x4 x 2.5 m.
- length (A) - 5 m;
- width (B) - 4 m;
- height (C) - 2,5 m.
Using these parameters, you can calculate:
- A * C = 5 * 2.5 = 12.5 m 2 (the area of one of the walls);
- 12,5 * 2 = 25 m 2 (the area of two opposite walls);
- A * B = 5 * 4 = 20 m 2 (area of the second wall);
- 20 * 2 = 40 m 2 (total area of the other two opposite walls);
- 40 + 25 = 65 m 2 (total surface area to be removed).
To find out how much material you need for such a room, you need to determine the size of one lining of the lining.

Standard lining dimensions are usually indicated on the packaging

How to wall the walls with your own hands with the horizontal placement of lining
The work is carried out in several steps:

How to wall the walls, if you place the lining vertically

Sheathing of the wooden facade
When facing a house from a log house there are some features
If you plan to paint the walls of the facade after the facing, then you can buy a middle class for the finishing. Otherwise, it is better to take the lining better, because all the flaws will be visible (even if the surface is lacquered).
Perform the work in the following sequence:

The process of wall cladding of the facade does not differ from the interior decoration.
Windows, exposed corners and skirting boards can be decorated with decorative elements for beauty.

Before facing the lining, be sure to mount the insulation layer and the vapor barrier
Processing of material after installation
Choose only high-quality processing tools.
You will need:

Ideally, the surface of the facing material should be surface-treated before it is installed.
Run the work in the following sequence:
- Clean the surface of the tree from dirt, dust and fungus with a steel or hair brush, and then a fine-grained emery.
- Treat the straps with an antiseptic and primer. These funds can be found 2 in 1.
- Paint or coat the surface with varnish. But before proceeding to this stage of work, wait until the previous layer dries well.
You can easily trim the walls of your house both outside and inside, using a lining for this. There are practically no difficulties. The main thing is not to be afraid and follow the instructions boldly.
The erection of any structure is completed interior decoration. The main criterion for interior finishing of a house is giving it a well-groomed look and efficient operation. One of the most popular types today is the finish of the wall panel.
The material is a thin board fixed on the perimeter of the room. Lining is used for interior decoration for a long time. This kind of finishing of the premises came to us from transport construction, when wooden panels were used for the wagon lining.
Material properties
The lining has a number positive characteristics:
- high ecological compatibility of the product;
- nice appearance;
- resistance to changes in high and low temperatures;
- increased;
- absence of temperature coefficient.
Lining is actively used for walling:
- wooden houses, summer cottages, bathhouses,
- terraces, balconies,
- as a decorative decoration of rooms,
- for a bright accent in wooden buildings.
With the right choice of finishing material, the durability of this finish can reach thirty years.
For masters who have experience in carrying out house wall cladding, fastening a wide lining - the occupation is not difficult. The cost of a square meter of sheathing is extremely small, except for a special decoration of the surface.
The lining is monotonous in appearance, but experienced designers are always ready to give it a universal look and find the original wall fastenings.
Initially, the construction of houses used only wooden, but modern trends and masters come up with other materials for the lining. Today, this type of decoration is widely used in modern construction and repair.
This material rightfully won its popularity thanks to the economy. The construction markets and shops are crowded with a wide assortment of lining for interior decoration.
Kinds
The main types of lining differ material,from which they are made. Every year there are new items presented by such materials as:
- Aluminum, it is strictly not recommended for interior finishing because of the lack of resistance to high temperatures and unpresentable appearance.
- PVC panels - will save on the purchase of material, but will lose by longevity.
- MDF - a pretty nice material, easily fit into any interior. Under the MDF, the wiring is easy to hide, and cleaning work is carried out.
Despite the innovative technologies in construction, the traditional choice of many construction companies still is a tree. Various types of wood are used, the most common are linden, cedar, ash, birch, alder.
Which is better to choose?
For interior decoration of saunas it is recommended to purchase deciduous wood, not skipping moisture and not letting heat out of the premises. with the finishing of coniferous wood will be filled with a pleasant aroma.
There is an opinion about the fragility of the tree and the influence of external factors on it. A few decades ago, one could agree with this opinion, but not today, when the stores are full of a huge selection of different means for caring for wood.
When choosing the right wood is extremely its class is important:
- Extra - has no defects and chips, is considered an ideal option for repair;
- A - does not have a core, it allows the presence of knots and resin pockets (no more than two);
- B - can be attributed material with two knots, two pockets, one stain of contrasting paint and two cracks;
- C- is already less suitable for finishing works, as it has a number of the aforementioned shortcomings.
Especially popularuse 2 options of skin:
- horizontal plating - the fasteners are made from the ceiling to the floor, which prevents the ingress of debris and moisture;
- vertical cladding is carried out from the corner, and on the back of the board the clay meter is placed in the groove, then attached to the crate.
How to decorate with decorative clapboard block house?
It is necessary to stop on furnish for the house - "block house". This finish is suitable for living room, kitchen, hallway, and will be an excellent solution for the attic.
An important advantage is that the "block house" technique allows walls to breathe and create a pleasant microclimate for the dwellers. This type of mounting will create an improved noise insulation, compared to the above methods.
Before the work is done, the hardware and quantity of material are calculated. But an even more important process is to give freshly purchased material a lie down without packaging about three days in the room where it will be installed.
Wall Preparation
Panels are installed on dry and even walls, so the surface should not contain defects. The walls must be waterproofed with a special film or deep impregnation.
Without this procedure, wooden panels can not withstand the increased moisture content, and the work will have to be reworked.
Sites with fungal lesions on the wall treated antiseptic.It is better to process them all the walls. After thorough impregnation of the walls they will become resistant to the negative effects of fire and mold. Impregnation with a water-repellent composition is mandatory before commencing such work.
How to level the walls with plaster, find out from our articles.
If you want, you can install additional materials for thermal and noise-insulating construction. As a noise insulation, foam polystyrene or mineral plates are installed.

Steam insulation film can be purchased with the purchase of facing material. Work begins with the shelter of the walls with a film, which in the future will perform the function of isolating steam.
Carcass fabrication
The frame is made in the following stages:

Wooden panels have a lot of weight, so for a quality sheathing you will need to make a reliable frame.
For a framework in the "block house" technique, a wooden base is suitable. The frame must be made of racks, the distance between which does not exceed 65 centimeters.
Before installing the frame, you need to identify the places where the sockets, switches and other electronics will be located. These marks are necessary in order to make cutouts in the facing before installation.
The bars can be fixed to the wall, both with nails, and with slats for mounting. After the completion of the work on the fabrication of the frame, you can start finishing in the style of block house yourself.
You can see the variant of the installation of the lath in the video:
Panel mounting
For an accurate measurement, plumb, gon and level. To calculate how many boards will be spent, you need to make simple calculations: the total area of the room divided by the area of one board.
Having calculated the area of one board, it's easy to find out how much all the material will go to cover the entire surface. When there is a shortage of panels, additional clays to fix the problem.
Fastening of wooden panels starts on a pre-installed crate. The initial bar is set from below, with indentation to 1 cm, this procedure is done to actively ventilate the walls and avoid further deformation of the material. A similar indentation is made at the top of the wall.

Block House is installed only in the horizontal direction. Sometimes masters choose a vertical installation, but this method has a lot of drawbacks.
Mounting to the frame is carried out with self-tapping screws at an angle of 30-45 degrees. On the surface of the panel a thin drill is made a hole, and then the screw is screwed into it.
The hat of the screw should not go deeper than 3 mm.
Then the panels are gradually installed from the bottom up. The spike when installing the panel should look up. The wood is joined together by means of spikes and grooves. If desired, corner joints are secured with corners.
There are several ways to hide the heads of screws:
- With the help of material left over from work.
- You can apply a "wooden paste", made of PVA glue and sawdust.
- Special stubs, which can be bought at the building store, will easily cover the irregularities.
From the scraps formed cork and glue PVA are fixed in the grooves. Uneven places are smoothed with sandpaper.
The thick composition is poured into the holes. Minus the way in the possible mismatch of the color of the composition and wood.
Attached with help glue PVA.
For detailed installation of the panels, see the video:
Corner design
The decoration of corners in the block house technique causes difficulty in self-coating.
You can purchase "boats" in advance for finishing interior corners and  elements specially designed for external corners. The finished skirting boards will be in tight contact with the block house only at the top point, as a result of which the skin will have unclosed slits, and this is unacceptable.
It is much more convenient to use with a planed beam of dimensions 5x5. Its installation takes place before the beginning of the skin. Block house is attached to the bars, and the finish will look much smoother and more professional. This method is effective for internal and external angles.
The final stage is grinding the surface, but doing such work should be done with caution. One awkward movement can disrupt the board's structure.
How to accurately make corners look in this video:
Which coating to choose: paint or varnish?
- alkyd;
- acrylic;
- linen.
Impregnation will significantly prolong the service life of the "Blockhouse", reduce the occurrence of cracks on the surface, and, most importantly, will give the wood fireproof and biosecurity properties.
In the event that the naturalness is an important point, and you want to preserve the appearance of the tree, an alternative to painting will be varnishing. The surface for the varnish must be perfectly clean, and do not contain any unevenness. 
To work on the walls you will need a roller or a conventional paint brush. The coating is produced in several layers, except for the first toning impregnation stain.
Which of the methods of coverage to choose, will depend on the desire of the owner of the room. If he is an adherent of traditional design, and wants to preserve the natural look of his walls, he will need a varnish solution.
If the premises are planned as a youth room or walls should become a bright accent, of course, preference should be given.
If the finish is done at the highest level, the room will look noble and presentable.
Cost of works on installation of lining
The installation of a wooden lining is a laborious process, consisting of a number of operations: preparing the walls, installing the lathing, fixing the material to the walls and final impregnation.
The detailed cost of works looks like this:
- Assembly and preparation of the crate for 180 rubles.
- Windproof device 150 rubles.
- Covering the elements of the construction with an antiseptic is 30 rubles.
- Installation 400 rubles.
- Impregnation with varnish or paint 70 rubles.
For a more accurate answer to the question of the cost of work, you should contact the representatives of the construction company.
Hello dear readers and subscribers of Andrey Noak's Blog! All tend to seek comfort, especially at home, at the dacha, to relax a little from everyday work. The most cozy is a wooden house, but how to create a cosiness in a house, apartment made of glass, metal and concrete? Very simply, you need to make a wooden lining. Today I will tell you how to wall the wall with clapboard and what we need for this. It will not only refresh the design, but will also create a natural microclimate in your home.
This technology appeared even in those times when the cars were knocked out of the boards. Thanks to the design, they were endurance-tolerant and served for a long time. From there came the idea of plating the walls of the house with beautifully crafted boards.
It is not difficult to make the installation yourself, but you need skills in working with building tools, patience and accuracy. In order for you to enjoy the result, you need to consider the process itself, pick up the material and determine how the walls will be walled (vertical or horizontal).
The most common material for boards are such types of wood as birch, pine, linden, aspen, larch. There is a variant of facing more expensive decorative rocks.
To select a material, the room plays a big role. If it is necessary to make the lining in the bathtub, in the kitchen, you can use plastic. Since there is increased humidity and the possibility of oil on the walls. On these sections of the house there should be an easy to clean panels.
Wooden cladding panels are perfect for a bedroom, hallway, living room, personal cabinet. The choice of wood also plays a significant role, because each material has different properties. For example, it is not advisable to take a panel of coniferous species (pine) for facing a bath, because when heating from wood, resins are released, which can damage the appearance of the skin. They can be used for living room or bedroom, because thanks to the material in the room will create an elusive scent of the forest.
Wooden panels have soundproofing properties, well-kept heat, rarely exposed to rot. The advantage of this material is long-term operation and a healthy influence on others.
Wooden lining is divided into different grades, "extra", and also A, B and C. The best option when buying facing material is "extra". The wall covering is done for many years, it is better to pay more once and to provide yourself with quality panels. Although, for example, for a cheaper wall lining a low-quality lining.
Preparatory process
Before the installation of wooden facing panels, they must be carefully prepared. The surface of the boards is covered with a protective agent to prevent decay and damage to the wood. Alternatively, the bale can be treated with stain or azure, then the material will get the color, at your request.

After such treatment, the facing panels should be carefully dried and brought into the room. When the material will stay in the house for a day, it will get used to the new humidity and temperature, after which it will not dry up and settle down.
To install the lining, you must first make a lath. For such a frame, you need to buy or cut the slats from inch boards with a small section. The length is pre-measured in accordance with the size of the room. The cladding is fixed to the wall, the distance between the rails is about 50-60 cm. When constructing, it is necessary to use the building level, for leveling the bearing structure. Between the crate and the wall it is necessary to leave a gap, which in the future will serve as ventilation. If necessary, the walls can be pre-insulated, then covered with a vapor barrier, on which the frame will be mounted.
To mold and molds do not affect the lining, it must also be treated with a primer.
Some masters make the installation immediately on the wall, without a crate, but this coating will not last long.
Ways of fastening
One of the main moments in the plating is the choice of the method of attachment.
The following fasteners are used for lining:
- With the help of nails;
- Screws are decorative;
- Stapler staples;
- Kleimers.
Here the main thing is not to damage the material. Each panel has a trough on one side, and on the other side a groove that, when folded, comes into the recess of the next one. Thus distinguish the outer and secret fasteners.
With the hidden fastening, the boards are nailed to the crate from the side of the grooves. Their mountings are practically not visible, and such a wall will have a beautiful aesthetic appearance.
You can use special metal kleymers. Such fasteners are made of tin and are manufactured with different shapes and sizes. They can be selected based on the type of lining and the thickness of its slots. Such fasteners are produced immediately with a set of nails. Kleimers cut into the grooves of the board on one side, and with a rug they must be nailed or bolted to the lining.
Fasteners with stapler straps are also an effective way, but they are used by real masters, with the ability to correctly handle a gun. The lining of the lining is nailed to the lathing, but it is necessary to make the fastening tight and at the same time not to damage the material.
An interesting solution can be the installation of panels using decorative screws. Using such a wall mount will look aesthetically beautiful. To achieve a good result here can even beginner.
Let's move on to the installation
The material is dry, the fastening is ready, even the fastening method is chosen, so it is possible to produce and install a lining.
If you want to visually expand the room, it is recommended to do horizontal plating, and if you need to raise the ceiling, then the vertical one will do. The facing direction should be considered in advance, before installing the fasteners, because the lath is built perpendicular to the skin. In the process of the board you need to put it systematically, one by one.
If you need to fix the lining horizontally, then you need to start from the ceiling to the floor, the grooves should look down. This prevents moisture and litter from entering, and the coating will serve a quality for a very long time.

When installing the lining, every 10 boards must be checked for flatness of the surface with a plumb or building level. The latest panel is fitted to the width using a circular saw, a hacksaw. The clearance after the installation of the lining is closed by a skirting board.
Sheathing vertical
Begin the installation of the panels from the corner, where the first is attached to the crate with the help of nails and closes at the place of attachment with a decorative corner. If the presence of decorative rails is not provided, the nail heads need to bite off bokorezami.
When mounting one board with a groove is inserted into the groove of the second one, a single web is built. You need to finish as you did at the beginning, and for a more aesthetic look, the trim is decorated with slats, corners and a skirting board.
When plating the ceiling, the panel needs to be mounted from the window to the opposite wall, to reduce the shadow between the joints.
Conclusion
Sheathing lining gives room comfort and natural heat. Houses built of bricks or other materials are reliable and strong, but at the same time their beauty is cold. To slightly dilute and give it natural it is possible to make the outer and inner lining with wooden boards. Thus, the impression is created that the house is built of wood.
In order for your cladding to serve a long and high quality, you need to process it every 2-3 years with special protective equipment.
Good luck and until new meetings, with you was Andrei Noak!
Videos help you:
Currently, special attention is paid to finishing materials for the interior finishing. It is also used for plating the outer walls of houses. It is a specially processed board made of selected wood.
This material can be worthy of competition to all available analogues on the market. Wood has a lot of positive properties. It can absorb excess moisture and give it to a too dry room. The interior decoration of the wooden house with the lining creates a balanced microclimate in the surrounding space. In addition, the aroma of wood is incomparable with the chemical smells of plastic materials.
Interior decoration of the house lining: photo beautiful interiors of living room and kitchen
The lining board can decorate the interior of any room. Especially often it is used in country houses, in cottages, for finishing interior and exterior walls of residential buildings and offices. Finishing the lining (video demonstrates the whole process) is found on the balconies and loggias. It is indispensable in the arrangement of arbors, saunas, baths and much more.


Finishing lining perfectly aligns the walls, provides the required sound insulation. Such lining for many years will not lose its relevance and attractiveness. It is quite simple to repair the woodwork, it is enough to use decorative wax for this.
In urban flats, they are finished with lining inside (photo of various interiors are present in this article). Such premises need natural materials. The exterior finish of wood calms and creates comfort and coziness.
It is not necessary to coat the whole apartment with a tree, it is enough to use a lining in the kitchen (the photo shows different options).


Such a place will become a favorite place for all tenants. It will be filled with warmth and a pleasant forest aroma. It is recommended to finish the planking only in the dining area, and for the kitchen apron to choose a suitable ceramic tile according to the texture. An interesting solution will also be the decoration of the room by the clapboard or the hallway.
Wall decoration by hand lining: design options and ways of fixing
Think about the design of the room from the lining, as well as to cover the walls and ceiling can be independently. At the first stage, the tree must be treated with an antiseptic. This will help to avoid, in the future, the appearance of mold and fungus. After the material has dried, proceed with the installation of the skin board.
To begin with, a crate is attached to the surface of the wall or ceiling. It can consist of wooden beams or metal guides. Depending on how the wooden lining in the interior will be located (the photo shows this in detail), the location of the lath depends. It must be remembered that the guides must be mounted strictly perpendicular to the main direction of the lining with a certain pitch.
When decorating the wall, the lining can be located both vertically and horizontally. In the first case, the boards begin to be laid from the corner of the room. In the second - from the floor to the ceiling. They are neatly inserted into each other by means of grooves and fastened to the staples with staples using a stapler or self-tapping screws.
After the finishing is completed, proceed to the next stage of the work - painting, which will give a wooden carpet not only an aesthetic look, but also retain it for many years. Most often for these jobs use different varnishes. But it is also possible to paint the boards with oil or acrylate paints. The latter can retain their shine and color for a long time, they can "breathe", are elastic and therefore do not crack. Another type of coatings - acrylic awnings. It is an ecologically pure water-soluble mixture of milky white color, which after drying turns into a transparent waterproof film. Such varnishes can be used for interior works, they are environmentally friendly and do not cause allergies.
Popular questions about lining
What types of wood is better to choose a lining for interior decoration of the house?
For the decoration of internal walls and ceilings in living quarters, in particular, in country houses and in cottages, we use a lining of coniferous species: spruce and pine. Such wood is designed for operation in rooms with a stable temperature regime. If it was a question of interior decoration of a bath or a sauna, it would be better for a linden or alder. And for plating the outer walls of buildings, ideal larch, which perfectly resists the low temperature and precipitation. 
What rooms are usually lined with lining?
Lining is traditionally used for finishing the walls of the veranda, balcony, balcony and attic rooms, that is, of rooms that are located close to the street. However, no one forbids you to use a lining made of natural wood in the interior of the kitchen, dining room, living room, bedroom and even bathroom. Correctly processed natural wood will serve perfectly even in a room with high humidity. 
What colors of painted lining are the most relevant in a modern interior?
The natural wooden lining is usually either painted in white, or with the help of paint or varnish reinforce the color of natural wood, or give it a new, original shade. With the help of paint or varnish, you can give a pine look like a whitened oak or dark nut, for example. There are also methods for decorative processing of painted lining, for example, artificial aging, or brashing. 
How to design a beautiful room design with lining from the lining?
If you choose as an interior finish a lining made of natural wood, it is assumed that the design and style of the room should emphasize this naturalness, naturalness and unique color of wood. For such a room, a country-style design, a Provence or, for example, a maritime style, is a good fit if you want to beat the similarity of the lining with the ship's lining. 
How can I use wooden lining in the interior of the kitchen?
The lining can be used to finish the walls in the kitchen in the dining area, and repeat the same coloring of the wood in the kitchen furniture. For ceilings in the kitchen, this finish is not suitable, because it will be very difficult to clean such a ceiling from fatty vapors. In the cooking area, it is also unacceptable to use a lining, it is better to trim the "apron" with ceramic tiles, mosaics or special easily washable plastic plastics. 
Is the wall decoration in the flat of the apartment building fitting?
Why not? Clapboard can be sewn not only a balcony or a loggia of a modern apartment, but also use this kind of decoration for walls in the kitchen, in the hallway, or even in the bedroom. However, it should be remembered that the very process of installing a wooden lining implies the presence of a crate, that is, a frame. Thus, finishing the apartment with a lining will take away some of the useful area. Therefore, if your apartment is very small, you need to use caution to finish the walls. 
What furniture to furnish the room, finished with lining?
Furniture in the room, finished with lining, should be in good harmony with it in style. Therefore, interior items should also be wooden, because metal, plastic or glass is unlikely to fit well into such an interior. It's great if the furniture is made of the same kind of wood as the lining on the walls, but it is not necessary. You can, on the contrary, play in contrast, and choose furniture of a completely different tone. An interesting idea is the use of rattan or bamboo furniture in a room finished with a lining. 
How practical is the use of natural lining in the hallway?
The hallway and the corridor are rooms in which it is important to maintain cleanliness, since dust and dirt are brought from the street. Accordingly, the finishing of the hallway, including walls, should allow wet cleaning, or at least wiping with a damp cloth. The special lining is very suitable for this purpose, so there is no reason to refuse the wooden plating in the hallway. 
How to decorate a room lined with lining?
Emphasize the charm of natural wood with decorative objects for antiquity, or souvenirs with a touch of provincial romance: statuettes, vases, carved wooden hand-made articles. Well in harmony with the carving paintings, depicting still lifes or calm forest landscapes. Pay special attention to carpets and curtains. Bamboo or threaded curtains made of wood beads are perfect for decorating windows. And on the floor you can lay something like a mat or animal skins. 
How to update the walls, upholstered in lining?
Over time, any cladding, even such a quality and durable, as a wooden lining, loses its presentable appearance. In addition, you may want to give the interior a completely different look, change style and design. And to dismantle at the same time a good covering of walls at all it would not be desirable. In such a case, remove a couple of millimeters of the top layer of wood from the walls lined with lining. This is done with a special carpenter's grinder. Then treat the lining against the fungus and apply a new decorative layer. It can be a clear or colored lacquer, or a special paint for natural wood. 
More questions about your topic:
- Structural plaster: photo and drawing by own hands; how does the seamless texture of the plaster look, and how to create paintings and bas-reliefs from it
- External decorative plaster for external works: what composition and how is the external plastering of the walls of the brick house made?
- Decorative plaster in the interior: Venetian, mosaic, artistic, stone and antique; painting on dry plaster, paintings and panels