Building your own home, whether it's a holiday home small house or country cottage, implies convenience not in the yard, like the grandmother in the village, but in the house. This is a bathroom, and a bathroom, and a sink in the kitchen.
Therefore, care should be taken (and this is first of all) for the construction of a sewage system and a drainage pit. It goes without saying that the water must also be connected.
How to make waste pit own hands (septic tank)?
This question is asked by many homeowners. In the absence of central sewerage, it is necessary that the drain works round-the-clock and uninterrupted.
We choose the right material for the construction of a septic tank with our own hands
From the building material used for the septic tank depends primarily on the cost of the drainage pit itself, as well as your labor costs. A traditional and fully justified choice is:
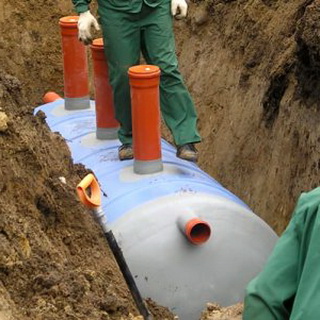
- Drain pit (septic tank) of plastic tank and plastic components.
- Prefabricated septic tank of reinforced concrete structures.
- Drain pit from monolithic concrete and the use of metal leads and bends.
- A drain pit made of bricks.
It is important!
When choosing the volume of the future waste pit, be guided by the volume of the cesspool of the sewage machine - you will periodically call it to pump out sewage from the drainage pit. The volume of the septic tank must be equal to or a multiple of the volume of the tank - then you do not have to order the cleaning of the pit several times a year.
Selecting a cesspool device
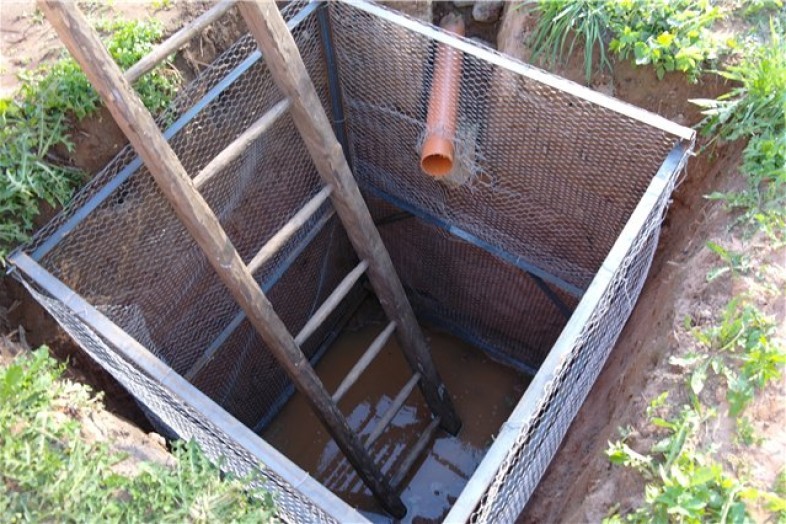
If the house you expect to live seasonally, then the disposal of sewage - the problem is relatively simple. It is necessary to make the most primitive cesspool from any sealed container. For a family of 3-4 people, the volume of the pit must be not less than 1,5-2 m 3. In the absence of such a container, you can lay a pit with a red refractory brick. The diagram of the simplest waste pit is shown in the picture.
But with a permanent residence such sanitation is not good! Why - now you will understand. Permanent residence of a full-fledged family assumes daily use of water in large volumes. These are baths, showers, washing dishes, wet cleaning, laundry, natural needs.
The calculation of water consumption is always based on maximum consumption, and this 180-280 liters per day for one family member. That is, a family of 4 people spends 0.5-1 m 3 water per day or 30 m 3 per month. Proceeding from this, even a large discharge pit of 15-20 m 3 should be cleaned 1-2 times a month.
Such a sewer will deplete your family budget by $ 150-200 per month. In addition, the purification procedure itself is specific and the rare owner has a desire to perform it too often.
Sometimes the improvement of the drainage pit is carried out by arranging the holes so that the dirty water goes into the soil, filtered naturally. But this way of utilizing the drainage water has many drawbacks, including it prohibited by sanitary norms.
Therefore it is necessary to make a drainage pit (septic tank) with natural cleaning sewage water.
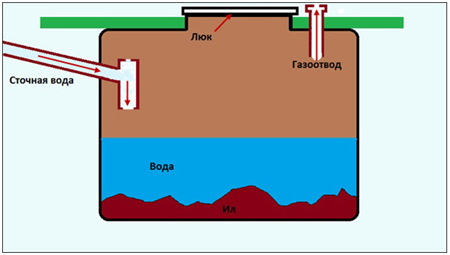
The principal difference between a septic tank and a cesspool is the ongoing anaerobic processes of organic decomposition
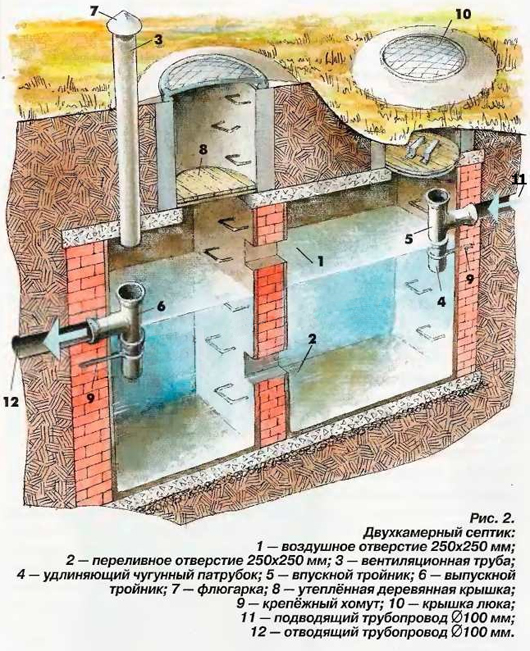
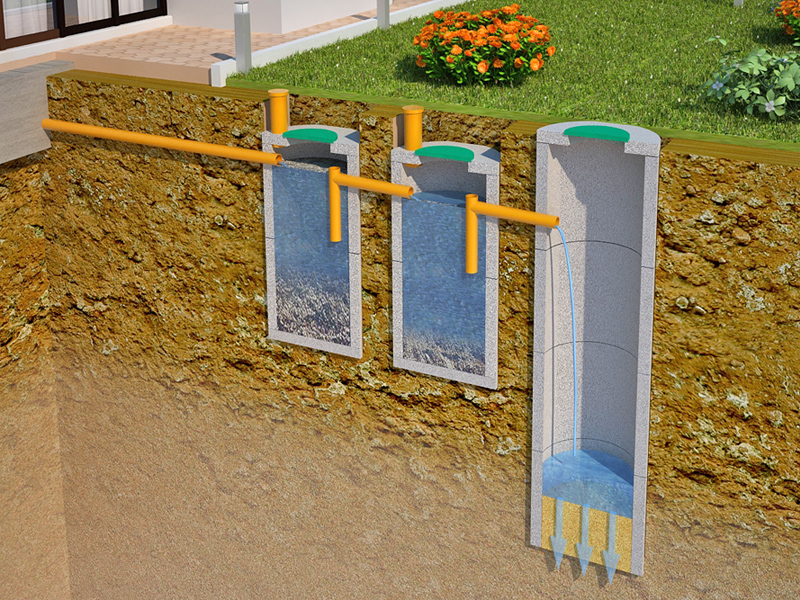
The solid particles will be retained at the bottom of the first chamber, and the second chamber serves for the biological processing of dirty water by putrefactive bacteria. The number of cameras can be higher, but the principle will be similar to the two-chamber septic that is depicted in the figure:
How to make a drain pit yourself
First, we determine the water consumption in the house, based on the data of the table:
The minimum height of the septic tank must be not less than 1.2 meters, otherwise solid suspensions will not densely settle on the bottom of the drain pit.
Single-chamber septic tank made of reinforced concrete rings
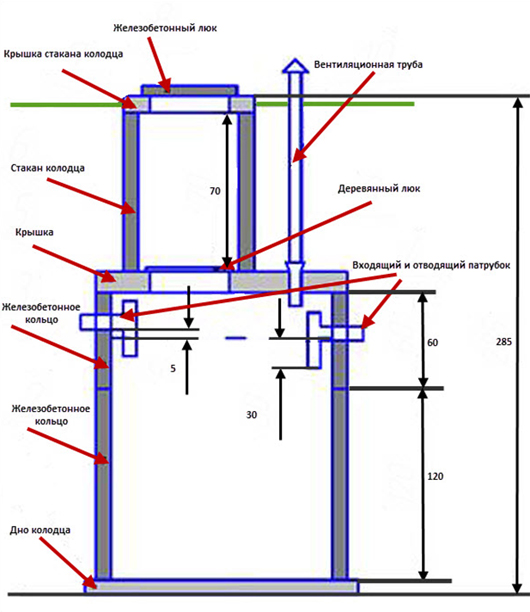
In the figure you see a scheme of a single-chamber septic tank made of iron concrete rings volume of 2 m 3.
Such a cesspool for the house can be completely done by one's own hands.
Inlet nozzle should be above the water level by 5-7 centimeters. This method will not allow a hydraulic closure between the inlet and outlet nozzles. Both pipes must be immersed in water for 30-35 centimeters.
The lower part of the pipes should be open, and these ends are removed above the liquid level by 20 centimeters so that no gas enters the pipes, which will be released during fermentation of putrefactive bacteria.
Channels between both concrete septic rings should be located within 30-60 centimeters relative to the water level. If the channel that is located between the cameras is lower, then large suspensions will fall into a small chamber. If the channel is higher, fractions that float on the surface can enter this chamber.
The septic, even the most simple, should be made exhaust gas(ventilation pipe in the diagram above), as well as a hatch for pumping out the liquid (can be wooden).
Configure the drain chamber can differ in different ways, as their shape and location do not affect the quality of sewage treatment. It is only necessary to observe the following proportions: a large chamber should be a volume of 2/3 of the total volume of the pit.
When choosing the shape of the pit itself, one must start from the material used.
As an example, we give the following calculation:
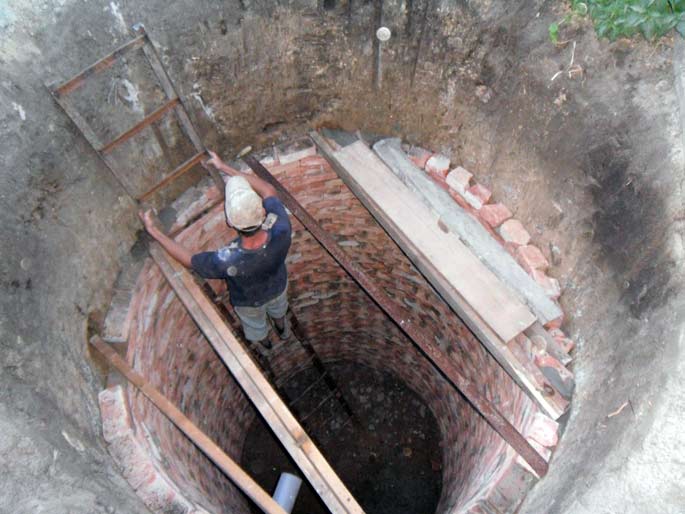
A round septic tank with combined chambers will require 10-15% less building materials than a pit of another shape, such a septic tank is stronger, since it better withstands compression forces from the ground. The best building material for such a drainage pit is brick.
We heat the septic tank
It is known that the water in the pit does not freeze, as the temperature raises the processes of fermentation and the soil itself below the depth of its freezing. But the cooling of water from the surface of the pit slows down the activity of bacteria that purify sewage sewage. Therefore, it is recommended to insulate the upper part of the low-seated septic tank. At least to a depth of less than half the depth of freezing of soil in this region.
Heater can act keramzit, which is covered with a layer of 25-40 cm thick, or foam plates PSB-25 with a thickness of 5 to 10 centimeters.
1.
2.
3.
If the owners of real estate in multi-storey buildings do not think about the question of where to put waste water and sewage, then the owners of private households the problem of waste disposal and sewage needs a permanent solution. They have no choice but to make a drainage pit with their own hands. This option for the construction of a treatment plant is the simplest and most accessible when performing construction on its own.
Begin improvement infield from the device of the water supply and sewerage system, since it is impossible to call a stay in nature comfortable if you have to carry drinking water from a well and in need to run to nearby bushes.
There are several options for the diversion and processing of sewage and sewage, but the simplest design is a cesspool. It is necessary to have knowledge of how to properly make a drainage pit without the help of specialists, so that in the future there will be no problems with its operation and the environmental situation in the adjacent terrain.
Types of waste pits
Despite the simplicity of the design, the drain pits differ in the way they are implemented.They are:
- sealed;
- filtering;
- two-chamber.
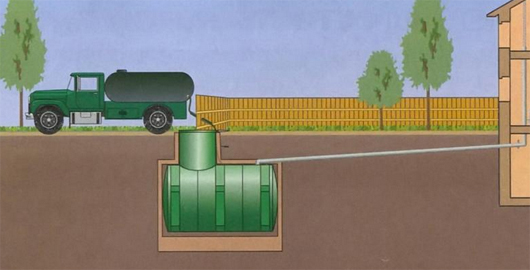
When the pit is made sealed, impurities do not pollute the soil and groundwater. As a result, the ecological system will not threaten anything, as well as the sources of drinking water. The advantage of such a cleaning design is that it can be used regardless of hydrogeological conditions on the adjacent site.
![]()
But there are drawbacks. Accumulated in the hermetic capacity of drains and sewage must be periodically pumped out, and the call of sewers is not related to cheap services. The pumping frequency depends on the volume of the tank used.
In fact, sanitary norms prohibit the construction of a local sewage system of this design: getting untreated in the ground can cause irreparable harm to the environment in this area. They can even be a source of contamination of sources of drinking water, and this is extremely dangerous for people's health.
This option, if used at present, is only for summer houses, since for people living in them, a small amount of water is required. The construction of pits for filter-type wastes is recommended only under the condition that the volume of effluents within a day is no more than a cubic meter. When the sewage is small, they manage to be processed by natural decomposition.
Often pits of this type are equipped for the construction of baths, steam rooms and for houses in which sewage separation is provided. In the latter case, it is necessary to lay two sewer lines and build two drainage pits on the site. The first of them, equipped with a filter type, receives waste water from a washing machine, a shower cabin, and a wash basin. These effluents are relatively clean.
In the second well of a sealed type, impurities are sent from the toilet and water from the kitchen.
Pit two-chamber drain. This solution to the problem of wastewater disposal is considered practical and reasonable.
The principle of operation of this treatment plant, depicted in the photo, is as follows:
- the drainage pit, consisting of two chambers, is connected in the upper part by overflow, the first of which is hermetically sealed, and the second one is filtering;
- unseparated wastewater initially enters the first of the chambers, is hermetically sealed, and there are sedimented (mechanically separated);
- solid particles fall down to the bottom, and already less polluted water pours into the next chamber;
- from another chamber the water is filtered into the soil;
- collected in the first chamber waste must be pumped out from time to time. To reduce the amount of waste use special biological preparations. Strains of bacteria contained in them, contribute to the processing of organic materials, which leads to a reduction in the amount of impurities.
How to properly make a drainage pit
Before you make a drain hole in a private house, you need to design a construction plan. It is necessary to choose the type of construction, the place of construction and calculate the required volume of the reservoir.Certainly, the number of drains is determined individually, but generally accepted norms apply. For example, for a family permanently residing in a house with three members, they build a pit containing 6 cubic meters.
When the capacity is calculated, the following points are taken into account:
- how affordable is the cost of the services provided by the sanitizers;
- the amount of waste that the sewage disposal equipment can pump out from the pit at a time.
When determining where to make a clarifier, take into account a number of factors:
- distance to the location of soil water. It should be sufficient to dig a two-meter depth of the excavation (this is the minimum value). Read also: "".;
- the distance from the source of drinking water to the sediment bowl should not be less than three dozen meters;
- you can not make a cesspool on the slope;
- it is necessary to provide for the possibility of the access of special equipment intended for cleaning the pit from the drain;
- it is prohibited to make a clarifier in the immediate vicinity of a residential building and a fence adjacent site. The minimum distance to a residential building should be 5 meters.
Thus, before making a drainage pit in your house, the place should be chosen very carefully to prevent contamination of the surrounding area, especially when the plot is built up. In any case, the rules need to be met.
Selection of building materials for the arrangement of a drain pit.
When creating a sealed cesspool, the following materials are used:
- concrete solution. First build the formwork, and then pour the solution into it so that the thickness of the bottom and walls of the sump is at least 7 centimeters. For reinforcement use a steel mesh;
- plastic water tank. The construction of a cesspool with its use is considered an option with the least amount of labor. First dig a foundation pit and already in it place a plastic container. So that it does not deform as a result of the pressure of the soil on it and does not come up during the flood, concreting the bottom and walls of the ditch. In the process of pouring concrete with concrete, special loops are laid to secure the tank with polymer belts;
- ceramic bricks;
- concrete rings.
When a discharge well of a filtering type is constructed, you can:
- overlay it with a brick, leaving between the rows in a staggered order slits of 5 centimeters;
- install it reinforced concrete rings for draining wells with perforation;
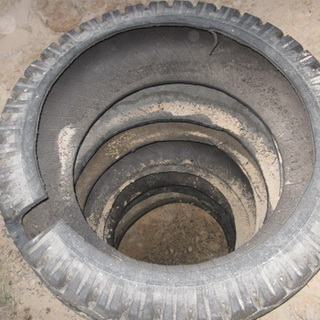
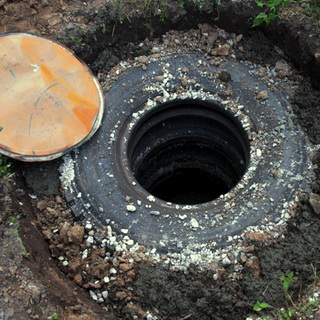
- use car tires. They are stacked on top of each other, cutting off the bottom rim on each tire;
- apply used metal or plastic tanks or drums. In them it is necessary to cut off the bottom, and in the lower part to make holes to improve the filtration of drains.
We make the drainage pit by our own hands
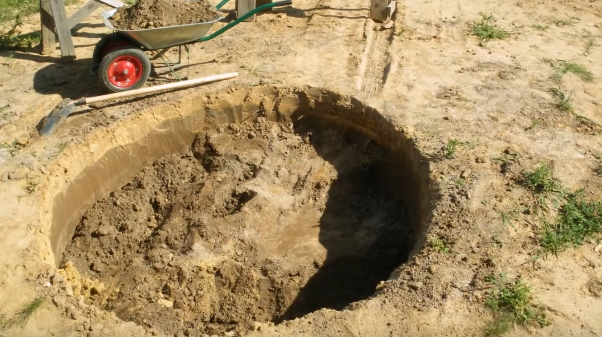
There is a certain order how to make a drainage pit with your own hands correctly.On the initial phase prepare a pit and dig trenches for laying supply pipes.
At the pit, the depth should be greater than the projected depth of the drain pit, since a drainage cushion will require space. It is made of layers of sand and rubble, which are carefully rammed.
If the construction of a sealed pit is planned, then the thickness of the layers should be 10-15 centimeters. On top of the pillow stack or reinforced concrete slab, or poured concrete screed.
When the filter pit is equipped, the minimum layer of crushed stone must be 20 centimeters for a better purification of the effluents. Due to this measure, the bottom will not be silted for a longer time.
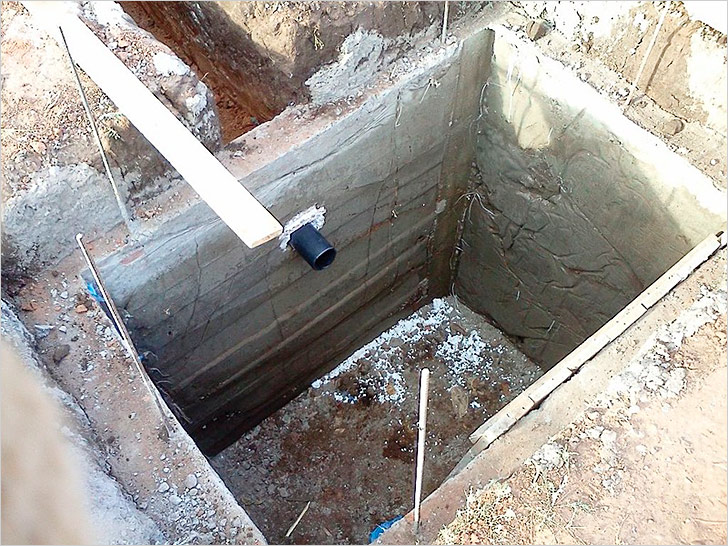
Then you need to fix the walls of the sump. To do this, perform brickwork, or use plastic containers, or mount concrete rings.
In the event that a sealed sump is being constructed, waterproofing should be carried out after the walls have been strengthened.
At the same time, connect the supply line to the receiving tank of the tank. It is necessary that the connection of the pipes to the reservoir is simultaneously hermetic and not rigid: then during ground movements it will not collapse. therefore rubber couplings should be used for the connection.
Approximately 40 centimeters from the surface of the earth make an overlap for the sump. Usually, a ready-made reinforced concrete slab having a hole for the hatch is already used. If you want, it is quite possible to make such a plate yourself, having previously made the formwork. Also, the floor can be built of boards, but it will not be strong.
In order to control the degree of filling of the tank and for pumping out sewage in the ceiling, a hatch must be arranged. In addition, a vent pipe must be mounted on the lid to remove gases (including methane), which are formed during the decomposition of the solid contents of the effluent. You can pour top on the overlapping of the soil, but so that in the pit could not get atmospheric precipitation.
When the creation of a local sewerage facility is planned, it is not superfluous for those domestic craftsmen who are new to this type of work to know how to make a drain pit for servicing suburban home ownership. Even if the hired workers take up the equipment, the owner will be easier to follow the quality of the services.
Sewerage is one of the most important benefits of civilization. Without sewerage, washing, showering, taking a bath and going to the toilet are accompanied by difficulties and inconveniences. But it is not always possible to connect to a centralized sewerage system - it is not available for remote villages, cottages and cottage settlements. The solution to the problem is the arrangement of own facilities for the collection, treatment and disposal of waste water. The simplest and cheapest solution is to construct a cesspool without a bottom with your own hands.
How does a cesspool without a bottom
There are two types of cesspools:
- sealed;
- non-hermetic, without bottom;
The first represent the simplest construction of concrete, brick or plastic, completely waterproof. They collect liquid and solid waste coming through the sewer pipe. Regularly, an average of 1-2 times a month, a sewage machine should pump them out of a sealed drain pit. The services of such specialists are expensive, because some owners are thinking about how to partly dispose of sewage with the help of soil after-treatment.
![]()
And the most simple variant are leaky cesspools. They are a shallow well, collected from bricks, old tires or concrete rings. They do not have a sealed bottom - there is either directly the soil, or a filter cushion of sand, gravel or crushed stone. Also, in the walls of the cesspool, a number of openings are created for the purpose of drainage. Through them and the bottom, liquid sewage drains partially escape into the ground and undergo a natural soil purification. The rest remains in the well and 1-2 times a year is pumped out by a sewage machine.
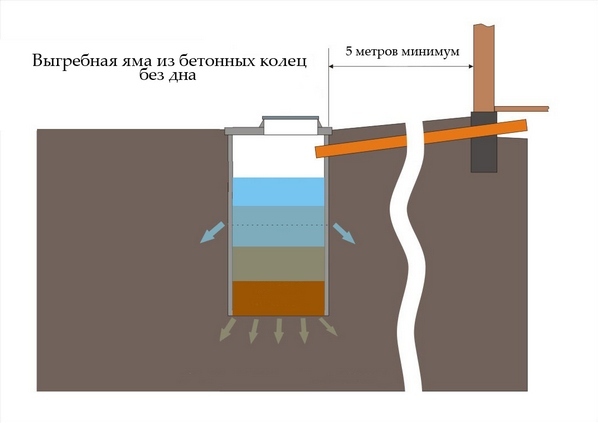
This structure is suitable for solving the problem with waste of life in the country, visited during spring and summer, or for village house, where 1-2 people live. For a large family, a cesspool without a bottom is not an effective and ecologically safe solution - in this case it is preferable to build a septic tank from several concrete wells.
The advantages and disadvantages of a cesspool without a bottom
Let's briefly consider what is good and bad design of an unsealed cesspool. Its advantages include the following.
- Extremely low price of the building in comparison with the cost of a full-fledged septic tank - both factory production, and self-made, built of rings or monolithic concrete.
- Simplicity of construction - excavation of a trench and a trench under a pipe, walls of a cesspool and a cover are established, connection is carried out. Without any problems, all these activities can be done independently.
- The speed of construction - a cesspool without a bottom of concrete rings is quite feasible to arrange for a couple of days.
- Lower costs compared to airtight cesspit - You can not call a sewer machine every month, but only 1-2 times a year.
![]()
Due to its simplicity and maximum cheapness, this sewerage system has serious shortcomings.
- Problems with the environment - if such a cesspool is placed near the source of drinking water, then in time the latter may become unusable - the sewage sinks through the soil will poison it with E. coli and other microorganisms. Drinking from a similar well is possible, but not safe.
- The likelihood of conflict with neighbors - those who live near you, is unlikely to like the existence of a potential source of pollution. But, as practice shows, this is a problem only for well-maintained cottage settlements and garden associations - in other places, most likely, neighbors have the same or even simpler structures for collection of sewage.
- Problems with SES. If the sanitary and epidemiological service comes to your site with a check, then it may consider the presence of a cesspool with leakage of effluents into the soil in violation of norms, with corresponding consequences.
- The fragility of the work - it should be understood that such a cesspool is unable to function for a long time - over time the soil around it will become silted and will stop passing water in the same volume. As a result, the construction will be filled with drains more quickly, so it will have to be moved to a new location or replaced with a full-fledged septic tank. Or more often turn to the services of sewers.
Selecting the location for the cesspool
Above several times it was mentioned that a cesspool without a bottom is not the best solution from the point of view of ecology and compliance health standards. But a competent choice of a site for its construction will allow to minimize possible risks and avoid poisoning of reservoirs and wells.
It is worth saying that the current sanitary and building standards do not give a clear answer to the question of the admissibility or, conversely, the inadmissibility of constructing a cesspool without a bottom. Below are some excerpts from various documents.


So, an unsealed cesspit should, if possible, be created on soils with good water permeability and in places where the groundwater table is at least 1 meter below the bottom.
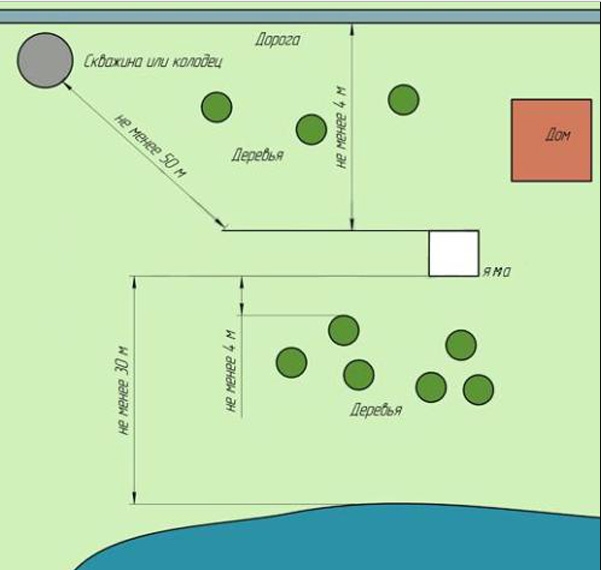
In the list below, the minimum distances between a similar structure and various objects are given:
- from a cesspool to a drinking well - at least 50 m;
- to the pond - not less than 30 m;
- up to trees and gardens - not less than 5 m;
- up to the road or site boundary - from 2 to 4 m;
- to residential buildings - 5 m.
Advice! Before the construction starts, familiarize yourself with the construction of sewage collection facilities near the nearest neighbors. Also, if it happens at the dacha, discuss this issue with the chairman of the partnership. This will avoid unnecessary conflicts and reduce the likelihood of visits by inspectors from the health service to your site.
Construction of a cesspool without a bottom of concrete rings
The most popular material for self-arrangement of cesspools without a bottom, drainage wells and septic tanks are concrete rings. They have enough strength for such a structure, their installation does not take much time, and the low price makes these products affordable for any household. The process of manufacturing a cesspool without a bottom of concrete rings by one's own hands is given below in the form of step-by-step instructions.
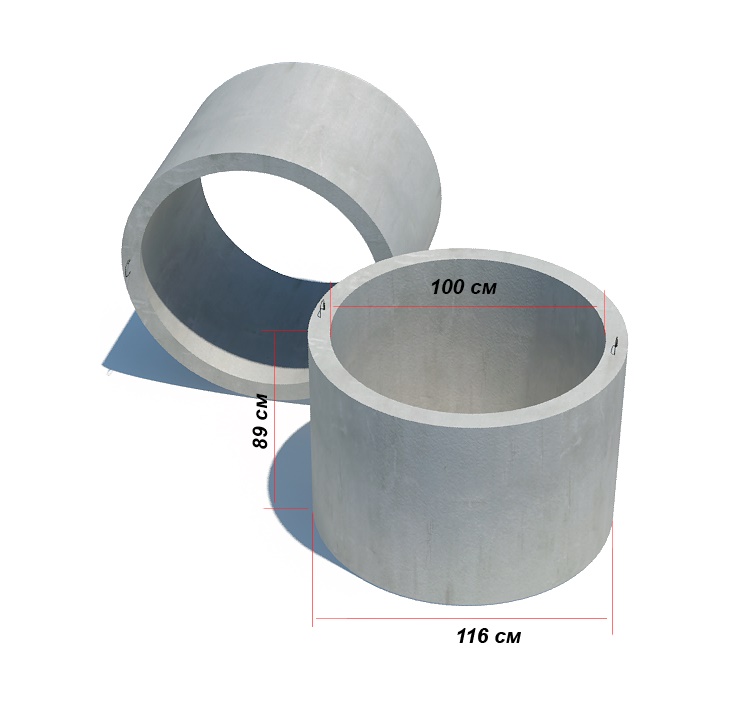
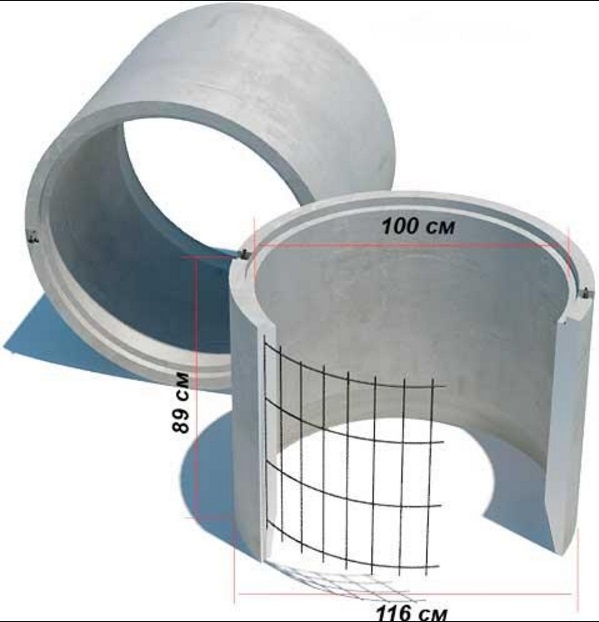
Important! Before undertaking earthworks, determine how many concrete rings and what size you need. For convenience, the main characteristics of the most popular products are summarized in the table.
Table. Dimensions, mass and volume of concrete rings, manufactured in accordance with GOST 8020-90.
| Name | Inside diameter, m | Outside diameter, m | Height, m | Weight, kg | Internal volume, m3 |
|---|---|---|---|---|---|
| KC10.3 | 1 | 1,16 | 0,29 | ≈200 | ≈0,3 |
| COP10.6 | 1 | 1,16 | 0,59 | ≈400 | ≈0,62 |
| COP10.9 | 1 | 1,16 | 0,89 | ≈600 | ≈0,94 |
| KS15.6 | 1 | 1,68 | 0,59 | ≈660 | ≈1,3 |
| KS15.9 | 1,5 | 1,68 | 0,89 | ≈1000 | ≈1,97 |
| KC20.6 | 2 | 2,2 | 0,59 | ≈970 | ≈2,24 |
| KC20.9 | 2 | 2,2 | 0,89 | ≈1480 | ≈3,38 |
Step 1. The construction of a cesspool without a bottom begins with the definition of the place where it will be located. More details about this are given in the previous section of the article.
Step 2. At the selected location, mark and define the boundaries of the future excavation. Its diameter is 20-30 cm more than the outer diameter of the concrete ring.
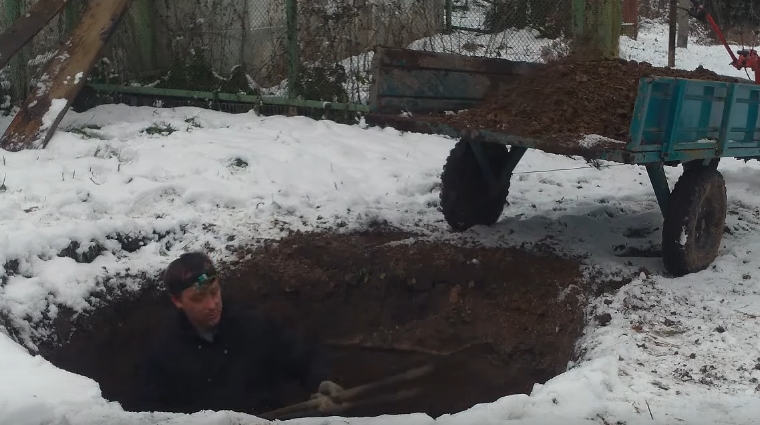
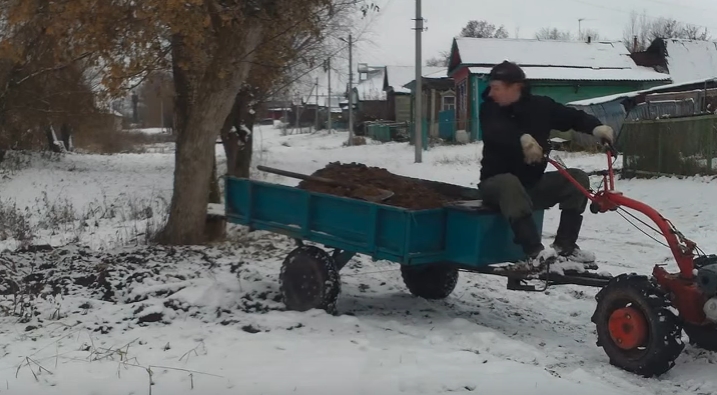
Step 3. Start the direct extraction of the soil. If the cesspool is supposed to be shallow, and there is enough time, earthworks can be done manually. It is advisable to do this in pairs - one digs, and the other raises the extracted soil upward. Work is greatly facilitated by using a bucket with a strong rope and a garden wheelbarrow (or motoblock).
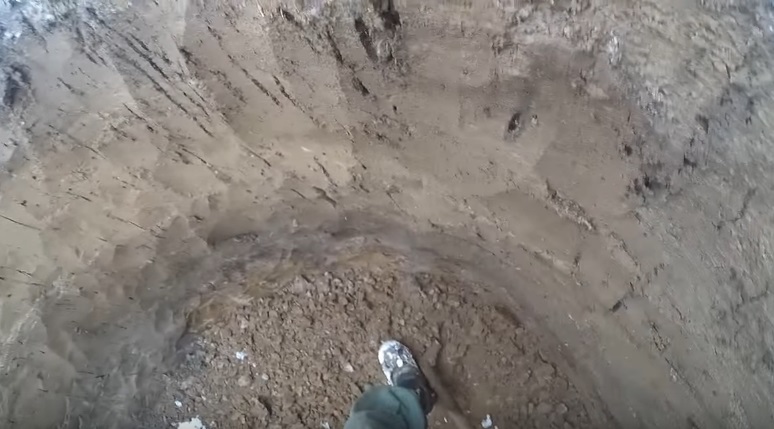
Important! If, during the digging of the excavation by hand, it was found that the soil tends to fall apart, then for your own safety reasons work should be stopped immediately. Otherwise, there is a risk of suddenly falling into the ground. In such situations it is necessary to involve the excavator in the case.
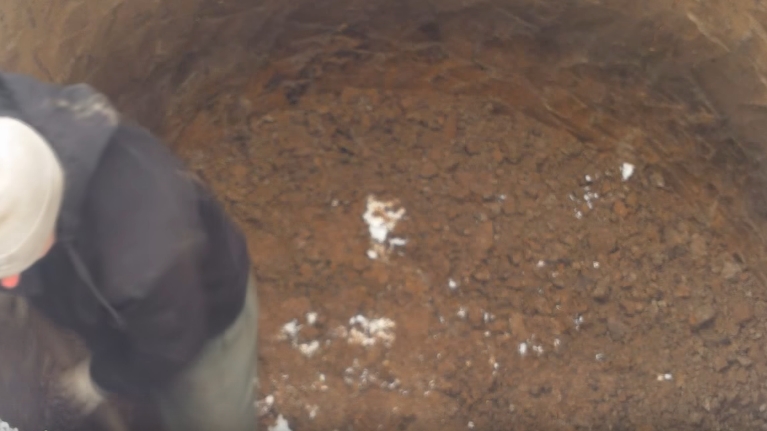
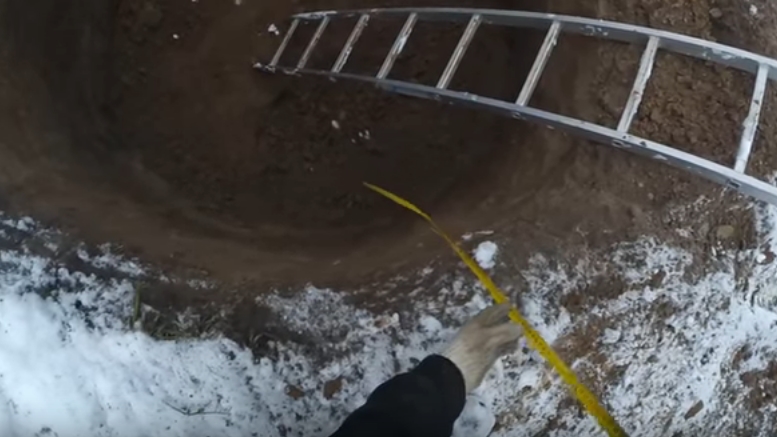
Step 4. Regularly measure the depth of the excavation using a tape measure. For cesspools without a bottom, this depth does not exceed 3 m. Also remember that there must be at least 1 m distance between sewage and groundwater (preferably more).
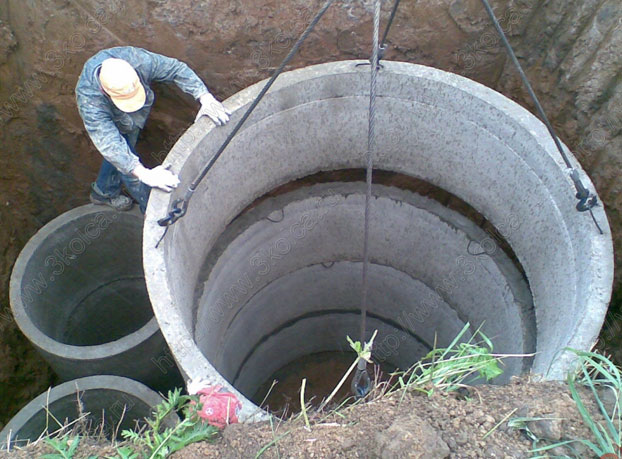
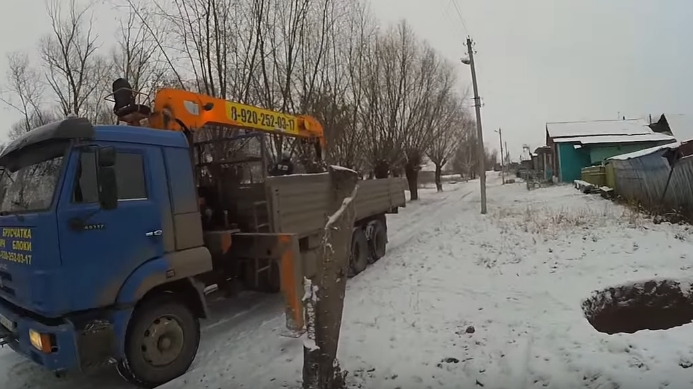
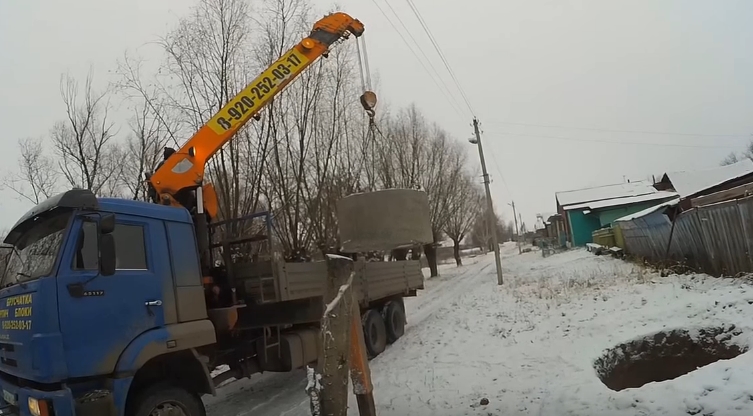
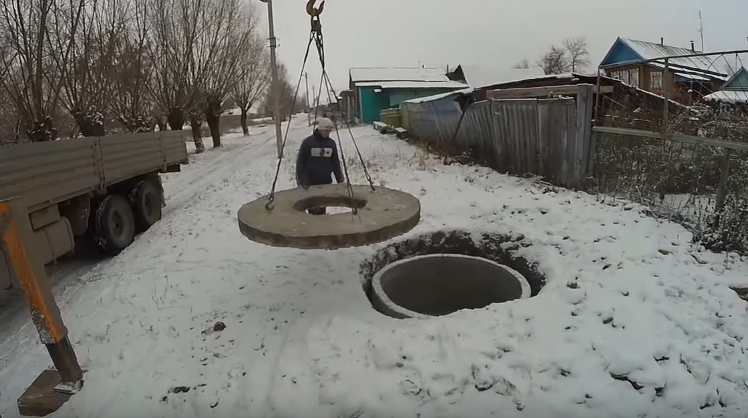
Step 5. Delivery of concrete rings is usually carried out by the manufacturer, while they are brought to the truck with a crane manipulator. Check the availability of all ordered products and their quality.
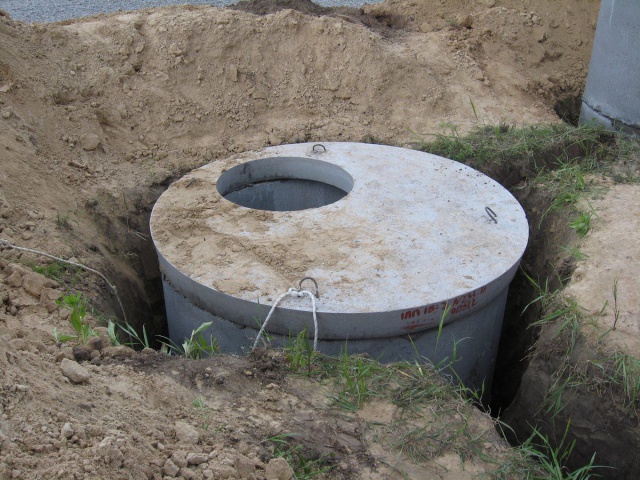
Step 6. Using a loader crane, immerse the first concrete ring in the pit.
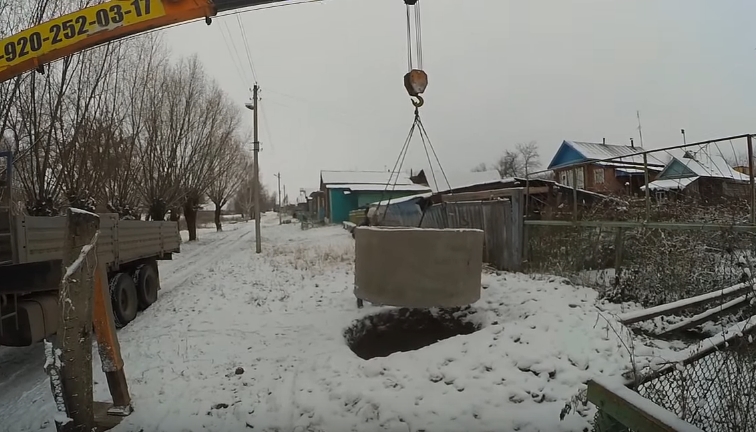
The ring is lowered into the pit
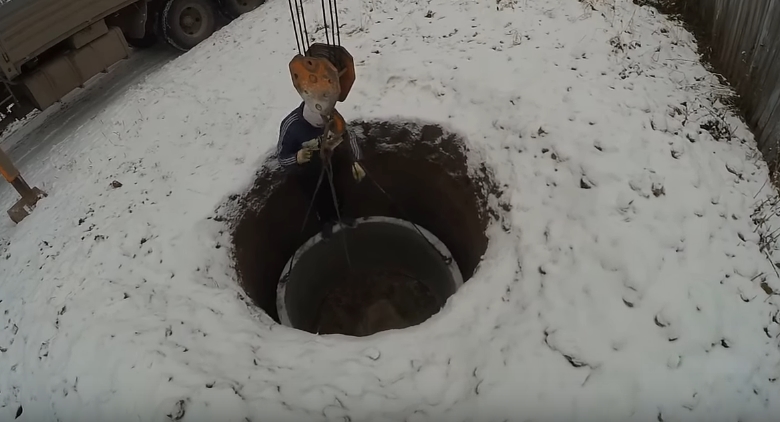
Important! To better fix the rings to each other, put a cement mortar on their ends before laying a new product.
Step 7. In the same way, put the second and subsequent rings on the first ring. In this case, align them with respect to each other.
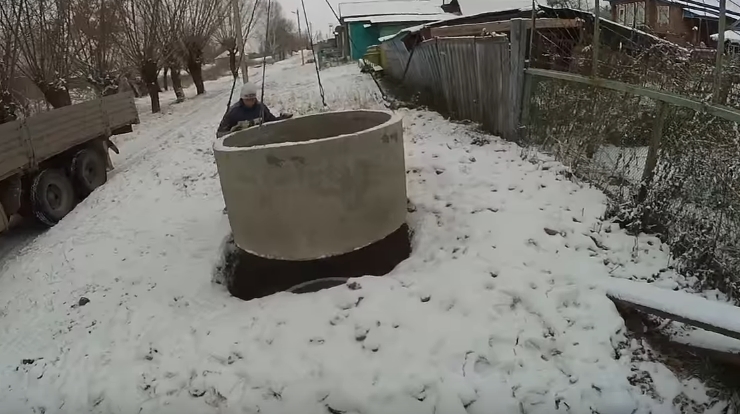
Step 8. Complete the laying of concrete products by mounting the upper circular plate, in which the hole for the hatch is cut out.
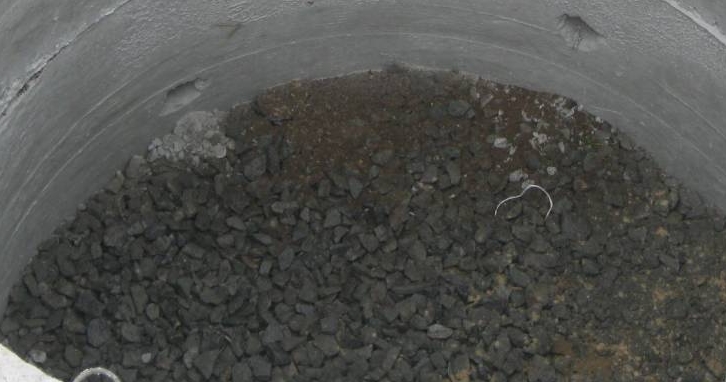
Step 9. In conditions of loam, effective drainage requires a large contact area. If you live in an area where the soil does not absorb water well, drill a series of middle-sized drainage holes in the bottom of the cesspool. Their total area should reach 10% of the total area of the internal surface of the structure.

Important! Often, a cushion of crushed stone with a thickness of 30 to 50 cm is poured on the bottom of such a cesspool. Its use allows at least a little to clear the sewage drains leaving into the ground. In this case, the filler of such a pillow requires regular replacement or washing, which is not the most pleasant and simple work. Each landlord must decide for themselves what is more important for him - the possibility not to pollute the surrounding land and groundwater too much, or the need to go down to the cesspool and replace the filter cushion from the rubble. Instead of the latter one can use ordinary sand.
Step 11. Fill the space between the walls of the excavation and the concrete rings with earth or sand.
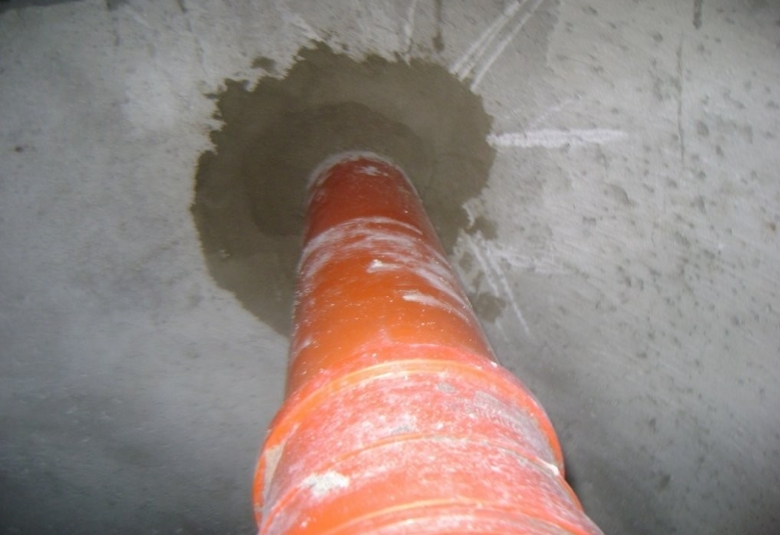
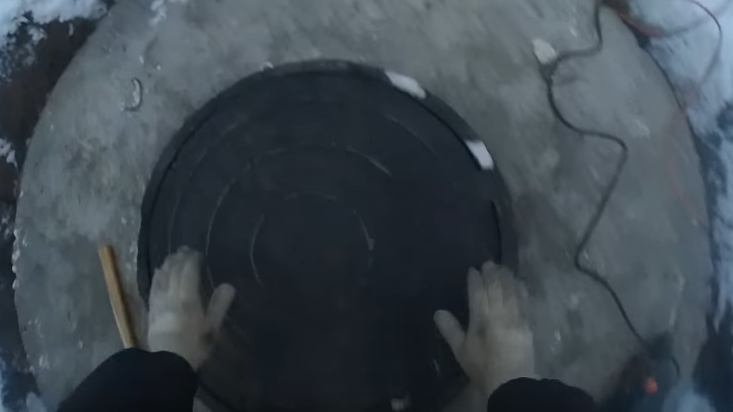
Step 10. Complete the arrangement of the cesspool without the bottom of the concrete rings by connecting the sewer pipe and installing the hatch.
Video - Sump pit
Construction of a cesspool without a bottom of bricks
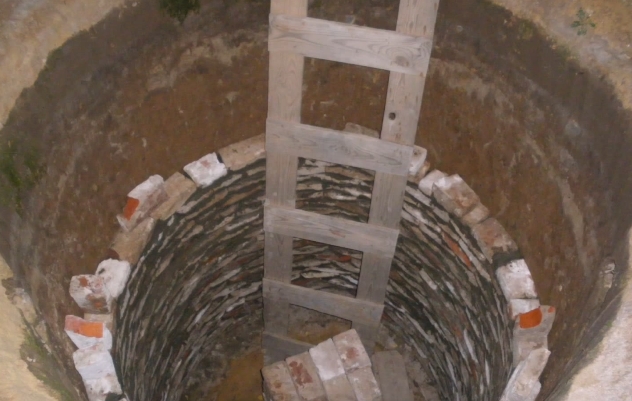
Another, no less popular variant of a cesspool is a structure made of bricks. It should be understood that it will require more time and effort than the construction of concrete rings. But if you have a lot of unused bricks on the site after building a house, a fence or a barn, then it makes sense to put them into practice and make a cesspool without a bottom completely with your own hands, without involving third-party people and construction equipment. In this case you will help step-by-step instruction with the photos below.
Step 1. Construction of a cesspool of brick, as well as any other sewerage, start with excavation works - choose a place and proceed to the digging pit of the pit of the appropriate size.
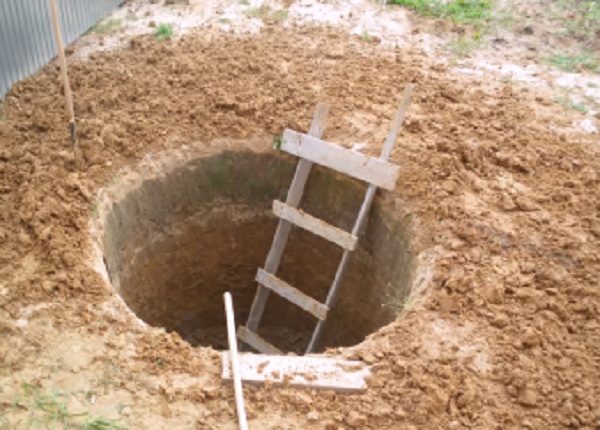
Important! The presence of a simple lifting device will greatly facilitate the process of extraction from the pit of the ground.
Step 2. Check the depth and diameter of the excavation using a tape measure.
Step 3. Get rid of the land extracted during the construction of the pit. At the same time leave it part for the subsequent filling of the lid of the structure.
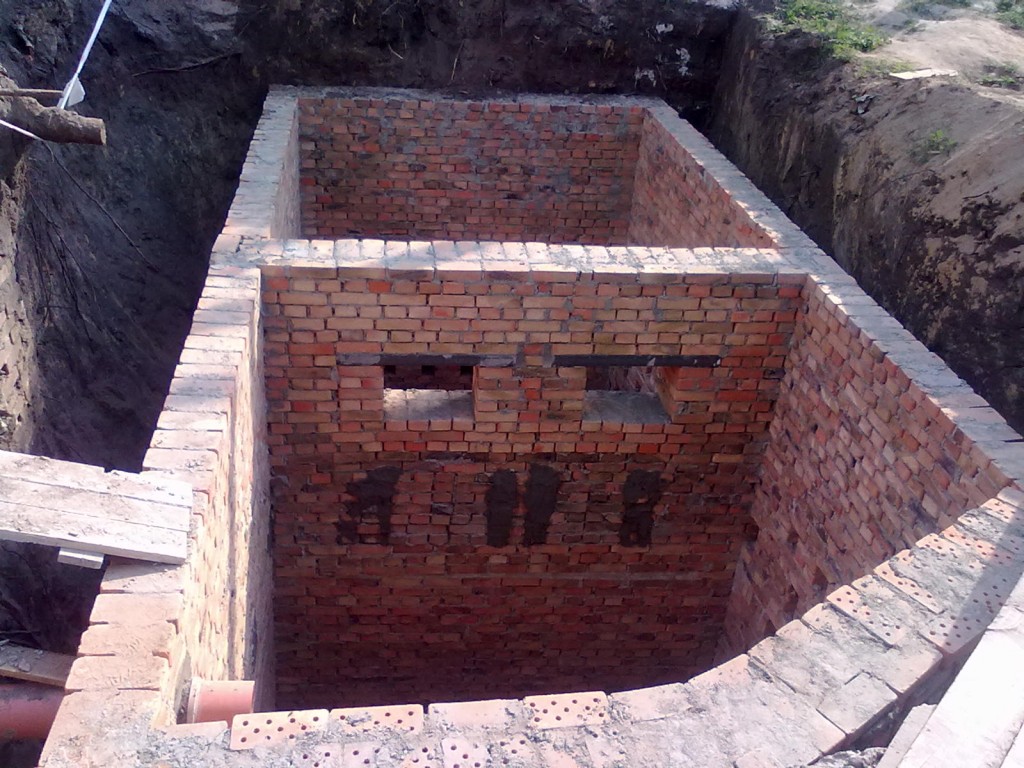
Step 4. At the bottom of the pit, build a flat ring of bricks, as in the image below. It will play the role of a kind of foundation under the walls of the cesspool.
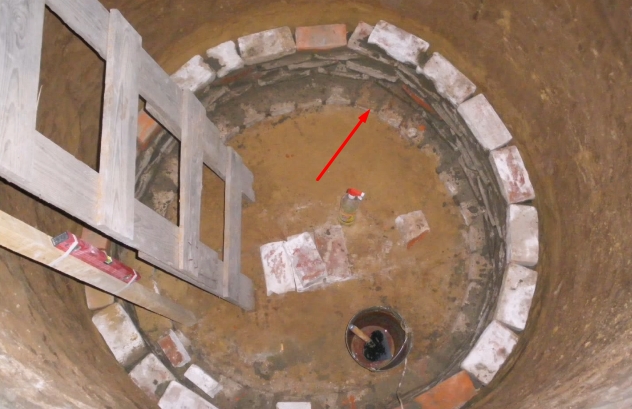
Step 5. Begin laying the bottom of the walls of the cesspool of brick. If you have not previously dealt with such material, then the construction of this structure will be a good practice for you, during which you will receive basic skills in working with bricks.
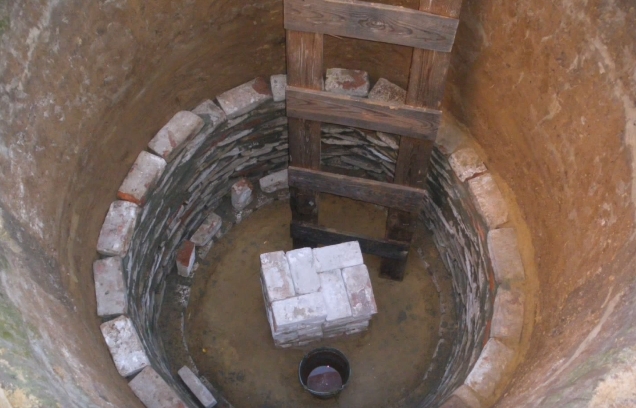
Important! Silicate bricks absorb water well and are gradually destroyed. If you want the cesspool to last longer - replace it with a ceramic pit.
Step 6. Continue laying and climb higher and higher, to the edge of the excavation. The space between its walls and a brick is covered with sand - it absorbs water well and partially filters it before it enters the ground.
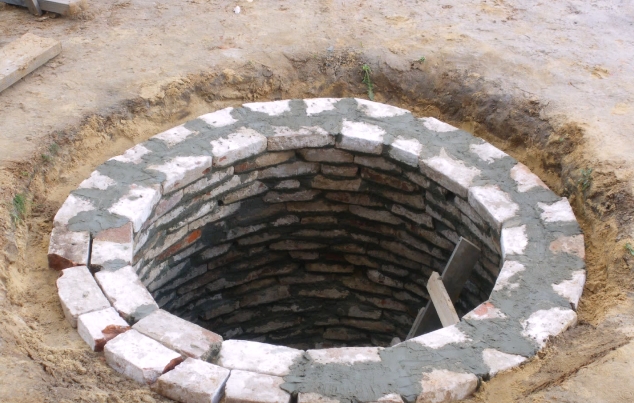
Step 7. Complete the laying of the walls of the cesspool of brick, not reaching a bit to the surface of the earth.
![]()
Step 8. Output to the cesspool sewage pipe from home.
Step 9. Strengthen the cesspool with a metal corner, installed as shown in the image below. Instead, it is allowed to use a wooden beam, but the latter will not last too long - over time, the material in an aggressive environment will begin to decay and rot.
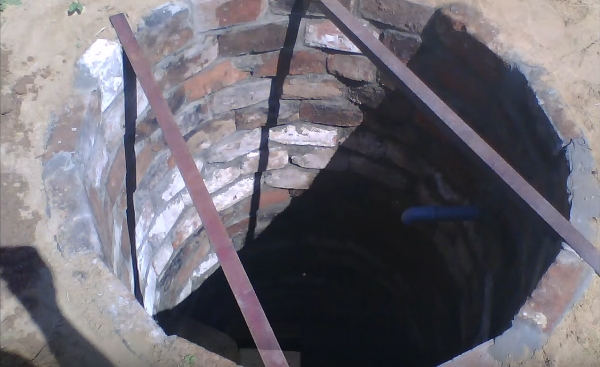
Step 10. Fold the same flat ring of bricks from above as on the bottom of the cesspool.
Step 11. Close the cesspool above concrete slab, made in advance or filled in place. Do not forget about the hole for the hatch, through which the regular pumping of sewage will be made.
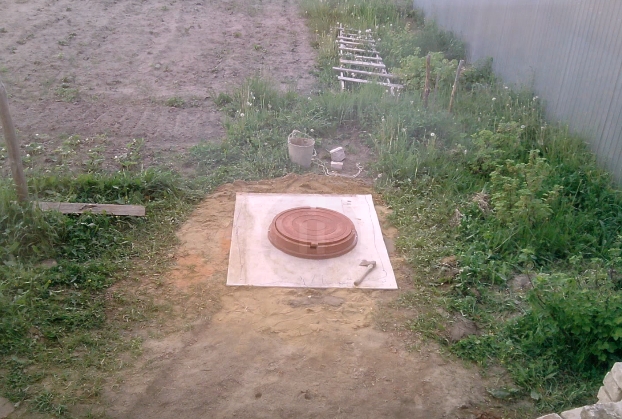
Cesspit without a bottom - a quick and economical solution to the problem of sewage disposal. But, if possible, replace it over time with a full-fledged septic tank produced at the plant or.
![]()
![]()
Unfortunately, but such an attribute of life habitual for the townspeople as central sewerage is often inaccessible in villages and villages. Therefore, residents of such settlements have to think about building local facilities. The simplest and most accessible option is a drainage pit in a private house. Such a sewerage system can be built on its own, without the involvement of professional builders.
Sewerage in a private house, it is desirable to plan on the stage of building a house. But engineering communications can be built even if the house has been used for a long time. After all, the option of living with "amenities" located in the courtyard of a modern man is unlikely to suit.
Today, various options for the installation of local sewerage are possible. The choice of the most acceptable option is carried out depending on the conditions of operation of the house and, of course, the financial possibilities of the owners. The simplest and most accessible option is a drainage pit. We'll figure out how to make a drain hole in a private house without involving professionals.
Selection of the type of discharge pit
Depending on the types of household waste that enter the drainage pits, the following types of these structures stand out:
- Fecal - designed to collect waste from toilets.
- Sewage - designed for collecting sewage from showers, baths, washrooms, wash basins.
- Mixed - this is a pit in which all drains from the house come in, without dividing them into faeces and sewage.
If there is a sewage system for a private house, the most practical option would be the installation of two pit pits. In the first, fecal water will be accumulated, it should be made sealed to prevent contaminated sewage from entering the soil.
The second one will receive relatively clean water, so the shower drain can be filtering. Such a variant of sewerage organization will help to reduce operating costs, as it will allow less frequent use of services of sewers.
The construction of a mixed filtering drainage pit into which drains enters without separation into "gray" and "black" is prohibited in many areas. Violation of the ban is considered an administrative violation. If such a violation is detected, the owners of the facility will be given a warrant to remove it and a fine will be issued.
Two-chamber waste pits
Another option for the practical organization of local sewerage is the installation of a two-chamber pit. In this case, two tanks are connected, interconnected by an overflow pipe. In the first (airtight) chamber, all drains from the house come in, then they settle down.
The sewage is divided into several fractions: heavy waste settles to the bottom, the lungs (for example, fat, surfactants, etc.) float upward. In the middle there is clarified water, which overflows into the second chamber. The second chamber serves as a filter, through perforation in its walls water seeps into the ground.
Construction of waste pits
As a rule, the construction of the drainage pit is carried out on its own, as there are no special difficulties in this process. Let us consider how this process is carried out.
Choose the place of construction
One of the most important and important stages of construction is the choice of the site of the pit construction. It is extremely important to correctly determine the distance of the drainage pit from the house. At the same time, it will be necessary to take into account the requirements of sanitary and building standards. It is believed that treatment plant The sewage system must be separated from the residential structure by at least five meters.
If the site is small in area or already fully landscaped, it is not easy to choose a place for the construction of drainage pits. However, it is by no means impossible to violate the SNiP requirement, because the drainage pit under the house is not just a source of unpleasant odors, but also the potential danger of flooding the base with drains. Even if a sealed tank is installed, it is impossible to exclude the possibility of an accident, after which the filtration of water into the ground will begin.
If a filter pit is being constructed, it should be located at a distance not only from the residential building, but also from other buildings - the garage, the summer kitchen, etc. As around the pit there will be waterlogging of the soil, which adversely affects the foundation of the buildings.
Thus, in the construction of a structure such as a sinkhole, the distance to the building must be exactly maintained. If the pit should be separated from the house not less than five meters, then from the foundation of other buildings should retreat not less than a meter. In addition, when choosing a place, one should also take into account such circumstances as:
- The relief of the site. You can not place a drain hole on the slope.
- Characteristics of the soil. The filter pits work effectively only where there is low GW, and the soil has the ability to pass water well.
Selection of construction material
The choice of material depends on the type of drain pit and, of course, the capabilities of the owners. So, for the construction of a filter pit, you can use:
- Brick. This is one of the most common options, if a drainage pit is built in a private house with their own hands. The advantage of this solution is that it will not be necessary to attract load-lifting equipment. You can do without even assistants, if the owner himself knows how to perform brickwork. To built a drain hole lasted for a long time, you need to know how to choose the right brick. Experts recommend the use of red ceramic brick, it has a long service life and is not afraid of moisture. You can use silicate brick.
Advice! The use of ordinary bricks is not advisable, as it quickly collapses with constant contact with sewage. Therefore, for sewerage structures, ceramic bricks are used.
- Finished well rings of reinforced concrete with perforation. This option is good because it will be possible to complete the construction as soon as possible. But during construction it is necessary to use hoisting rings, since products made of reinforced concrete have a significant weight. From reinforced concrete rings it is convenient to build a two-chamber pit. The first camera is made from deaf rings, and at the very bottom a ring is installed that has a bottom. If it is good to seal the junction between the rings, then the installation will be sufficiently tight. The second tank is assembled from perforated rings.
- Car tires. Such a device of a drainage pit in a private house will cost almost free, as used tires are used for construction. The disadvantage of the option is a short service life. In addition, tires can not be used to build a sealed tank.
- Old plastic barrels. This option is suitable if the water flow is small. From the barrels you can build a filter pit, for this you need to remove the bottom of the barrel, and make a perforation at the bottom.
For the construction of sealed tanks use:
- Solid reinforced concrete rings provided that the waterproofing of joints between individual parts is carried out.
- Concrete mortar, construct monolithic structures.
- Containers made of plastic.
Tank volume selection
The volume of the future drainage pit depends on how much water is consumed in the house. It is clear that the more people live in the house and the more various plumbing devices are installed in it, the larger the volume of the tank will be required.
Installation work
Regardless of which option was chosen, the construction of drainage pits begins with the preparation of a trench. The depth of the pit is determined by such an indicator as the GWP.
If the soil water is at a level of more than 6 meters, the depth of excavation can be 2-2.5 meters. Taking into account this circumstance and the planned volume of the reservoir, the width and length of the pit are determined.
Advice! To implement the construction as quickly and with less labor, digging equipment should be used to dig the pit.
- At the bottom of the prepared pit, perform a pile of rubble, the height of the layer - 20 cm.
- Then the settler body is collected. As already mentioned, it can be laid out of brick or assembled from reinforced concrete rings.
- If the construction is planned monolithic construction, then formwork is first constructed, then the solution is poured. To make the structure more reliable, it is necessary to reinforce the metal mesh.
- In the upper part of the pit, an overlap is made of a concrete or reinforced concrete slab with holes. The holes are necessary for the hatch device, so that the waste can be pumped out. In addition, ventilation of the waste pit is necessary, because in the process of rotting waste, explosive gases are formed, including methane. Therefore, their diversion should be envisaged.
Thus, the installation of drain pits is the simplest and affordable option for the construction of local sewerage. In order not to encounter any problems, during construction, the requirements of SNiP and SanPiN should be taken into account.
Foreword
The issue of plum for the shower at the dacha is solved by "grandfather's methods".
Required Tools and materials
ArmatureConcrete mixerBituminous masticBulgarianBeamBucketWaterNailsGvozdoderPlaned boardDrillSewer pipesPencilExpanded clayBrushCuvetteShovelMaster OKMetal cornerA hammerHammer drillSandRuberoidRouletteSelf-tapping screwsExtensionLevelCementScrewdriver
Contents
The issue of plum for the shower at the dacha is solved by "grandfather's methods". Someone is draining water under the garden plantings, others are draining the drain, and some do not care about this problem, considering that it is enough to install a grate under the shower frame, and then all the waste water will seep into the ground. How to make a sink from the dacha soul competently and efficiently?
Where to drain the water from the summer shower in the country?
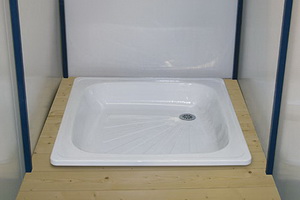
Equally important when designing a summer shower is a drain for draining water. The easiest way to connect the drain to a special gutter, if it is located on the site. At the base of the summer shower should be installed a pallet made of galvanized sheet metal. The tray will prevent the soil from washing away under the shower.
Variants, where to drain water from the shower in the country, a few: it is possible to connect a drain to the central sewage system, take water to the drainage pit, there are other ways.
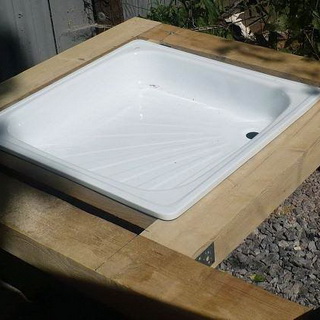
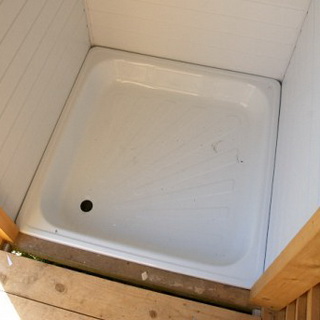
Before you make a shower drain in the country, if the pallet is placed directly on the ground, you need to dig a small depression in the place where the building will be located. The pit should be filled with rubble, stones or completely concrete. Before concreting, this indentation needs to be covered with a roofing material, so that the earth does not soak. The pallet should be installed on, which can be used as large stones or other improvised materials.
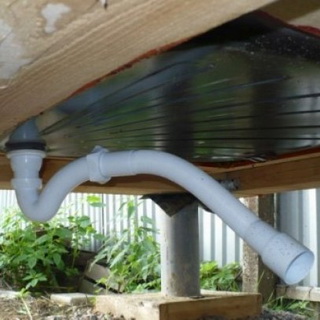
Then it is necessary to connect the pallet to the gutter, using a pipe laid in a trench. Sometimes a shower drain on the dacha with their own hands can be performed together with a collection of soapy water located outside the shower. Its volume should be at least 200 liters. Not far from the summer shower should dig an ordinary pit. Its walls need to be strengthened, otherwise they can collapse very quickly during operation. It is better to make the bottom and walls of the collector concrete, then the water will not soak into the ground, and wash it away.
You can arrange a septic tank for a summer shower, but it should not be located directly under the shower stall, because because of the large volumes of water it will start to fill with soapy water, and it will work worse. All this can lead to the destruction of the soil, and then the foundation of the summer shower cubicle. To save the soil and the structure itself, the drain for the summer shower must be built a few meters from the shower, and next to place with drainage. Stoke from the summer shower should be on the slope, so that it goes to the side of the drainage tank or trench.
It is advisable to lay out the drainage pool for the summer shower with its own hands using a PVC film, which can be replaced with a ruberoid or simply make a concrete screed with a trough reinforced with a metal mesh.
It is not recommended to use clay for the installation of the waterproof layer of the runoff, as it can be washed out over time and flood the drainage ditch. Drain should be built in such a way that it is ventilated. In this case, there will be no problems with unpleasant odors.
How to make a drain from a country shower based on a drainage well
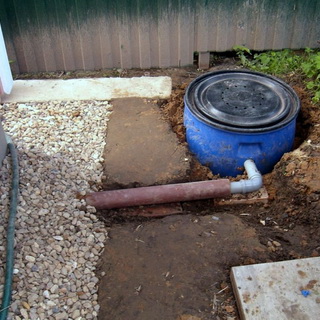
How to make a summer shower drain the most simple way? The most simple drain for not too polluted water from a summer shower can be performed on the basis of a drainage well. It is best to build it from an old 200-liter steel barrel. The barrel should be buried in the ground.
In order that the barrel can not be ejected from the ground in winter, it is recommended to install a special underground anchor that will prevent its ejection. To do this, it is necessary to cut the fourth part of the barrel with petals and bend them outwards towards the bottom of the barrel. After its installation, these steel petals should be covered with a mixture of crushed stone and sand.
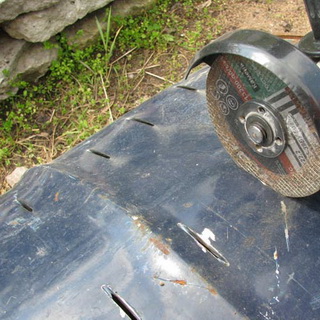
When the petals are cut, you need to use a corner cutter to stagger the drainage holes along the entire surface of the barrels. Such work can only be carried out in goggles and dense leather gloves.
In the bottom of the barrel, cut a round hole, and then insert a branch pipe of the sewer pipe into it, treating the inside of the barrel with silicone sealant. While holding the pipe, it is necessary to tighten the connecting sleeve gently. Subsequently, the main drain pipe will be connected to it.
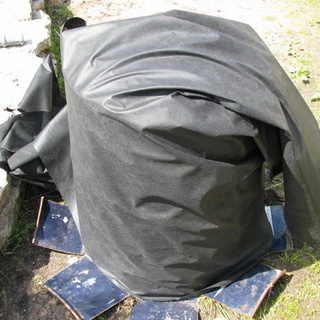
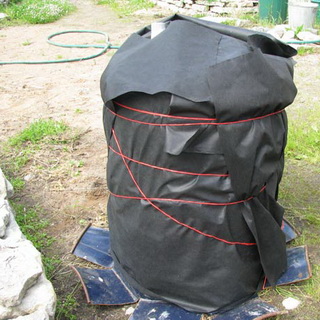
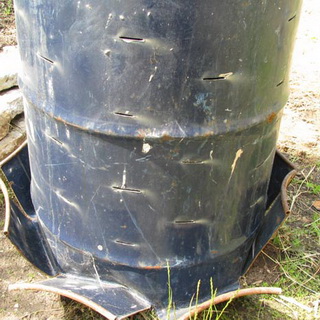
The barrel must be placed with the petals down and carefully wrapped with a geotextile, which is a special fabric that passes the liquid, but retains particles of soil inside the barrel.
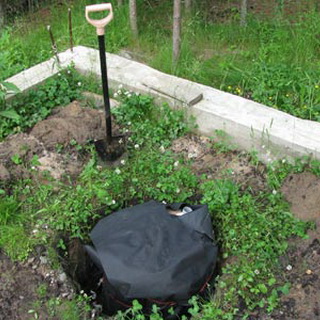
Geotextiles can be secured using a synthetic tow. Then the barrel should be put on a separate geotextile sheet and wrap its edges behind the barrel petals. It only remains to dig a pit for a barrel a bit larger than its own, drop a barrel into it and fill the pit with a mixture of rubble and sand. The simplest plum for a country shower will be obtained in the form of a drainage well from an old steel barrel.
Such a sink can be supplemented with a septic tank in the form of a deaf well in which water will be settled and processed by bacteria. Then the water will go into the drainage, and the precipitate will fall to the bottom. The overflow pipe should be arranged in such a way that the liquid leaves it from the average height of the settler volume, where there are few suspended particles.
For water from the summer shower, there will be enough 1-2 cleaning steps. It will be saturated with the necessary elements, so it is allowed to use it for irrigation of ornamental garden plants. Instead of a drainage system, a septic tank can be added with a storage pit.
For better operation of such a structure at the inlet of the drain pipe, it is recommended to place a filter from a fine mesh.
Do not place a drain on the summer shower in the country near the perennial plants that have a deep root system. Roots can easily penetrate into the pipes, forming there plexus and overlapping the cross-section of the pipes.
For a summer shower intended for 2-3 people, it is enough to arrange only a drainage ditch, in which it is necessary to bury a large-diameter sewage pipe, having previously made holes in it. In addition, it should be wrapped in geotextiles to prevent plugging holes with ground. Above the drainage ditch must be filled with sand, and then covered with soil.
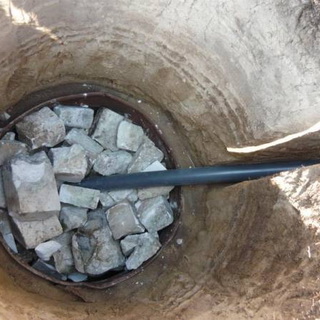
Sewage from a summer shower can be taken to a drain pit, the depth of which should be about 2 m. In order for its walls to not crumble, it is recommended to lay 6-8 old automobile tires with a diameter of 1 m in the pit. They will give the system rigidity.
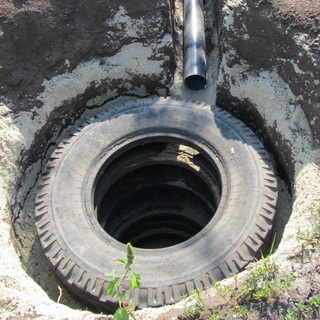
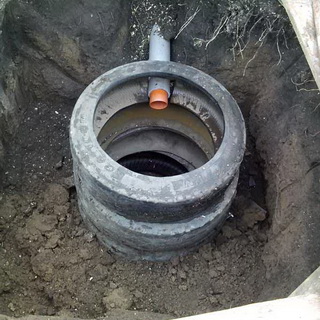
A drain pipe for draining used water from a summer shower must be inserted into a pre-cut hole between the 3rd and 4th tires. To prevent water from stagnating, holes must be made along the sides of the tires.
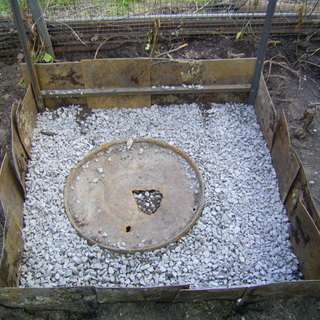
If it is supposed to use the shower in cool weather, then the discharge pipe is recommended to be laid to the ground to a depth of 1-1.2 m. On top of the pit it is necessary to cover, creating an overlap of dense material.
This way of creating a drainage system from old tires or an inverted barrel is more suitable for a summer shower, which is used by no more than 2-3 people. With economical use of water, such a drainage system can last a long time, especially with sandy soil.