Repair of the smallest, but most demanded premises in an apartment or a house should be carried out qualitatively and quickly. The toilet is the most functional room in the house, therefore it is not worthwhile to start long-term repairs here. In this article, we will talk about how and how you can finish the floor in the toilet with your own hands. So, you will save costs and create comfort quickly and efficiently.
Preparation of the foundation for a new coating
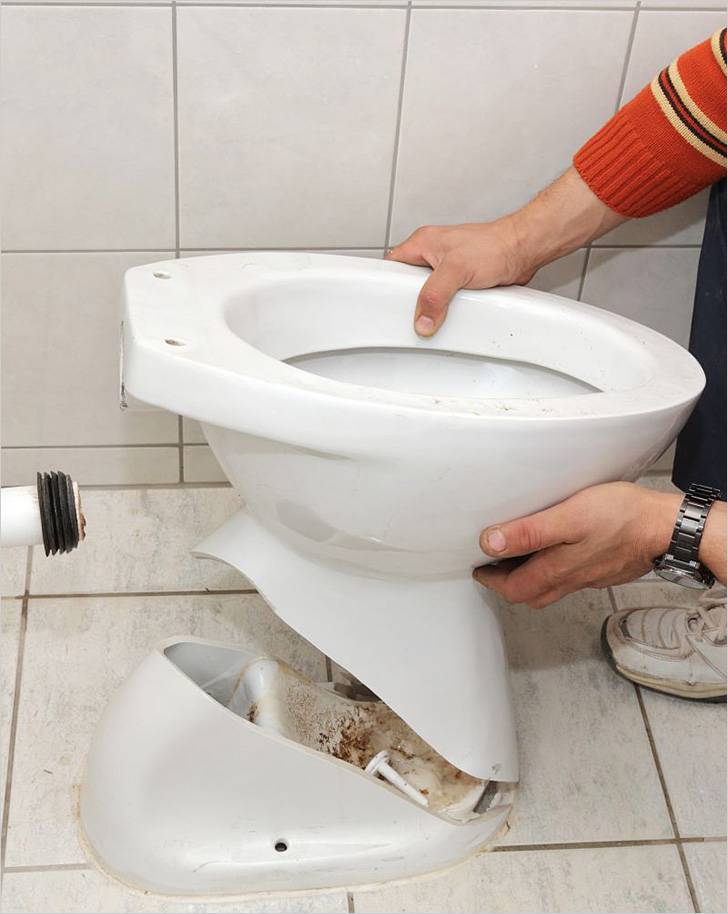
All the preparatory processes before the repair are quite dusty and dirty. First of all you need to inspect the fastening of the toilet bowl and, if possible, unscrew it. Only in this way you can remove the tile without damaging the toilet, of course, if you do not plan to replace it. If you need to replace the toilet before you start removing the old floor covering, remove the toilet and take it out of the toilet.
Note! The toilet bowl should be removed only if you do not plan to use it during the repair work. However, if there is still a need in it, it is better to postpone its dismantling to the process of replacing the pipes.
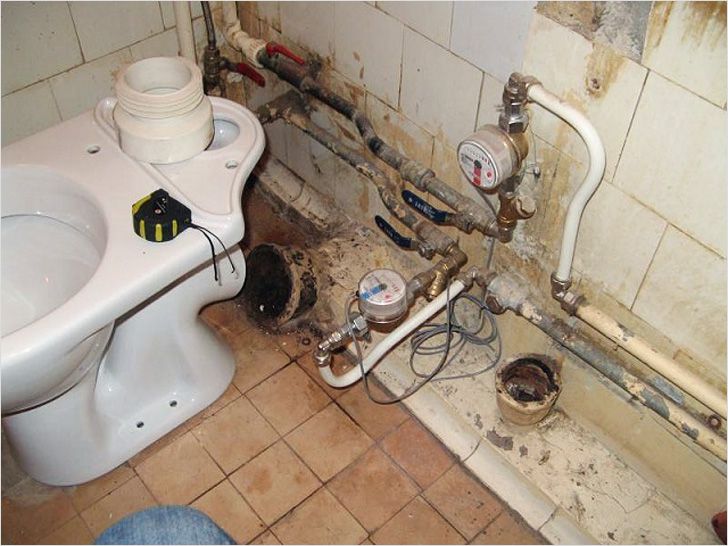
Before dismantling, close the water and drain the remainders from the reservoir. Unscrew the water supply hose. Unscrew the nuts under the shelf and remove the tank from the toilet. If it is hanging, then detach the pipe and remove the tank from the fasteners, which must be dismantled later. To do this, unscrew the dowels or unscrew the nuts from the studs. Place the waste container and then remove the rubber bell from the sewer pipe. If your toilet was installed on cement mortar, then you have to work with a hammer and chisel. Sewer hole should be closed. To do this, you can use a rag or a standard lid, having drained the water from the toilet bowl.
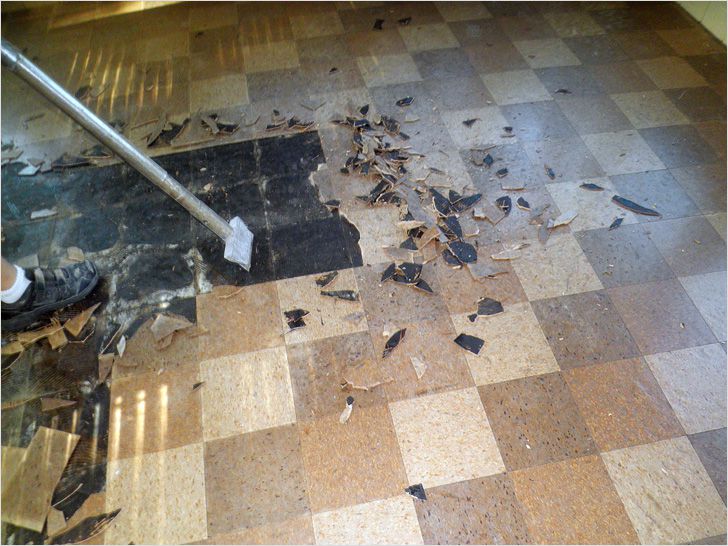
Now it's time to dismantle the tiles. It is worth noting that you do not need to knock down the tiles from the floor to the base of the floor. Screed and the bulk of the plaster in the toilet is not spoiled, even after a lapse of time. Do not clean the floor to smoothness, knock the tiles in black if planning to make a bulk screed. For these purposes, you can use a drill or a hammer and chisel.
After the tiles are brought down, do the cleaning. Take out the remnants of the floor covering, cut out the floor and primetuntuyte. Cracks should be sealed with sand-cement mixture or tile glue.
Waterproofing
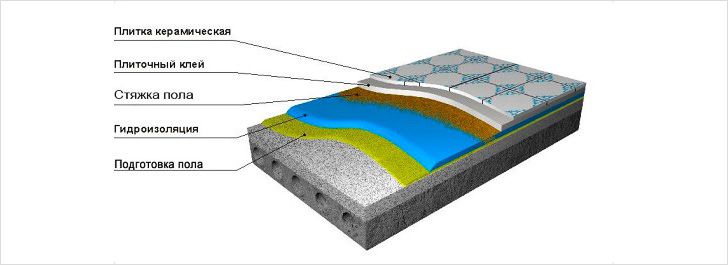
In the water there are many alkalis, acids and salt. To prevent the destructive effect of moisture on the floor, waterproofing should be carried out. It will protect the room from unpleasant odor, fungus and dampness. In addition, reliable waterproofing will prevent flooding of neighbors from below. This is especially important if you live in a block of flats. For insulation of the floor, coating and roll materials can be used. If to speak about the last, their lack that in due course they can exfoliate. But, on the other hand, rolled waterproofing materials are cheaper than their analogues. If you decide to buy a roll-up waterproofing, then choose a self-adhesive option. To glue the roll-on waterproofing, pre-prepare the surface by treating it with a bituminous primer.
Note! Greasing waterproofing is more expensive, but it is easier to apply it to the floor. You can purchase a polymer-cement, seamless, concreting or inorganic cement coating waterproofing. The material fills all pores, which makes it possible to create a strong and reliable water-repellent layer. Thus, the floor screed is sealed and strengthened, which increases the life of the floor.
Concrete compounds are characterized by frost resistance, structural density and strength. They are used for the manufacture of reinforced concrete structures. Cement inorganic mixtures are used for laying ceramic tiles. Seamless waterproofing will provide a reliable water-repellent layer. Apply the material with a spatula, brush or roller. Polymer cement mixtures adhere well to concrete, wood and brick. They can be applied not only on dry, but also on wet surfaces.
Floor screed device
In order for the coupler to be level, lighthouses should be installed. They are special rails. They are distributed on the floor. In the toilet, most likely, will be enough for one or two of these racks. It is fixed to the solution used to fill the screed. Leave the wall about 20 cm and screw the screws into the floor parallel to the wall in a straight line. All hats should be on the same level. Check it with a level. The distance between the screws is 60-80 cm. The mortar should be placed on the screws, the rake is mounted on top of them.

The mortar on which the slats are fixed must dry completely. So, you can level the floor by level. To fill the screed, you can use special ready mixes. To properly prepare them, follow the instructions for use. If you decide to make a screed of a cement-sand mixture, then it is important to maintain a standard proportion of cement and sand, equal to 1: 3.
Note! To ensure the strength of the screed is appropriate, add the adhesive mixture for the tiles in the solution.
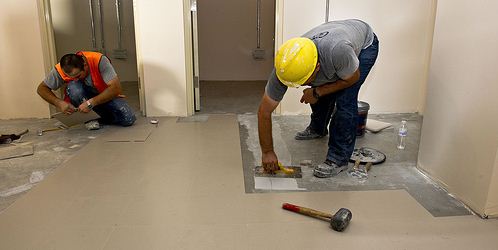
The filling process should be carried out in a single setting. Please note, however, that the cement slump settles in 40-60 minutes. After this time, the solution will be poorly compared, and it is not possible to add water to it. Non-compliance with the technology results in a decrease in the quality of the result. First fill the strip between the lighthouses. Surface level with the rule. In places where there is not enough solution, you need to add it. For air release pierce in some places a layer of solution. It is possible to get on the surface of the screed only after a few days. To form a reference island, use a drywall or chipboard sheet. After a day, remove the beacons, and fill the grooves with grout. Smooth the surface with a trowel or a trowel. After the full hardening of the screed, you can proceed to finish the floor.
The floor in the toilet should not be slippery. Therefore, choose materials for finishing with a rough surface. The floor covering must be resistant to moisture and abrasion. It must be waterproof in case of leaks. All these requirements correspond to the tile. However, the market of building materials offers buyers a wide range of floor coverings, differing in their original design. Some of them are successfully used for finishing the floor in the toilet.
Tiles of synthetic materials
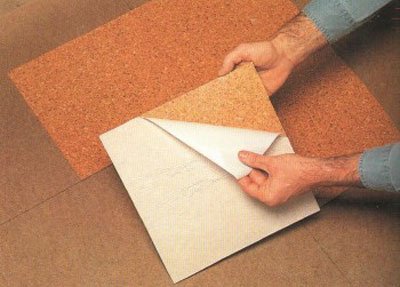
This is an economical option for finishing the floor in the toilet. Polyvinyl chloride tile is a modern material for lining, which is made with the addition of amorphous PVC, plasticizer and powder filler. The material is not inferior to the characteristics of either ceramic or glass tiles. However, PVC tiles can not be laid in places where the air temperature exceeds 50 °, in particular near heating systems. The material is dense, provides sound and heat insulation, is durable, heat-resistant, waterproof, and wear-resistant. Standard sizes are 150 × 150 mm, 200 × 200 and 300 × 300 mm with thickness of 1.5 cm, 2 cm and 2.5 cm. Tiles with different patterns and color solutions are produced, and even with a relief surface.
Quartz tile is a kind of tile made of synthetic materials. It is made at high temperature indices by the pressing method. The composition of the material is a mixture of vinyl, pigments, quartz sand, additives and plasticizers. Quartzvinil is wear-resistant, has anti-slip properties, chemical resistance and fire resistance. Dimensions are 300 × 300 and 600 × 600 mm. Of course, such a tile can only fit in toilets of large sizes. The color palette is diverse, there is even an imitation of marble in the assortment.
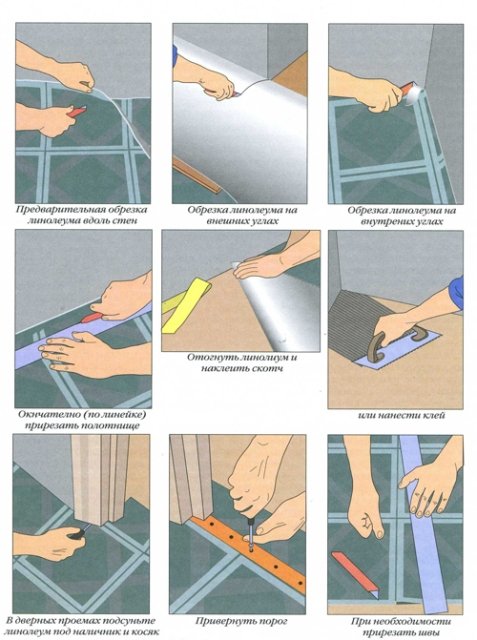
Laying synthetic tiles is a time-consuming process. Finishing the joints of the floor in the doorways, with walls and thresholds is carried out with the help of special products such as skirting boards, doors and trim.
For laying such a tile, special glues are used. Pre-coat the primer with a primer layer made from bitumen and gasoline in a 1: 3 ratio. After 8-10 hours proceed to the layout of the floor. Then set the beacon rows along the berthing cords. On the base of the tile, apply glue to the floor, then lay the tile and press it. After the lighthouses are ready, lay the remaining tiles. Acrylic, rubber or vinyl glue is used for gluing quartz vinyl tiles. The method of installation does not differ from the installation of PVC tiles.
Linoleum
Among the advantages of the material - practicality, lack of seams, ease of installation and ease of maintenance. The market provides customers with a variety of linoleum, which allows you to choose the optimal price / quality ratio. The richness of textures and colors makes it possible to fit in linoleum coating absolutely in any interior. The material can imitate granite, marble, wood, stone, etc.
Note! A certain type of glue is suitable for each coating. For linoleum on a fabric basis - dispersive and bitumen-synthetic glue, for a material with a heat-insulating base - dispersion adhesive, for a base linoleum - mastics based on rubbers and synthetic resins.
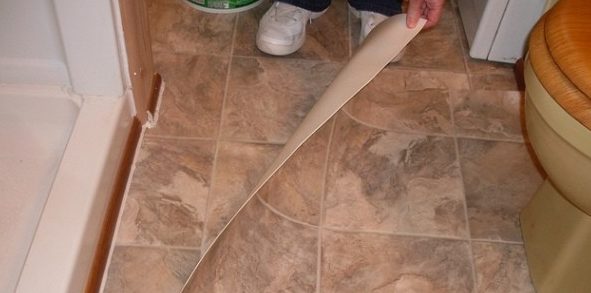
The material should lie in the room for 2-3 days. Then you can start cutting. However, before slicing, consider shrinking the material. Lay it on the base and leave for 48 hours so that the linoleum can level. On the back side, apply glue, lay the cloth and roll it with your hands, and then with a bag of sand. The panels must be laid with a 3 cm overlap. The edges do not need to be smeared with mastic or glue. After the glue dries, they can be cut with a special knife, and glue the edges with the same glue as the entire cloth. Now you can to install skirting boards.
Ceramic tiles of non-standard shapes
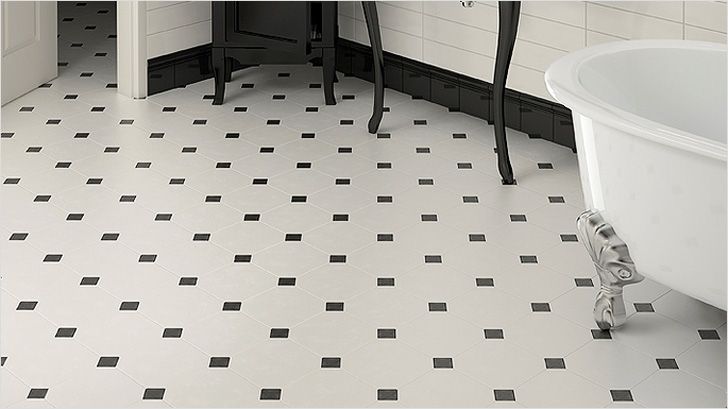
If you decide to distinguish yourself and have purchased a six- or octagonal tile for the floor in the toilet, you should take into account that the way it is laid is a little unusual. The installation begins with marking and surface stamping. Then you should lay out the first frieze row. It consists of square or rectangular tiles. The finishing row consists of the same tiles. Perpendicular to these rows, 2 cords are installed, and on them are laid lighthouse strips of hexagonal tiles. In the corners lay quarters and halves of tiles of unusual shape and perform all the masonry in the usual way.
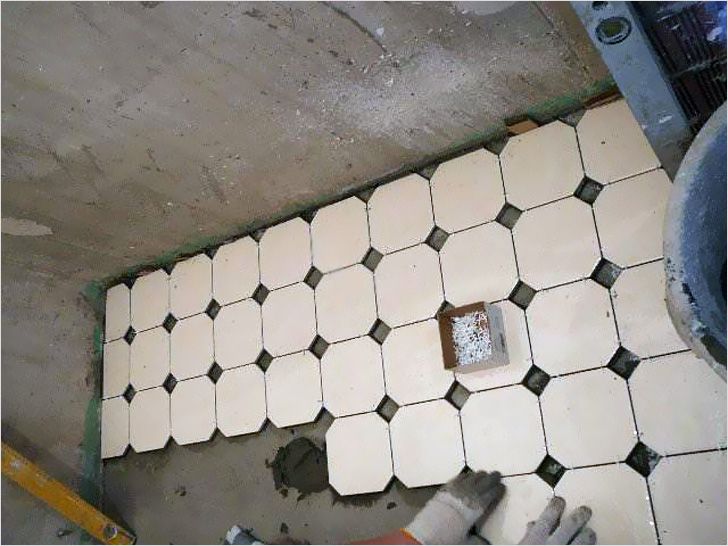
The laying of the floor with octagonal tiles also begins with a finishing and frieze series. Then there are lighthouse rows and the subsequent laying of the tiles according to the scheme.
Tiles of standard sizes
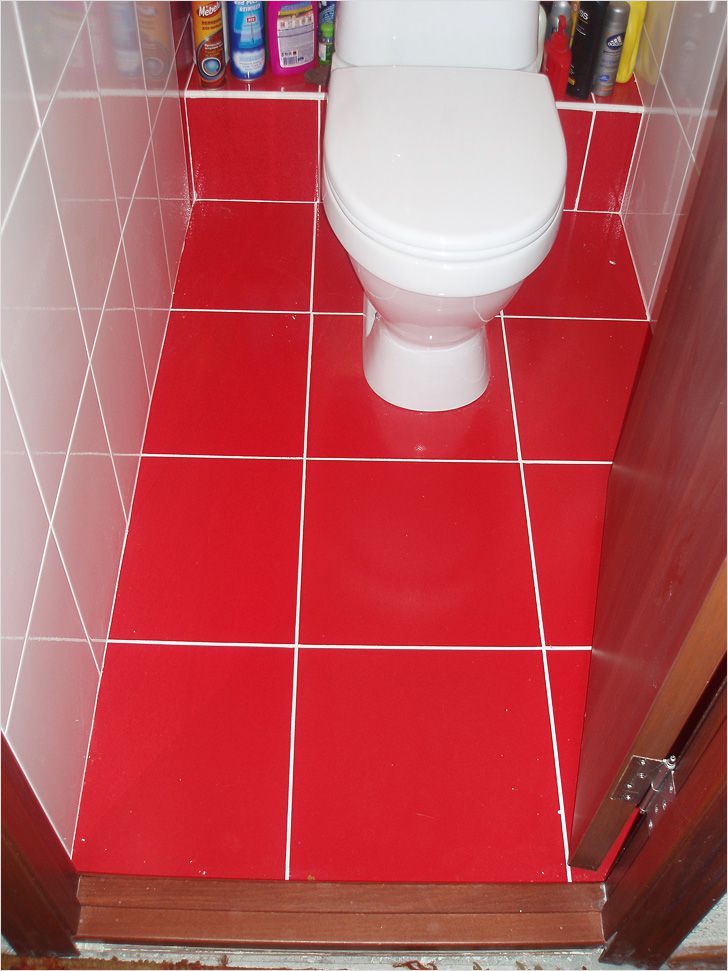
Ceramic tiles are made of kaolin clays, pigments and additives. Mass is pressed and fired. The material is moisture resistant, has high strength. The assortment is so wide that the coating can be chosen for any style of decoration. Ceramic tiles can be corrugated, embossed, smooth, multi- and one-color, unglazed, glazed and partially glazed.
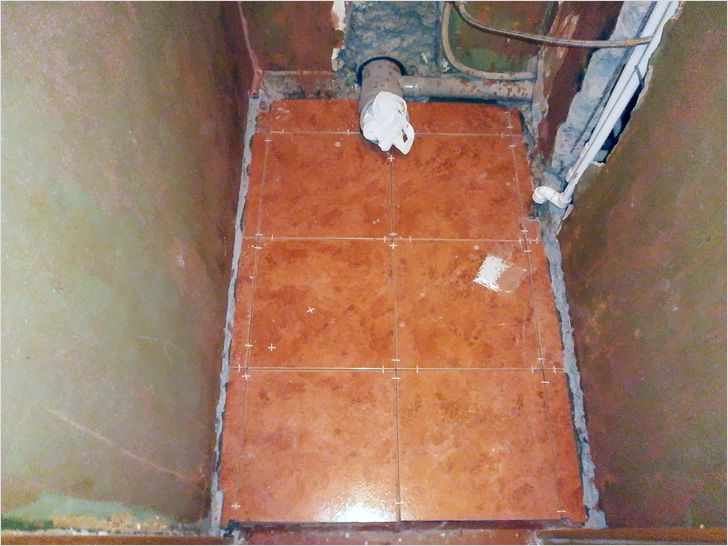
When laying tiles on the floor, a solution or glue is applied to the wetted floor screed. The floor can be laid diagonally or directly next to each other. Laying by the "straight line" method begins with the installation of rows adjoining the wall. Then there are the following rows towards the exit from the toilet. Tile should be moistened with water paint brush, and then squeeze to the floor, upsetting to the desired level with a special rubber hammer or wooden handle of the blade. Remove excess adhesive with a spatula. The size of the seam is fixed with steel pins, which should be removed after laying about 15 tiles.
The quality of the lining and the leveling of the surface is determined by the building level. Differences should be eliminated by adding or removing glue as necessary. Swipe the stitch along the seam. If it does not catch the corners of the tiles, the seam is even.
Inclined rows of masonry should be made at an angle of 45 °. To do this, pull the mooring line, which will allow to control the straightness of the joints. In other respects, the technique corresponds to the "straight line" method.
So, there are enough ways of laying the floor in the toilet, which makes it possible to make a cover corresponding to the possibilities of the wallet and personal preferences. If you have any questions about the topic, then ask them specialists who work on the site. If necessary, you will be provided with additional advice. Write comments to the article!
Video
The following video shows the technology of laying ceramic tiles on the floor:
Repairing the toilet of a residential apartment or a house is a quick process and requires careful and thoughtful preparation. This is the most demanded place in the apartment and tighten the construction process in it will not work.
Without touching the utilities and plumbing, we will consider one of the most important positions of the bathroom arrangement, namely, how to avoid mistakes by laying the floor in the toilet. How to avoid unnecessary waste, create comfort and coziness, and also make coverage qualitatively.
 Before the beginning of the repair it is necessary to determine the choice of materials and the type of work to be done
- selection of the type of toilet bowl, determination of the place and method of its attachment;
- the definition of styles and details of the interior;
- calculation and purchase of necessary building materials;
- the dismantling of doors and materials covering the walls, ceiling, floor;
- if necessary, dismantling and replacement of communication pipes;
- leveling the floor;
- leveling and repair of walls and ceiling;
- decorative floor finish;
- installation of a toilet bowl;
- decorative wall decoration;
- door installation.
If necessary, any stage can be deleted, but the general order is not changed. All works carried out during the repair of the bathroom are dirty.
Dismantling and cleaning
 Before removing the structure, drain all water
If the repair is not planned to replace the toilet bowl with a new one, then before dismantling the tiles, it is necessary to carefully remove the toilet bowl without damaging the fasteners. Before removing the toilet, close the water, drain the tank and remove it, having previously unscrewed the supply hoses.
If the plumbing has been glued to the cement slurry, then using it repeatedly, most likely, will not work. When dismantling with a perforator or a chisel, it can not be saved.
Drainage drainage covered with rags or a standard lid, which must be purchased in advance at the building store.
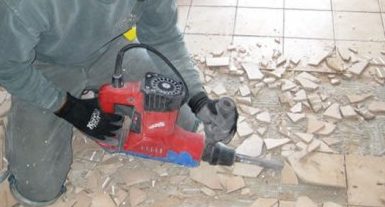
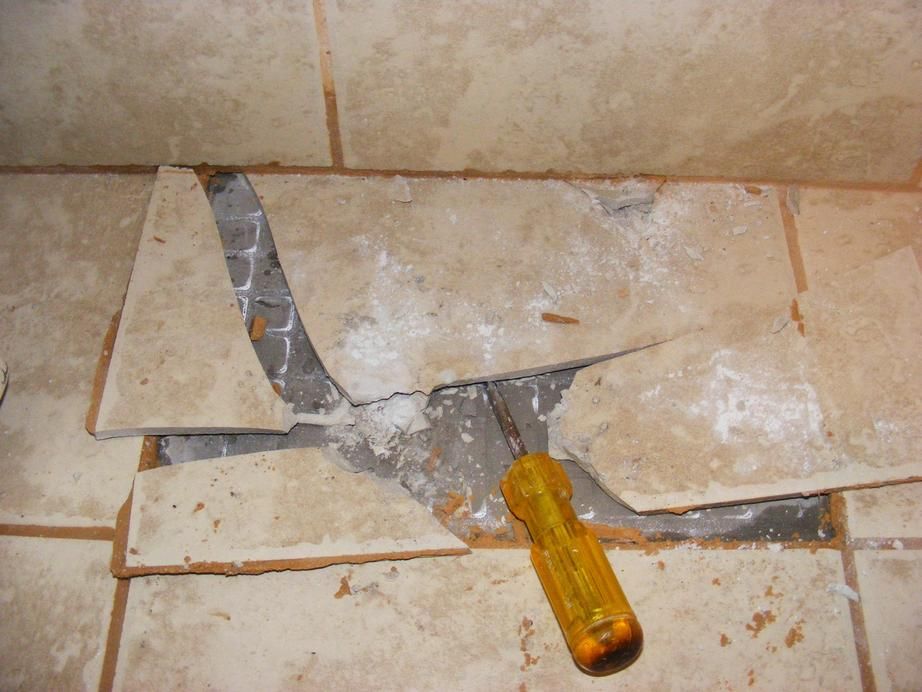 After you took off and carried out all the plumbing, it's time to knock down the tile. The toilet, usually, does not differ in the large sizes, therefore bring down materials up to the basis of walls and overlappings.
This should be done so that the new leveling layers do not eat too much space. If the size of the bathroom is allowed, then knock down to the base is not necessary. As a rule, the cement base does not deteriorate over the years.
All dismantled material must be removed from the premises. Floors should be cleaned and treated with a primer of deep penetration.
If cracks are found in the base, they must be "healed", treated with a tile adhesive or a concrete solution with the addition of plasticizers.
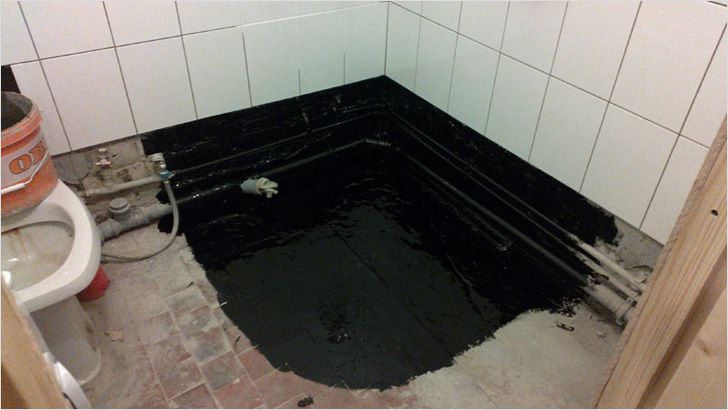
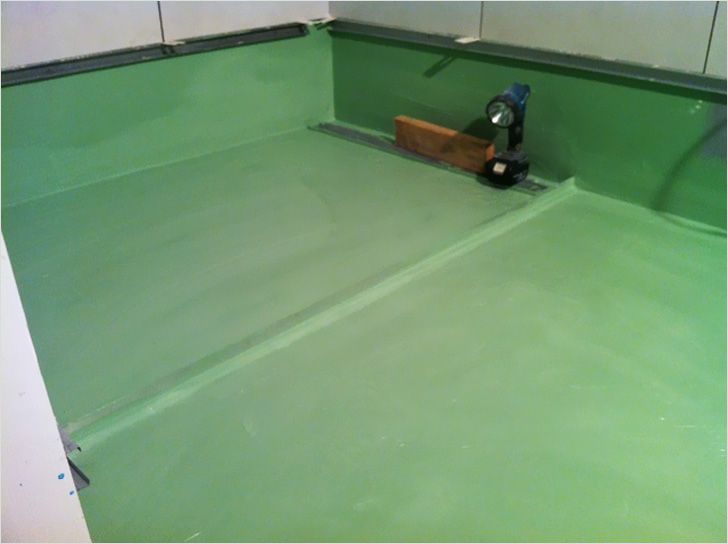
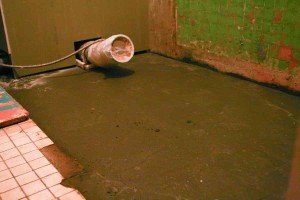
![]() Waterproofing will protect against the appearance of fungus
Waterproofing will protect against the appearance of fungus
Situations in life are different, and in order to avoid negative consequences on the ceiling in the toilet, serious work should be done on waterproofing.
This will protect the room from the reproduction of mold and fungus, and as a result of the appearance of unpleasant odors. In a private house, this point is not so relevant, and owners of apartments in a multi-storey building can not do without this process.
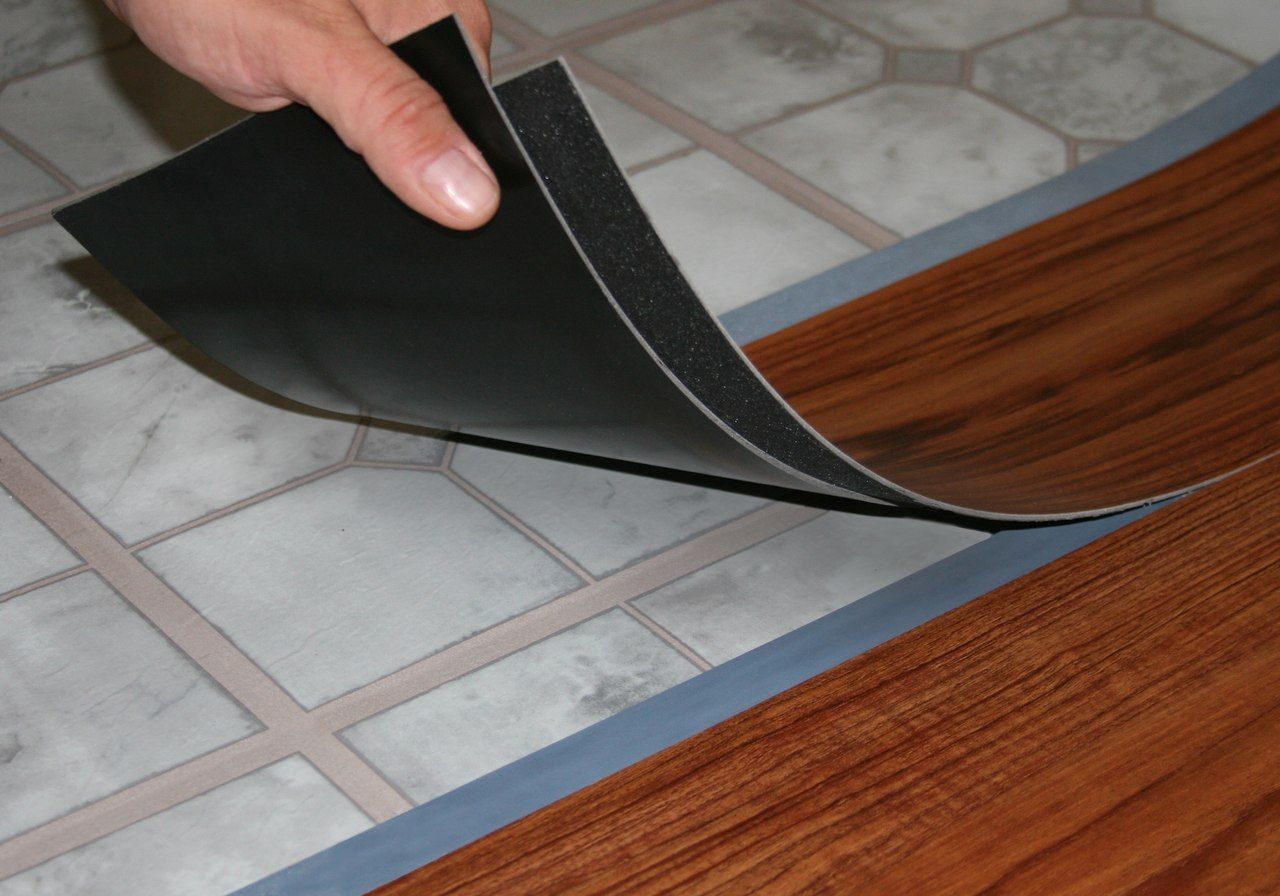
Use can be roll material or plastic coatings. The choice is entirely yours. Rolls have the disadvantage of peeling off the substrate over time, but are much cheaper than the lubricating ones.
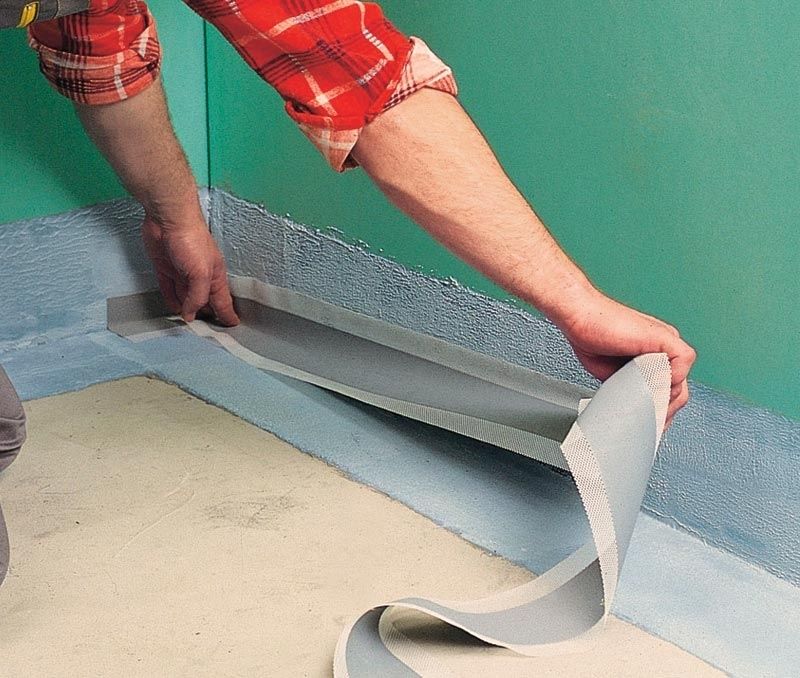 The output can be self-adhesive waterproofing. Before its flooring, it is necessary to treat the surface of the floor with bituminous mastic. Foam waterproofing is much easier to apply, and it is guaranteed to penetrate into all "hard-to-reach" places.
The floor can be treated with seamless ground material on a polymer-based substrate, while simultaneously strengthening the coating and increasing its service life.
Specificity of the use of coating primer
| № | Type of composition | Recommendations for use |
|---|---|---|
| 1 | Concreting | They are distinguished by their special strength, frost resistance, density of structure. Recommended for use in the manufacture of reinforced concrete structures. |
| 2 | Cement inorganic | Used for laying ceramic tiles and porcelain tiles. |
| 3 | Seamless insulation | Provides 100% water-repellent layer. Apply with a spatula, brush or roller. |
| 4 | Polymer-cement | Good adhesion with any type of substrate. For use, it is not necessary to wait for absolute drying of the substrate, use on wet is permissible. |
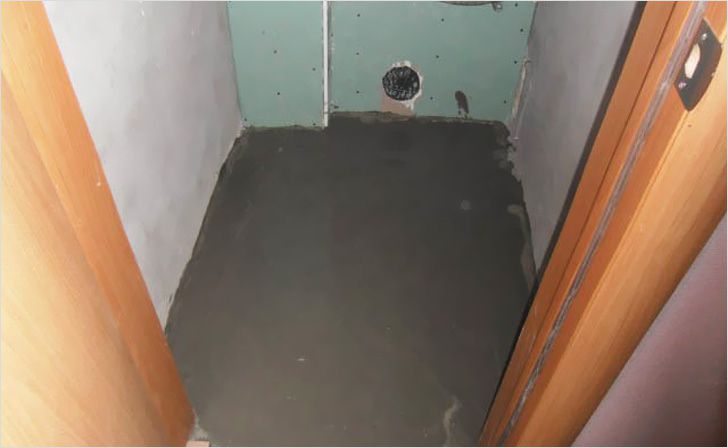
 Do not use plaster mixes in bathroom and toilet
 The device of the sexual toilet base is no different from any other screed. Due to fluctuations in humidity, it is not recommended to use mixtures with the addition of gypsum. All works are carried out in accordance with established lighthouses. For a typical toilet, it is enough to install a pair of racks.
After fixing the slats on the cement mortar, carefully check the position with the horizontal construction level. For self-preparation of mortar for roughing screeds, you should take the material in proportions (sand, cement, crushed stone):
| Concrete grade | Cement brand 400 | Cement grade 500 |
|---|---|---|
| 150 | 1 / 3 / 5 | 1 / 4 / 6 |
| 200 | 1/ 2,5 / 4 | 1 / 3 / 5 |
| 250 | 1 / 1,8 / 3,3 | 1/ 2,5 / 4 |
| 300 | 1 / 1,5 / 3 | 1 / 2 / 4 |
On 10 kg of a dry mix it is usually accepted to take about 1,7 liters of water. The solution consumption per 1 m2 is 9-10 kg with a layer height of 5 mm. For more information on filling screeds, see this helpful video:
For the final leveling layer, it is better to use a ready dry mortar mix of the filling floor.
Finishing Coating
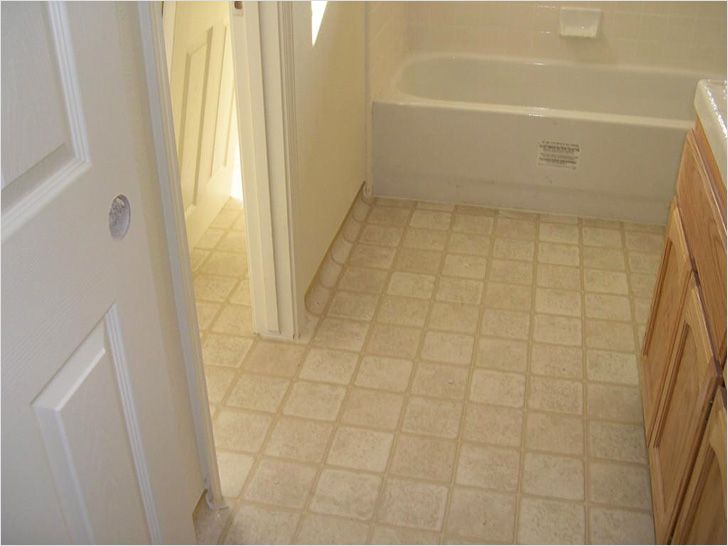
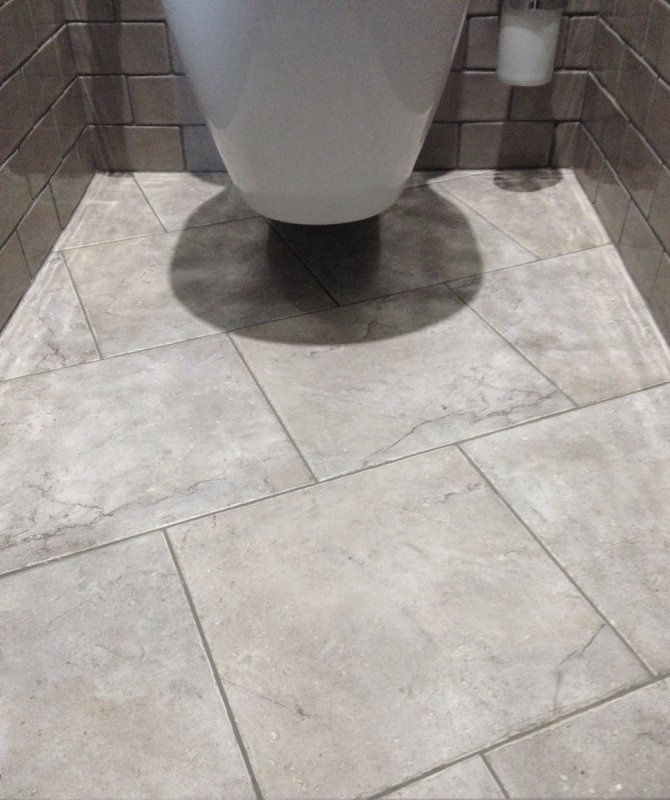
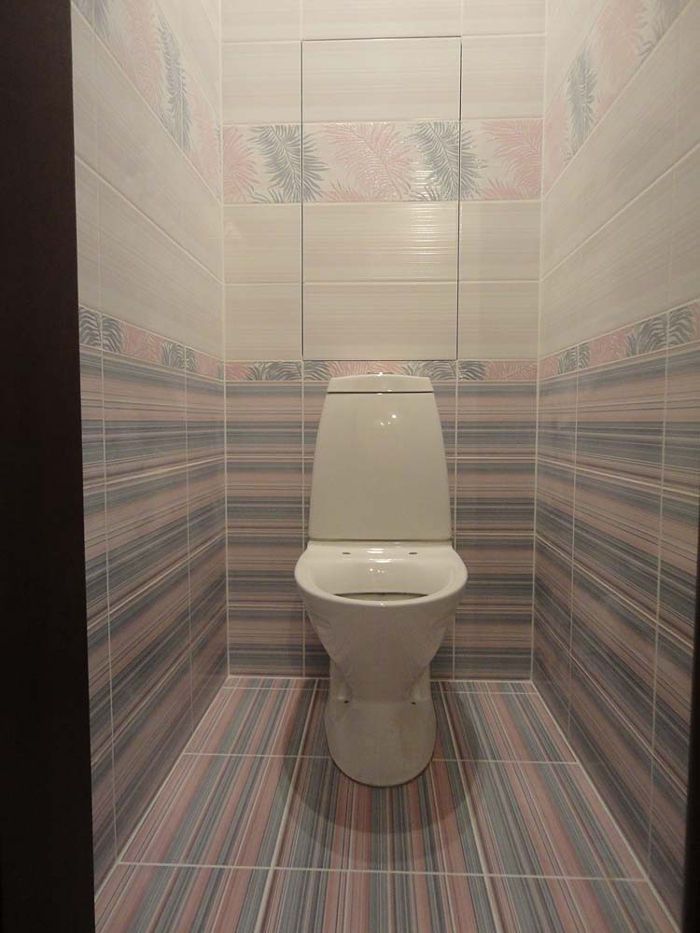 Ceramics or tiles - one of the most practical coatings for wet rooms
 After the floors are brought to a perfectly flat surface, the floor covering can be laid any, including roll.
That is, if you want, you can lay linoleum. But most often in the bathrooms are used ceramic tiles.
What are the requirements for the material used in the toilet on the floor? The material used must be:
- relief, rough, not slippery;
- not susceptible to moisture level changes;
- resistant to chemically aggressive substances.
In the most popular place in the apartment should be covered with a coating, resistant to abrasion. In the modern construction market, the choice of materials that meet all these requirements is quite extensive.
Stone, tile and granite
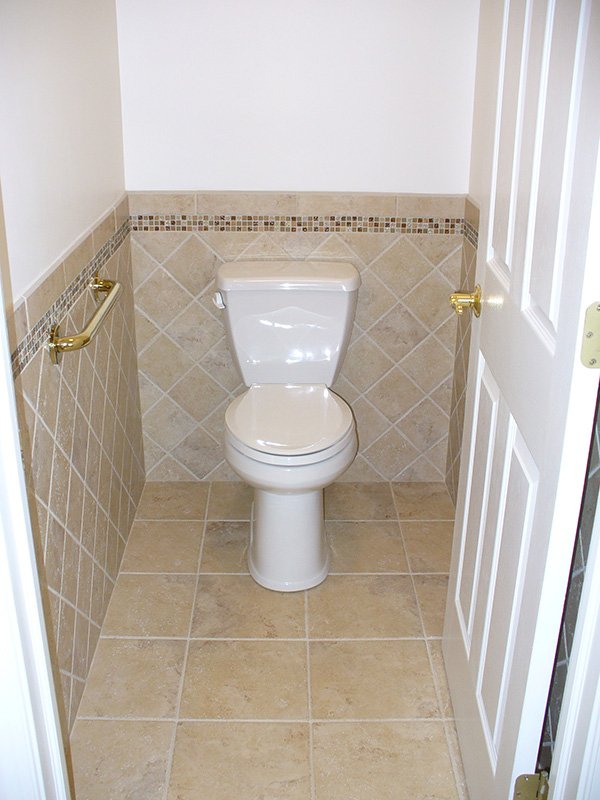
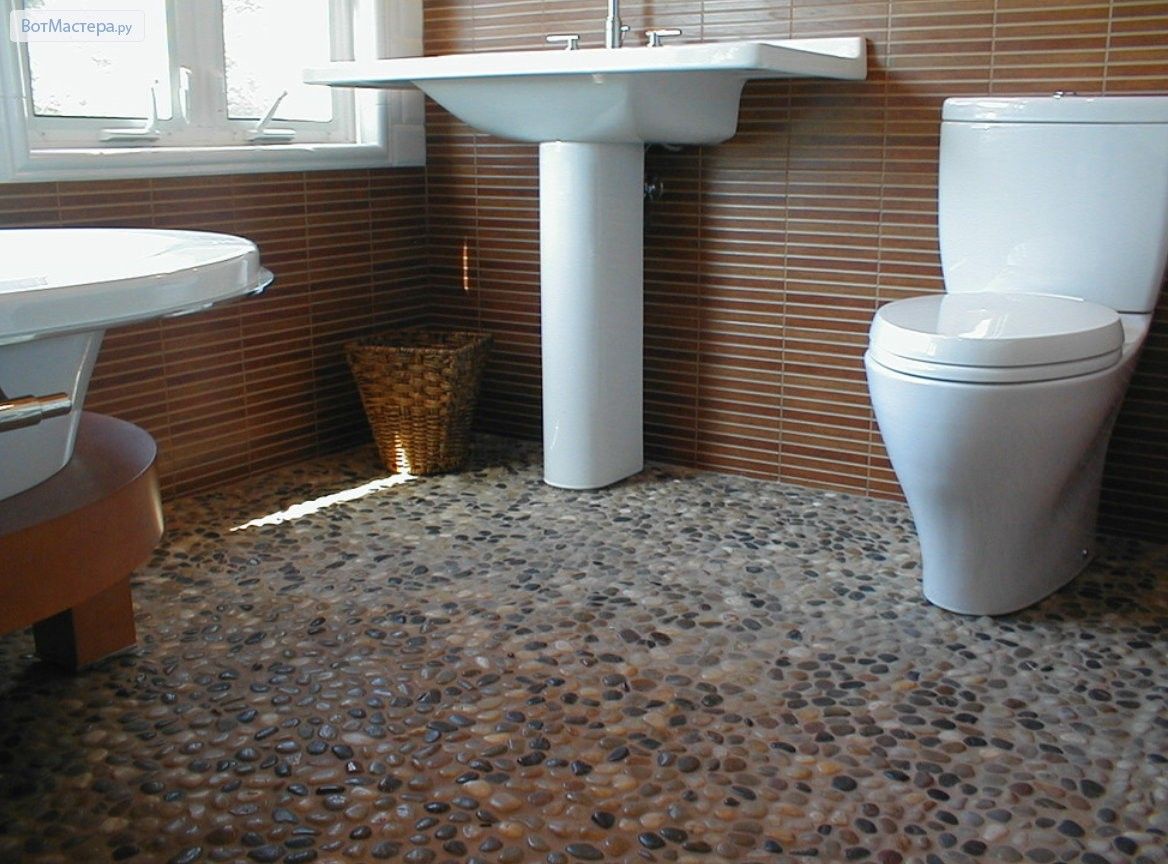 The floor of stone tiles will be the highlight of the bathroom
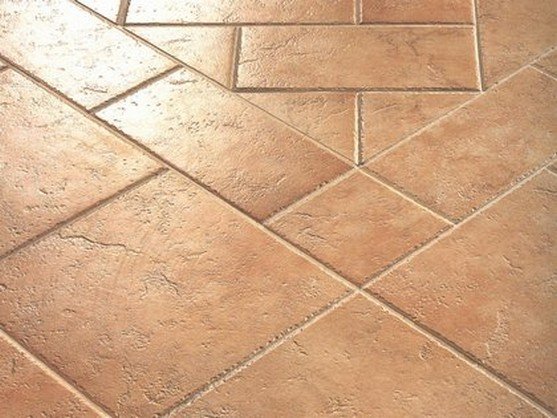
 The most common as a decorative coating in the toilet are tile and stone tiles. These materials have a high level of strength, the water absorption coefficient is close to zero, they are resistant to abrasion.
At the same time, modern manufacturers produce whole lines of interior design solutions, where floor tiles are supplemented with wall material in tone and decoration in the form of skirting boards, friezes and decor elements. All this allows you to make the floor in the toilet not only practical, but also beautiful.
Any kind of conditionally stone coverages is not susceptible to the action of aggressive substances, due to this they create additional protection and are very easy to care for. For information on how to fix the toilet with tiles, see this video:
The stone has one significant drawback - it's a cold material and this must be taken into account when laying it. This can be corrected by installing a system of warm floors. In addition, stone coverings are rather complicated in laying, work requires certain skills. In addition, the cost of the material is quite high.
When selecting a tile, pay attention to the markings on the package. The tile, intended for laying on the floor, has a strength of at least grade 3.
New materials
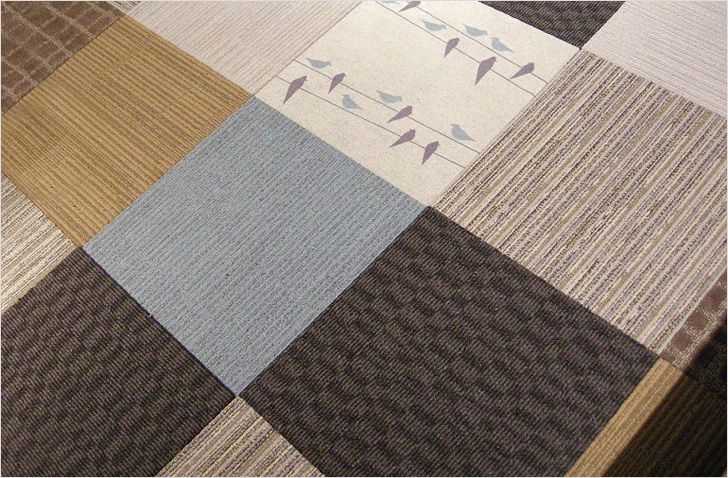
 Quartzvinil has a rough surface, which is important for wet rooms
 In building stores, you can purchase materials that successfully replace ceramic tiles and stone. PVC tiles or quartz vinyl tiles have excellent performance, but are much cheaper in price.
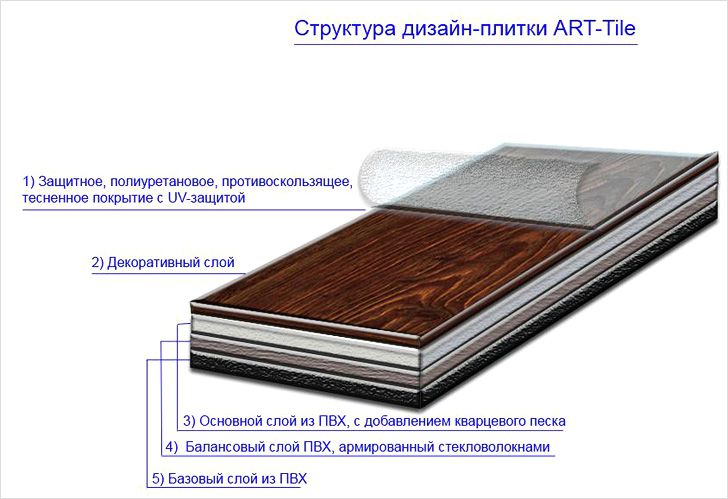
Quartz vinyl coating is a tile made of a mixture of synthetic and polymeric materials, sand and vinyl binder. It is produced by pressing with thermal treatment.
Quartzvinil is durable, wear-resistant, non-slip, not subject to aggressive chemistry, refractory. This coating was developed as a material for floors in rooms with a high level of patency. The aesthetic data of the tiles are diverse, differ in the variety of textures, often imitating natural materials.
 PVC tiles - one of the most economical materials
 The economic option is PVC tile, which in its qualities and composition is similar to the usual linoleum. The tiles are made by extruding PVC granules, plasticizers, stabilizers and fillers, stabilizer.
Decorative diversity is achieved by adding dyes to the mixture. The material has a high level of thermal insulation, is resistant to mechanical influences and is not influenced by chemically active substances. For more information about this tile, see this video:
 For the installation of PVC or quartz vinyl materials, special adhesives are used. Pre-screed is recommended primed with a mixture of bitumen and gasoline (1k3).
After completely drying after 8 hours at least, you can start laying the tile material. The glue should be applied to the base of the tile, then it should be pressed firmly to the floor.
Regardless of the material chosen, you should remember that you often step on the floor of the toilet with bare feet, so when making repairs, take into account the tactile sensations of the material and, if possible, it makes sense to arrange a system of warm floors.
You can make a quality floor in the toilet yourself. Laying the floor in the toilet is not a difficult process, but very responsible. Therefore, let's talk about this in more detail.
- 1 Material selection
- 2 Aligning the surface
- 2.1. The final stage
Material selection
Of course, the floor is also a room with special conditions, like a bathroom. This is an increased level of humidity, because of which not every material becomes suitable for use.
As practice shows, the majority of our compatriots choose between a fairly narrow list of finishing flooring materials:
- Linoleum. It is cheap, quite practical, has a wide assortment, which allows to choose the optimal coloring for any interior design. Alas, even seemingly moisture-resistant products are still not particularly friendly with moisture and water. Weak places are joints. If you choose the same linoleum, pay special attention to the edges and joints, so that they are as tightly sealed as possible;
- Laminate. More affordable analogue of parquet, which looks similar, in fact. Agree, this material is not entirely correct to use in the toilet. And according to its characteristics, the laminate has not gone far from linoleum in terms of its effectiveness in the bathroom;
- Ceramic tile. Perhaps the best that exists in our time. Tiles can be selected among the impressive variety of collections, independently laid. The material is absolutely not afraid of moisture, and its price range pleasantly pleases consumers.
As you understand, the choice is not so difficult to decide. Although everyone has their own opinion on this matter. Anyway, floor repairs need to be done.
Surface Alignment
You can not simply remove the old flooring material and immediately replace it with a new one. If there was a tile, there will inevitably be a lot of chipping, unevenness. Plus, the floor itself can have swings and irregularities in its geometry.

For such facilities as bathroom and toilet, an important stage of floor repair is waterproofing and leveling. We note at once that waterproofing is recommended to be trusted by specialists, since it is a very delicate, delicate and responsible work. But you can even level the floor yourself.
In fact, the alignment is carried out by two actual methods in our time:
- Concrete screed;
The concrete screed was done before, because there was no special choice. She showed herself well, allowed to really achieve an ideal flatness of the floor. Nevertheless, this work takes a lot of effort and money. Plus, it's very time consuming.
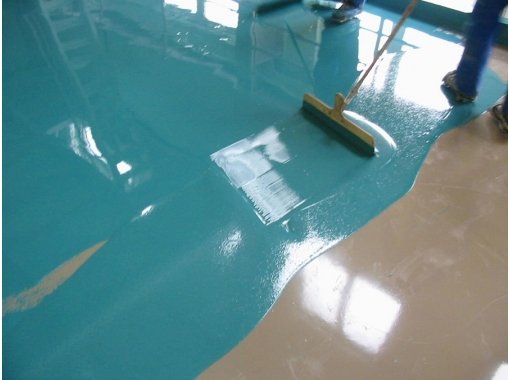
We want to do everything quickly, having spent a minimum of our free time. Of course, not at the expense of quality. For this purpose, self-leveling floors have been developed. A great alternative to a concrete screed.
The created mixtures have unique properties. They should be simply mixed in accordance with the manufacturer's instructions and poured on the floor. A few simple movements for uniform distribution of the mixture on the floor, and you can leave, expect drying out. What is most interesting, the drying process of the floor can be about six hours. Of course, this depends on the mixture itself, its characteristics, as well as the thickness of the embedded layer.
Anyway, the bulk floor clearly demonstrates its advantage over the concrete screed. The mixture fills all voids, notches, just "eats" into the surface, thereby creating a solid foundation for laying future flooring materials.
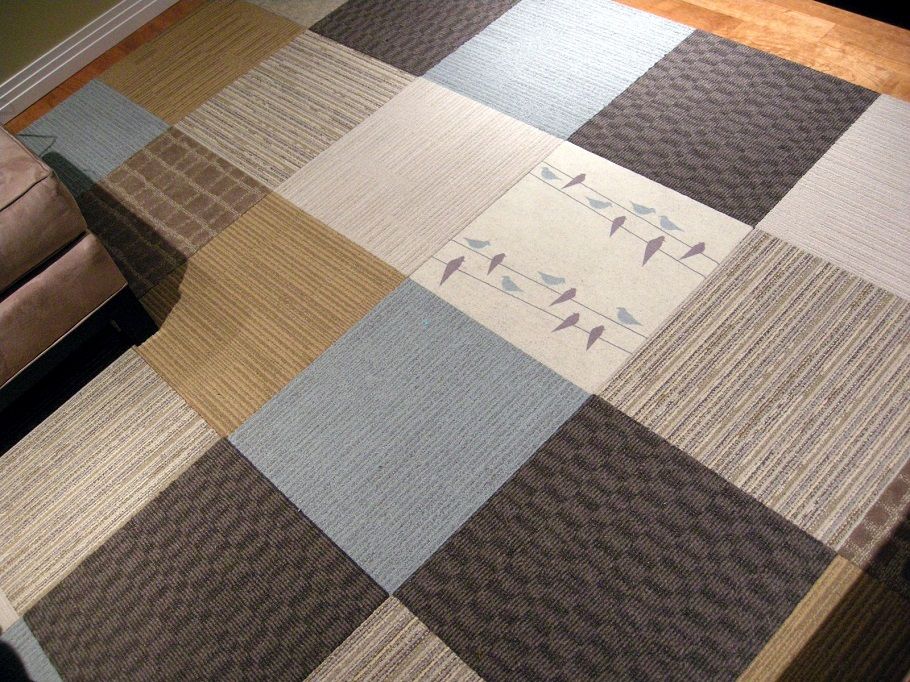
Do not forget about polymeric self-leveling floors. Due to special additives, they can represent ready-to-use floor by themselves. You can supplement it with toilet rugs, for example. Just think in what color you want to see the surface.
The final stage
The last stage on the way to completing the repair of the floor in the toilet is already directly laying the floor material. Of course, do not forget about the basic plumbing work, the features of the connection of the toilet and other elements of the room, which should be thought about before the final styling begins.
- Make sure that the tile you choose is really outdoor. This can be done by looking at the packaging. On it there should be an icon with a footprint. If the hand is represented, then this material is intended for walls. Accordingly, it can not be laid on the floor.
- An important issue is the size of the plates. With a larger tile, floor can be laid more quickly, while small tiles do not have to be practically cut. Plus, focus on the dimensions of the room itself. The floor should look harmonious, and because too much tile in a very small toilet will be inappropriate.
- Carefully apply the adhesive on the floor or back of the tile. It is extremely important to avoid the formation of voids under the tiles, as this can lead to their breaking.
- Act neatly and do not rush. Haste is often the cause of unsuccessful repairs, the shortcomings of which will only appear after you have started to operate the premises.
- Before starting repair, make a clear plan and follow its points. So you do not have to remember every time what actions are taken further, or what process is followed.
As you can see, it is possible to practice sex in the toilet without assistance. To do this, you just need to pick up quality finishing materials, think through each stage of the repair, and follow the planned plan.
A competent approach in combination with properly selected materials will yield an excellent result and a source of pride. After all, you have done everything with your own hands.
Greetings, my dear readers. I will not delicate and immediately go to the topic of our today's conversation: the floor in the toilet with their own hands.
The house is a purely functional room. In it everything, including the floors, must obey one goal: to provide the user with an optimal work of the smooth muscles of the excretory system, including intestinal peristalsis.
I warn the homegrown prudes: from the foregoing, it does not follow that I will talk today about indecent things. To the exact opposite: I intend to dedicate you today to the process of transforming a strictly intimate room into a comfortable, extremely comfortable, comfortable and peaceful place.
Not for nothing, the unforgettable Avicenna, back in the 11th century AD wrote: "... for your own health and longevity, send your natural needs in good spirits and with pleasure."
The levels of humidity and temperature in the toilet do not often go beyond the usual parameters for a dwelling. However, the finish of the floor in it still has its own characteristics. When you pick up the cladding material, I recommend that you take into account the following.
- Fluids on the floor in the toilet are spilled a little and rarely enough. However, what gets into the finish, even in small volumes, is saturated with biologically (BAS) and chemically active substances.
- Vapors in the toilet, as compared to the same bathroom room, is also small. However, most of them are active chemical compounds that are badly and strongly smelling (cyclic, aromatic and unsaturated hydrocarbons, hydrogen sulphide, ammonia, etc.).
These initial circumstances lead to such priorities in the choice of materials:
- The floor should be smooth and easy to clean (it should be easy to wash).
- Important and safety of the coating - it should not be slippery. Proceeding from this, it is best to choose a finish with a slightly rough or embossed surface.
- The facing should be resistant to high humidity and abrasion.
So, what to choose for laying yourself on the floor of the toilet?
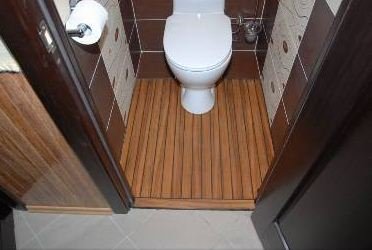
- From wood based materials and analogues from the products of its processing (chipboard, MDF, laminate, plywood), I advise you to refuse immediately. They are organic and porous. The fact that the tree quickly absorbs small sprays is good only at first glance. In practice, the same: a warm, beautiful, tactilely pleasant floor will quickly become a haven for harmful microorganisms.
- Optimum variant for a covering is a ceramic tile, faience or kaolinovaja (white from the underside, on a break brilliant and fine-grained).
- It is suitable for work and granite. It is chemically stable, dense and strong facing material, the price of which is slightly higher than floor tiles.
- A good budget solution is for you a choice of linoleum. The only limitation, about it - this is for durability to be a semi-commercial, and not a household class.
- Look also at fairly new types of cladding. For example, quartz vinyl or PVC-tiles, polymeric bulk floors.
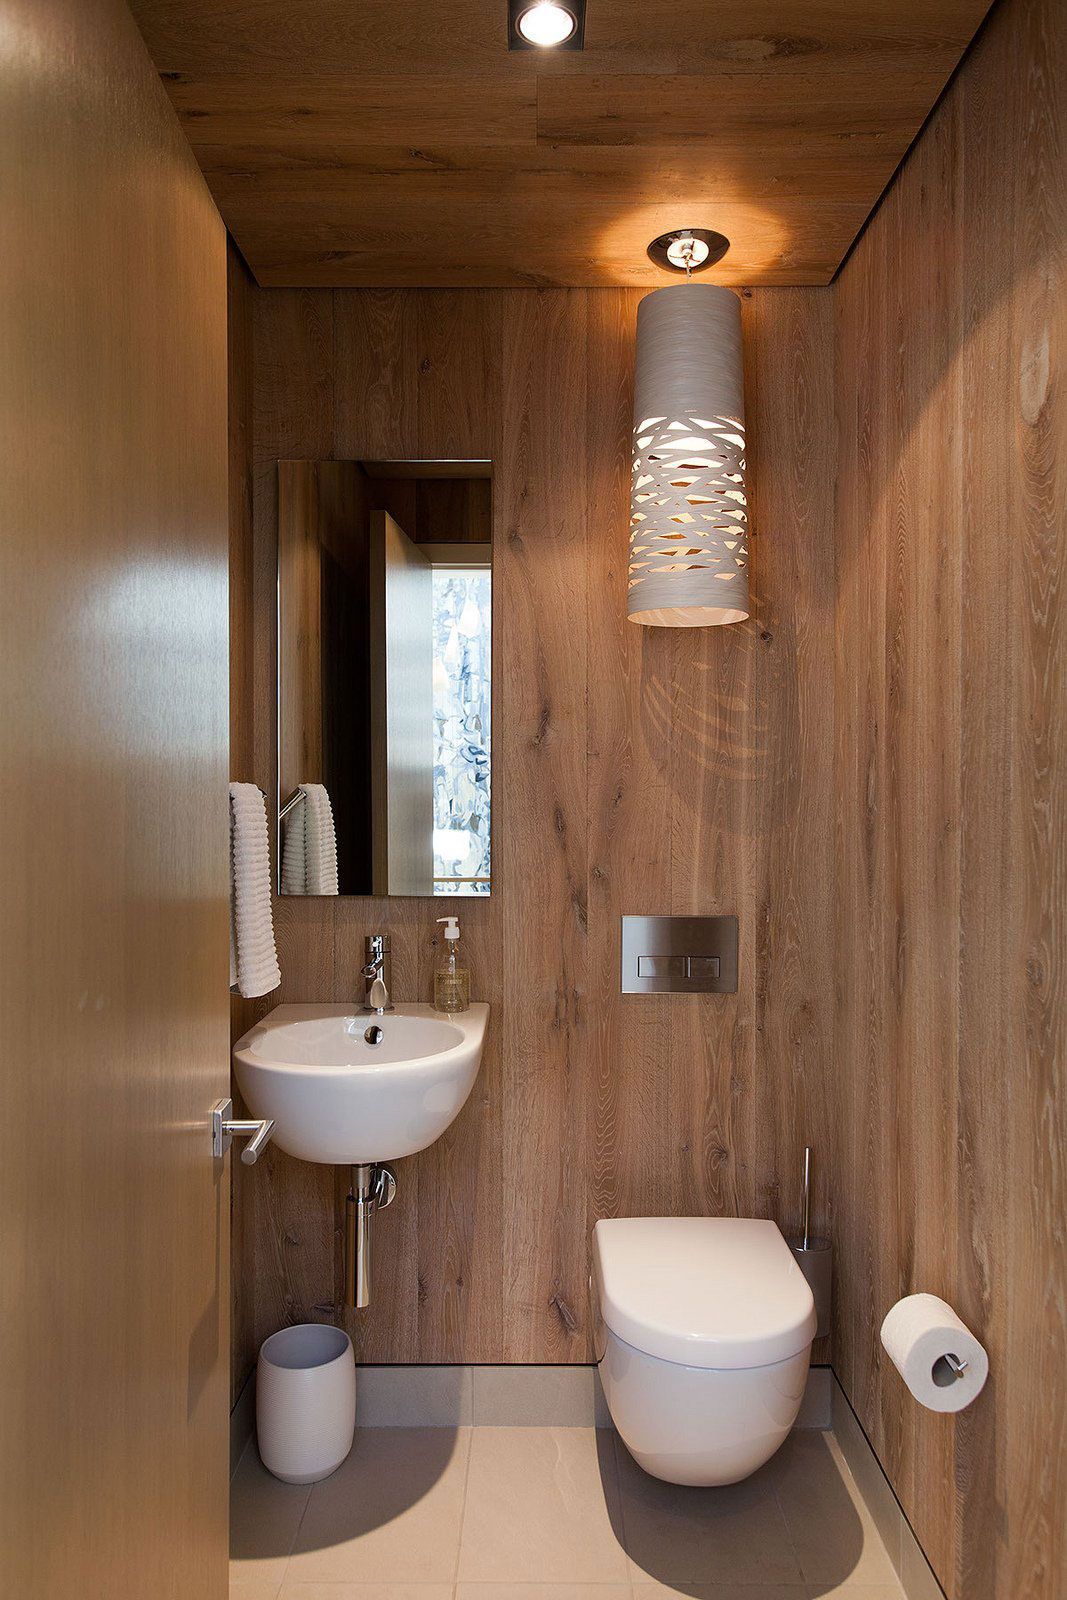
Now I want to give a little attention to the design of the flooring in the toilet. As we all know, this room has a very specific and narrow purpose, namely - in it we cope with natural needs.
- Proceeding from this, small details, especially the motley ones, are unacceptable in the restroom. They provoke an unconscious sense of anxiety, which disrupts the excretory system.
- For the same reason, you should not choose in the color palette a rich, flashy, bright tone.
The justified physiological color design of the latrine floors involves the use of pastel tones, as well as sufficiently dark, brown, yellowish, grayish. Such colors are also good in the sense that the frequent change in the shade of the finish in the toilet is not so noticeable.
Floor preparation
In the preparatory work, first of all, you will need to clean the floor of the floors.
Cleaning the base
- After you remove the old toilet, carefully inspect its attachment. From their safety depends the total cost and complexity of work on the arrangement of the floors in the toilet.
- Next, knock down the floor tiles. Do not try to remove the old screed beneath it. It is not necessary to raise the base to a bare concrete slab. If the coupler keeps firmly, it can be left.
- Coverage can be knocked down in black, without cleaning the substrate until smooth. If you further plan to use a bulk screed, then small irregularities will be insignificant.
- After cleaning them, vacuum the floors and cover them with a brush with a deep penetration primer (for concrete).
Surface Alignment
I want to warn you at once: the floors in the restroom should have a level 2-3 cm lower than the floors in the living rooms. It is necessary that the flooding of the apartment does not occur if, for example, a hose that feeds water into the drain flap kicks or breaks.
Before leveling the floors, calculating their thickness, take into account the sounded circumstance.
Now I'll tell you about how to make a screed:
- For it you will need one beacon metal bar. Cut off from it 2 pieces, equal in size to the length of the walls of the room.
- Guide beacons set by stepping back from the walls 15 centimeters.
- Grater and rule you will need small, because the width of most of the standard toilets is 60-85 cm.
- As a screed under the screed, I recommend that you use fine-grained expanded clay. By the way, he will additionally insulate the floor.
- If the old fastening of the toilet bowl you had to remove, on the new bolts, in advance, weld anchor plates measuring 5 × 5 or 7 × 7 cm.
- Mount bolts on the base immediately, even before filling it with expanded clay.
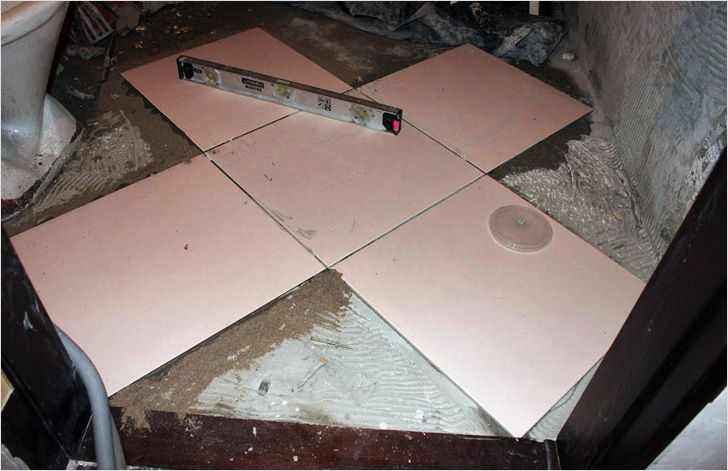
- Put the template on the fasteners to avoid knocking them off when pouring the screed. First remove it (the template indicates the distances of the fixing holes on the plumbing fixture) from the new toilet. Then copy onto paper and paste it on the cut. Next, through the paper, drill the holes for the bolts.
- First lay a waterproofing material on the substrate (for example, "Aquaizol", "Hydroisol"). At the same time, set it on the walls to a height of about 10 cm.
- Further, proceeding from unevenness of the base, fill it with a cement-sand screed. Its minimum thickness should be 3 cm.
- When the roughing screed has dried, lay the finishing layer of the filling floor having a thickness of 1.5-2 cm. Note that the polymer compound "self-leveling" is only conditional. It does not spread out on its own.
Proceeding from this, I will describe how to fill the floor with a tile with such a mixture in more detail:
- First, mix the base compound. To do this it is necessary with the help of a low-speed electric drill with a nozzle-mixer, in a bucket for 10 liters. I warn you that in a basin a quality mixture is much more difficult to prepare.
- Pour the solution into the middle of the toilet floor and level with a steel float.
- Then roll the mixture with a needle roller to expel the air bubbles.
- When the base withers after 24 hours, you can begin to lay the tile. Or fill it with the final polymer composition (it can have different colors). He's growing the same way.
Starting from the moment of mixing the components, the polymeric filling mixture has a "lifetime" of about 30 minutes, then it begins to set. Proceeding from this, work quickly.
How to equip polymeric 3D floors
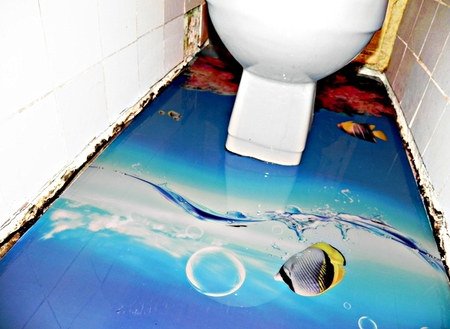
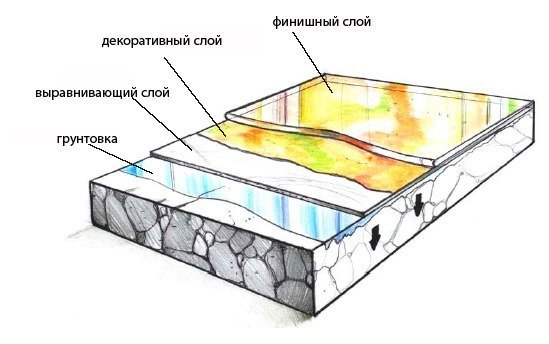
Polymer floors in the 3d version are made using the same technology as conventional liquid analogs. The difference lies in the fact that the image on the prepared base is first placed similar to the wallpaper.
Then it is poured with a layer of polymer, in it for additional aesthetic effect it is possible to add pebbles, coins, pieces of wood, sequins. When the floor dries, it is covered with a protective layer of clear polymer varnish.
Such a coating makes the floors an exclusive element of the interior. Their design depends only on your imagination. In addition, when you look at the 3D floor at some angle, the picture looks bulky, thereby enhancing aesthetic impressions.
You can order the required image in an advertising, printing agency.
Advantages of Technology

The floor with a 3D effect has such operational qualities:
- high aesthetic characteristics;
- durability, looks great and after decades;
- solidity;
- high strength;
- moisture resistance;
- environmental Safety;
- does not attract dust;
- fire resistance;
- its surface is not slippery.
Coating process
- First, the base is prepared and leveled. I already described the process above.
- Then, using a liquid diluted mixture for bulk floors, an image is glued to the substrate.
- Then it is covered with an epoxy or polyurethane composition that creates the desired volume. To this end, the mixed base is poured over the floor and leveled by a grater. In this case, the thickness of this layer should not exceed 5 mm.
- Then the base layer should be rolled with a needle roller, the use of which will prevent the appearance of traces of burst air bubbles on the surface of the coating.
- Then wait until the floor is dry.
- Then cover it with a transparent layer of protective polymer.
Flooring with ceramic and granite tiles
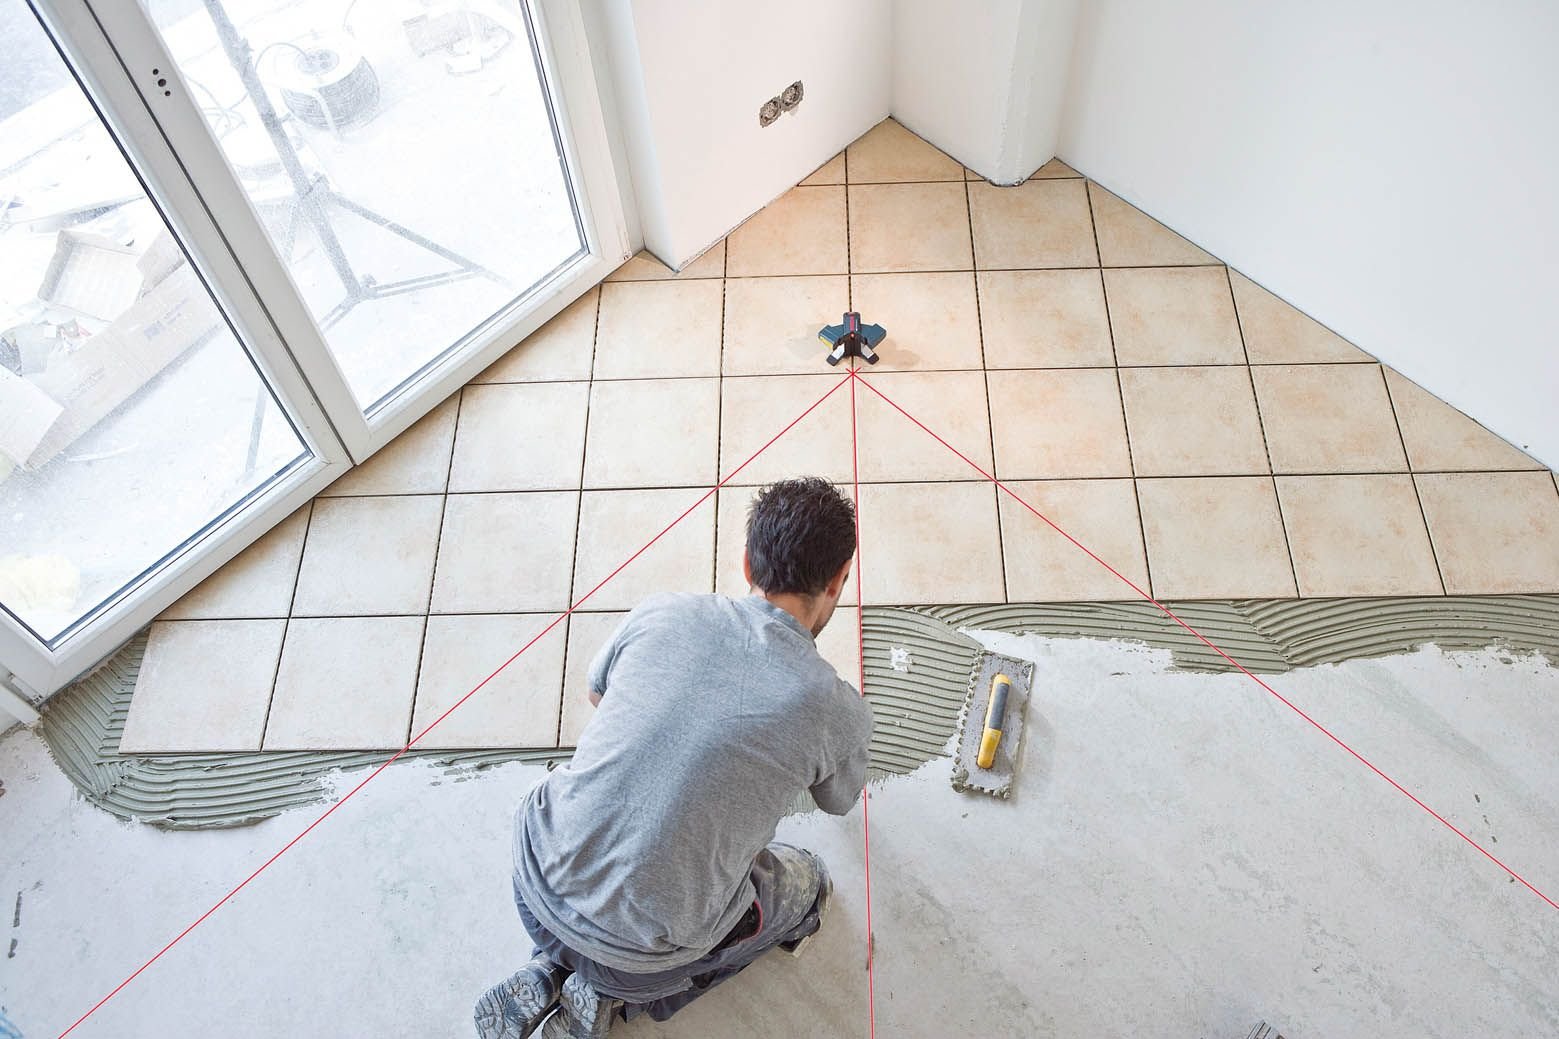
For finishing the toilet floor, select tiles with a matt and slightly rough surface. The technique here is slightly different from the process of facing the walls. The main difference is that the solution is distributed not over the material, but on a slightly moist basis.
Before you put the tile on the floor in the toilet, remember that with square and rectangular material you can finish in two ways: "joint in the joint" ("straight row") or "diagonally".
Mounting of the "butt joint" coating
- Work begins with laying two adjacent frieze levels of tiles (rows that are adjacent to the walls), on the side far from the entrance to the room.
- From them continue the floor covering towards the toilet door.
- Before use, moisten the back of the material with water using a paint brush. Do not allow strong impregnation of the ceramic.
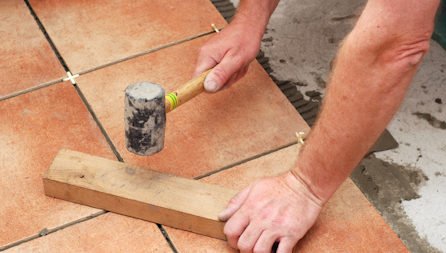
- Spreading the solution under the tile, put it in place, press it against the base and precipitate to the desired level with accurate tapping of the wooden handle of the trowel or rubber kyanki.
- Pull out the adhesive solution on the joints with the same trowel. Then, to fix the evenness of the seams, insert plastic crosses into them. They can be removed when the solution seizes.
- Check the correct leveling and quality of the coating with a bubble level.
- When you find a bulging or tumbling tile, remove it. Then remove the excess solution or add the missing one. Next, lay the element in place, flush with the rest of the trim.
Laying tiles diagonally
![]()
Now I'll tell you in more detail how to put the tile in the toilet on the floor diagonally:
- I recommend in this case, the frieze levels still put the method of "joint in the butt". Inside such a frame, already place the tiles diagonally. Then the coating will look neater and more original.
- To lay a tile on a diagonal you can the levels located in parallel one wall or rows inclined.
- If you choose the last type of masonry, at an angle of 45 degrees, stretch the cord "mooring". It will help you to control the straightness of the seams.
- In all the rest, laying the tiles diagonally does not differ from its installation "joint in the butt".
Vinyl and quartz vinyl tile
To cover the floors in the restroom, you can use PVC or quartz vinyl tile.
Material Features
Vinyl tile is a technological finishing material made from polyvinyl chloride (amorphous binder), talc, wood flour (powder fillers) and plasticizer.
Advantages of the material are:
- relatively low cost;
- low density, due to which the coating has good noise and thermal insulation qualities;
- the material is strong enough;
- it has high wear resistance;
- the tiles are waterproof and thermally stable.
Among buyers, the most demanded square PVC tiles are 15 × 15, 20 × 20 and 30 × 30 cm. The thickness of the material can be 0.5-3.5 mm, with a step of 0.5 mm.
The color and pattern of tiles can be very different. For the toilet, I recommend that you use a material that has a raised surface.

Another modern synthetic floor covering is quartz vinyl tiles. They are made by the method of high-temperature pressing of a composite consisting of vinyl, quartz sand, plasticizers and pigments.
The resulting coating has the following advantages:
- high abrasion resistance;
- moisture resistance;
- fire safety;
- chemical resistance;
- anti-sliding qualities.
Produced tiles of square shape have a size of 30 × 30 and 60 × 60 cm, their thickness is 1.6-4 mm. The material can have different colors, as well as drawings for different types of wood or stone.
Finishing of floors with synthetic tiles

In this case, you will need not only to lay tiles, but also to polish the mating of the floor with the walls, the door opening, the threshold. To this end, buy the appropriate additional elements from a similar PVC material. Wherein:
- the skirting boards produced can have a length of 240, 300 and 360 cm;
- platbands - 200, 210, 240 and 270 cm;
- the nails are 240, 280 and 300 cm.
Laying of tiles from PVC is carried out on special glues and mastics, the additional elements are fixed with glue 88 or 88-N:
- Apply a pre-prepared and leveled floor primer, which is a bitumen mastic. Its composition: bitumen and diesel fuel (gasoline, kerosene) in a proportion of 1: 3.
- When the primer will dry after 7-8 hours, start marking the base. Carry it out, based on the option of laying the cover ("joint in the joint" or diagonally).
- For a "joint to butt" (straight seam), first determine the transverse and longitudinal axes of the floor. In other words - lines that are perpendicular to two adjacent walls and coming from their center.
- On the longitudinal axis, stretch and fix the cord-pier. Next, using a square, draw a transverse axis. On it, too, pull the pier.
- Cover the cover with the installation of beacon levels along the cords. Spread the glue on the floor with a paintbrush that has a stiff bristle. The width of the strip of the fixing layer should be slightly larger than the width of the tiles. Next, lay the row and press it firmly against the base.
- When mounting the beacon levels, lay the rest of the tiles by placing for each subsequent row of piers.
If you prefer the diagonal version of the masonry, first also mark the transverse and longitudinal axis of the floor:
- Further at an angle of 45 degrees, stretch the pier through the point, which crosses the transverse and longitudinal lines.
- On this axis, lay the beacon level. Then lay the rest of the tiles, acting in the same way as when laying the "butt joint".
- After mounting the main field of the coating, proceed to gluing the frieze (wall) tiles. Cut them at the place of installation and carefully adjust the cut elements.
- Between the coating and the walls, leave a deformation gap of not more than 1 cm.
Quartz vinyl tile with their hands is put on a leveled, primed and dried base. Elements can be mounted in the longitudinal and transverse direction. Beforehand, mark the floor in the same way as when laying PVC-boards.
To fix the coating, you can use rubber, vinyl or acrylic adhesive. Lay the tiles close to each other, and then roll them with a heavy roller to create a better fit and a coupling with the base.
Flooring with linoleum
Now the range of linoleum is very large and allows you to choose a coating both in terms of quality / cost, and in terms of decorativeness. The widest choice of textures and colors makes it possible to fit such flooring into any toilet design. This coating can have a pattern of different types of stone and wood, ceramic tiles, matting, etc.
The advantages of linoleum in the toilet are:
- moisture resistance;
- absence of joints;
- practicality;
- ease of installation and courtship.
Covering technique
I draw your attention to the fact that you must carefully choose for each type of linoleum a certain type of mastic or glue composition:
- for a material on a heat-insulating basis - these are water-dispersion fixatives;
- for analogues on the fabric substrate - special mastics, as well as water-dispersion and bitumen-synthetic glues;
- for single-layer and non-base coatings are mastics, the basis of which are synthetic rubbers and resins.
As with other types of cladding (especially interesting in this regard is the painted floor under the tunnel), before flooring of linoleum, prepare and align the base:
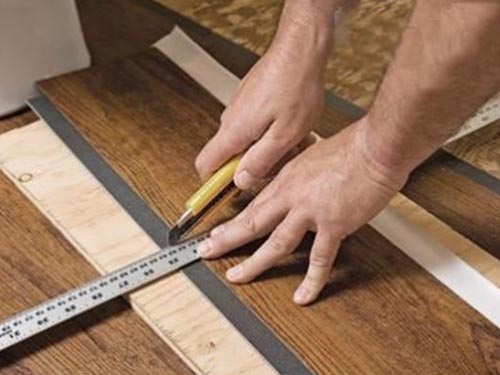
- Cut out the desired piece from the roll, taking into account the required allowances for shrinkage (1-2 cm).
- Lay the cut on the floor and wait 1-2 days. During this time, the coating will be leveled.
- Then you can paste linoleum. The adhesive is applied not to the base, but to the working (back) side of the cut.
- When using water-dispersion adhesive and mastic, distribute the fixing composition with a notched trowel with a layer of 0.6-0.7 millimeters.
- Bituminous materials I strongly recommend to distribute a layer of 0.4-0.5 millimeters.
- The optimum thickness for the adhesive based on synthetic rubbers and resins is 0.3-0.4 millimeters.
- Lay the linoleum cut on the base and spread it with your hands. Then roll it with a heavy roller.
- When the glue dries, mount the plinth.
Conclusion
I tried in this article to describe for you everything, the most acceptable floor coverings of the toilet. I believe that this topic should not be hushed up. As they say: "what is natural, it is not ugly." We must fulfill our natural needs in comfort and dignity.
The video in this article will continue this very interesting and delicate topic. If you are tortured by any questions, ask them in the comments, and I will answer them. I say goodbye and good luck to you in your endeavors.
August 2, 2016If you want to express gratitude, add a clarification or an objection, something to ask the author - add a comment or say thank you!