Before each owner, who started the warming of the walls of his own home, immediately there is a question, which in this case plays a primary role: what material to use for thermal insulation? Today, the range of insulation is so great that makes you think hard, before making a final choice.
But no matter how long meditation lasted, it is still necessary to make a decision, and in the end many prefer Material, which due to its characteristic features deserves some attention from consumers.
It's about penokplex. It was he who became one of those heaters , which are more often used for thermal insulation of walls.
What is a penoplex?
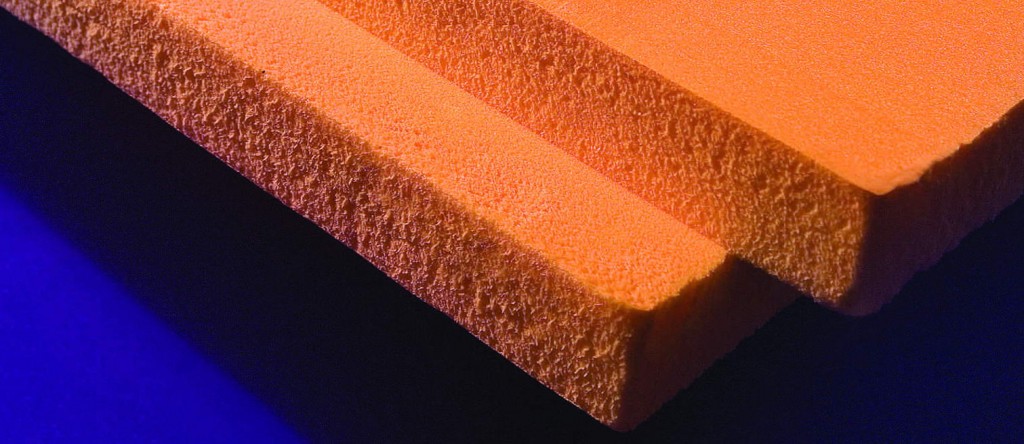
Penoplex or extruded polystyrene foam Is a relatively new material for insulation, belonging to the class of foamed plastic. It has the form of plates and is essentially the same polystyrene.
The only difference is that this heater has a higher coefficient of thermal insulation, as well as the structure of increased density. Penoplex, like foam, consists of extruded balls, but in the first case they are joined together by the pressing method, and in the second - by glue.
Kinds
Exist five basic types of penoplex, intended for use in various types of insulation works:
Perhaps you will be useful information on how to insulate a brick house from the outside? Read in this article.
Advantages and disadvantages
Like any building material, penokleks has its pros and cons.
The positive properties of insulation are:
- low vapor permeability, thanks to which penokleks practically does not absorb moisture;
- low thermal conductivity - the material has high thermal insulation properties and perfectly preserves heat in the house;
- high compressive strength allows the penplex to withstand significant loads;
- long service life - the material can last up to 40 years;
- with penokleksom easy and convenient to work, the installation of the material can be done by hand with any home master.
Disadvantages:
- penoplex is a fire hazardous material;
- can suffer as a result of rodent invasion;
- has a higher price than the same foam.
Thickness and ways of fixing the material
For external insulation of walls, you need to choose a thicker material than in case of internal thermal insulation.
The thickness of the outer insulation must be at least 50 mm, whereas indoors, in regions with a temperate climate, penplex thickness of 7 mm is used.
Also, with heat-insulation works, the question arises: what is the use of foam foams? Here everything depends on the nature of the surface.
For gluing to concrete it is possible to use mineral glue which is of low cost, however, certain skills are required to prepare the composition and work with it.
Composite mixtures differ higher efficiency and ease of use, but are much more expensive.
You can glue the foam to the metal on the mounting foam, liquid nails or silicone sealant . For a wooden house, liquid nails or liquid foam plastic are also suitable.
Internal warming of walls by own hands

In order to insulate the walls from the inside, first they must be prepared, the surface must be cleaned of crumbling fragments, aligned and treat with special protective agents, which prevent the formation of mold.
After preparing the surface, you can start installing a penoplex, which includes the following stages:
- It is necessary to apply incisions on the slabs with a knife or needle roller - this will increase the adhesion of the penopolix with the glue.
- When using a glutinous solution, it is applied to the surface with a conventional spatula, after which the excess is removed from the scallop.
- The panels are started from the bottom corner. The material is well pressed against the wall, slightly rotating it to the right and left to better glue it to the surface.
- Joints of plates should be treated with a sealant. This will not allow cold air to penetrate between the panels.
- After installing the penoplex it is necessary to allow it to dry, leaving for a few days in an untouched state.
- The final stage is additional fastening with dowels. Usually this is done by using thick penoplex plates.
Wall insulation with foam from inside the video instruction.
Many people have the question: is it possible to plaster the foam pen? The finished surface is not only possible, but also you need to plaster.
Above the penoflops plastered mesh is installed of fiberglass. In most cases, it is fastened with leveling glues, but mechanical fasteners are also possible.
Top of the grid the start leveling layer is applied, the thickness of which should not exceed 2-3 mm. After the first layer has dried, plaster is applied. To do this, use a wide spatula.
The thickness of the layer should ensure smoothing of all unevenness of the insulated surface.
Plaster rubbed with a special float, then you can putty, then the surface can be painted or another finish.
How to make a thermal insulation from the outside?

The process of warming the facade in a private house, as well as the procedure for internal thermal insulation consists of several stages.
Mounting a penoplex it will not take long and does not require special skills, all the stages can be performed at home.
From the surface, dirt is removed, as well as old layers of paint and plaster that have moved away from the wall. Places in which fungus and mold have formed are treat with a special bactericide compound.
The surface is leveled until the pits and hollows are completely eliminated - this will help to avoid damage to the plates during installation.
Do you know how to insulate a wooden house from the outside with your own hands? Read this.
Next we begin to mount the penokleks. Here, just as with internal insulation on the slabs of the material, incisions must be made to ensure better adhesion. The glue is applied at the edges and in the center of the plate. Begin to fix the material you need from the plinth, from the bottom corner.
The doors and window openings should be sheared only with whole sheets.
After the glue has dried (after 3 days), sheets of penoplex should be fixed, dowels, which are nailed in an amount of 5-6 pieces per slab. When attaching panels to the corners of the wall, use a larger number of dowels.
The joints are processed. Clearances with a width of 5 mm should be filled with mounting foam, and more significant gaps can be sewn using strips of insulation.
Insulation of walls from outside with foam: video instruction.
The next stage is reinforcement. On the surface of the plates apply a layer of adhesive 2 mm thick, which is pressed with a wide spatula reinforcing mesh . At the same time, the edge of the net should be left unglued for further splice overlap.
After the reinforced surface has dried, its should be wiped using a plastic float with an emery cloth.
Now you need to align the wall. To do this, a layer of plaster with a thickness of 3 mm is applied to the surface with a large spatula.
As a plaster mortar, you can use the same mix as when installing a mesh or special finishing plaster.
The grouting of the dried surface is carried out in the same way as in the case of reinforcing mesh. The finished surface is treated with a primer, after which you can proceed to the finish finish.
If you decide to conduct a wall insulation with Penoplex, the main task is to secure it securely. From the article you will learn all the editing methods and you can choose the one that best suits your object.
Ways of fastening
The choice of a particular installation method depends on which surface is insulated.
What you need to know:
- Place of work. Inside or outside the building there is a wall;
- Type of foundation. It can be concrete, brick, gas silicate or wood; . If there is plaster on the outside, then you need to fasten the elements especially carefully.
Warming of the plinth
This part of the building is most exposed to moisture. That's why Penoplex is ideal for thermal insulation of the foundation, because it does not absorb moisture and is not afraid of temperature changes.
Let's consider what materials are necessary for work:
- Penoplex, plates with a thickness of 5 cm or more are usually used. It all depends on the region of your residence and the design features that you will insulate;
- Bituminous mastic. We will use it for gluing the insulation. If you are waterproofing with a mastic, then just buy about a half times more than you need. This is enough for both processing and fixing the material;
Also for work you need a tool:
- A construction knife or hacksaw with small teeth for cutting insulation plates;
- Spatula or other device for applying mastic to Penoplex.
Instruction for work:
| Illustrations | Description of work |
 | The surface is waterproofed. You need to do this in advance, you use either mastic or roll materials for work, you can combine both. Glue the sheets on an unprepared surface is not worth it, because moisture can penetrate through the joints. |
 | The sheet is applied with mastic. This is done as shown in the photo: 6 points with a diameter of about 10 cm and a thickness of about 10 mm are placed on the surface. Applying the compound is most simply a narrow spatula, but you can also adapt another tool. |
 | All surfaces are pasted. If there are protrusions on the base, the material is cut into pieces of the required size and adhered. Before applying the glue, be sure to try on the pieces, whether they become good and whether you need to trim individual areas. It is better to do this in advance, then the styling will pass quickly and simply. |
 | Fills are filled with foam. This allows you to achieve an ideal work result. Foam not only isolates all the cracks, but also serves as an additional fastener, after drying it reliably glues all joints. |
 | In a day, the foundation can fall asleep.No additional fixation is required, because the ground will press the sheets more durable than any dowels. |
 | The above-ground part can be additionally fixed with dowels.To even better insulate the structure, put the plates of Penoplex under the blind, reinforce the surface and fill it with a solution. This option provides reliable protection of the cap from the cold. |
To ensure additional connection reliability, it is possible to apply a special adhesive composition to the grooves when gluing the sheets to the surface. So you immediately isolate all the joints and tightly connect all the elements.
Warming of brick, concrete and gas silicate walls from the outside
It is with these reasons that one has to work in most cases, the facade is often insulated, but sometimes work can also be done from the inside.
First, we'll figure out what materials will be needed to work:
- Penoplex. The insulation for walls must have a thickness sufficient to effectively insulate the surface. Usually options are taken at least 5 cm thick;
- Dowels for insulation. The fastener for Penoplex is used the same as for foam and mineral wool. It is better to use options with a metal nail and a thermal head. The length should be 50-70 mm more than the thickness of the insulation (for aerated concrete can be taken and 100 mm longer), and the amount is calculated based on the indicator of 6 pieces per square meter;
- Adhesive compound for insulation. Sold in dry form in bags of 20-25 kg, the consumption is indicated on the packaging, therefore, knowing the area of warming, it is not difficult to make calculations. Choose mixtures that are produced no more than 3 months ago, because over time, the quality of the compounds inevitably falls, and they absorb moisture.
The following tool is also needed:
- Capacity and drill with mixer for the preparation of the composition. It is very hard to prevent dozens of bags from hand, you will get tired of making a solution more than from the main job;
- Toothed spatula. Application of adhesive composition I recommend to produce a notched trowel. The size of the teeth should be 8-10 mm. Instead of a spatula, a toothed iron can be used, if it is at hand;
- Hammer drillneeded for drilling holes for dowels. Do not forget to equip it with a 10 mm diameter drill. As for the length, it depends on the size of the dowels used;
- Knife or hacksaw for cutting insulation.
The manual is as follows:
| Illustrations | Description of work |
 | A foundation is prepared. For this, all the inflows of mortar and sticking out areas are knocked off the wall so that the sheets do not rest on them. If there are cracks, it is recommended to fill them with foam. The surface must be dry. |
 | Preparing the adhesive composition. To do this, the necessary amount of water is poured into the container and the mixture is poured, the exact proportions are indicated on the package. It is very important to thoroughly mix the mass so that it is free of lumps, and there is no dry layer at the bottom. |
 | On the back side is applied glue. Identify the back of the sheet simply by corrugation, which provides improved adhesion of the adhesive composition. The solution is first applied with a conventional spatula, then the layer is evenly distributed by the gear variant, at the same time all the surplus is removed. |
 | Elements are glued to the wall. The bottom is fixed to the plate, so that the sheets are located exactly, after which they are fixed. Here everything is simple: installation of Penoplex on the wall is made by shifting the grooves and pressing the sheet to the surface. Make sure that all parts are level and do not warp. |
 | Penoplex is attached with dowels.Everything is easy: they drill either two holes on the sheet, as in the photo to the left, or one hole in the middle and four in the corners, so that the fasteners hold several elements at once. Insert the dowels, after which the nails are hammered into them. When fastening to a brick wall, they must enter into it by 50 mm, for blocks the minimum depth of penetration is 70 mm. |
When carrying out the work from outside, a reinforcing mesh is attached over the heater, and the surface is tightened with the same adhesive compound for thermal insulation. The mixture is applied to the surface, the mesh is pressed into it, after which the wall is tightened with the solution so that an even plane is obtained.
Warming of brick, concrete and gas silicate walls from the inside
This type of work is most often performed on loggias, as well as in cases where fixing the material from the outside is not possible.
In this case, the following materials are needed for the job:
- Heater Penoplex;
- Adhesive composition In cylinders, which is applied from the gun for mounting foam. If the amount of work is small, liquid nails can also be used;
- Mounting foam for sealing joints;
- Foil scotch tape for insulation of seams;
- Dowelsfor fixing thermal insulation.
As for the devices, the following tool is needed:
- Glue gun. If you have a special composition in cylinders, then you need a gun under the mounting foam. If you use liquid nails, then get a special gun for small tubes;
- Hammer drill with a drill for drilling holes for dowels;
- Knife for cutting Penoplex and cutting excess foam.
The workflow looks like this:
| Illustrations | Description of work | |
 | Walls are prepared. Removed the remains of old coatings, if any, and all the protruding elements. The slots are filled with a mounting foam or sealant. | The sheets are glued to the surface. In the process of work, the most important thing is to tightly press each element to the surface and, as best as possible, join the ends together. If necessary, the individual elements are cut to the size you want. |
 | The dowels are fastened. To do this, first holes are drilled through the heater, in the process of work, keep an eye on the even position of the punch, otherwise the dowels become awry. After drilling, the fixing parts are inserted, after which nails are hammered into them. |
|
 | Joints are filled with mounting foam. This is done as necessary, if you have very tight connections, then this part of the work can be skipped. Foam is sealed not only joints, but also places of abutment to the floor and ceiling, pay special attention to the corners. |
|
 | Joints are glued with a special adhesive tape. It has a reflective surface and minimizes heat loss through the seams. Before sticking the tape, the excess foam of the assembly foam is carefully cut with a construction knife. After this, the final finish is selected and its installation is carried out. |
If you want to mount sheet materials on the loggia or a lining, it makes sense to pre-build a wooden frame, in which Penoplex will be laid. In this case, there is no need to glue the elements to the wall, it is enough to cut them precisely to the size of the niches and seal them around the perimeter with foam, it will serve both as a heater and as a glue.
Conclusion
After reading this review, you can easily figure out the technology of correct and reliable attachment of Penoplex on different surfaces. To better understand the topic, see the video in this article, it clearly shows many important points of the workflow. If you still have some questions, then write them in the comments below. »Width =» 640 "height =" 360 "frameborder =" 0 "allowfullscreen =" allowfullscreen "\u003e
Conclusion
After reading this review, you can easily figure out the technology of correct and reliable attachment of Penoplex on different surfaces. To better understand the topic, see the video in this article, it clearly shows many important points of the workflow. If you still have some questions, then write them in the comments at the bottom of the page.
Thermal insulation of the facade of the house by Penoklex allows to reliably protect it from fluctuations in temperature, noise, condensation, precipitation and prolong the service life of structures. The main advantage of this technology is the possibility of carrying out work independently, without resorting to construction firms. For the installation on the outer walls of private houses, two types of Penoplex are suitable: Comfort and Facade, the latter is specialized and has a milled surface that facilitates the plastering process. At all stages: from the preparation of the base to the finish, the manufacturer's recommendations are taken into account, it is important that all used building materials are compatible with each other.
Work begins with calculating the thickness of the plates of Penoplex and determining the required quantity. Layout scheme is thought out in advance, taking into account two nuances: stacking with displacement and mounting around the window and door openings of whole sheets, rather than pieces. Regardless of the choice of exterior decoration of the facade (for siding or plastering), the heater is fixed equally - with a landing on the adhesive composition and additional reinforcement with dowels with bowl heads. In two-layer application, the consumption of glue increases, the calculation of the required quantity is carried out taking into account the data specified in the manufacturer's manual.
Step-by-step installation instructions include the following steps:
- Preparation: removal of old building materials, priming, leveling.
- Thermal insulation slopes, lintels, openings.
- Mounting insulation to the walls of the facade.
- Anchoring of Penoplex plates with dowels.
- Application of a reinforcing layer, placement of a glass mesh.
- Finishing the facade.
Let's look at each step of the manual separately. In the alignment, any facades with a deviation of more than 2 cm are required, this stage is carried out both to reduce the consumption of the glue and to reduce the risk of breaking the plates. Preparation is even necessary for even walls, especially painted with oil paints (or other compositions with low permeability). They are completely cleaned, after which the surface is treated with any penetrating primers or antiseptics.
The next step of insulation by Penoplex is the finishing of slopes and openings. Thinner slabs are used for this purpose. Extruded polystyrene foam is also suitable for thermal insulation of monolithic concrete bridges by hand, but such work is carried out simultaneously with the construction of a private house or when replacing windows. Outside eaves are attached directly to the windows, taking into account the extension of the window sill by 2-3 cm, the inner cavity beneath it is filled with pieces of polystyrene mixed with glue. The sheets placed on the slopes should extend at least 1 cm, this simplifies the fitting of the vertical insulation.
Laying of plates start with the placement of a thin socle profile, at a height of at least 30 cm above the ground. Its level is checked several times, the evenness of all subsequent series depends on it. The adhesive solution is diluted in strict accordance with the instructions, in the absence of experience of construction work should use polyurethane compounds in cylinders with a gun. When installing on a flat surface, the adhesive is spread with a notched trowel all over the plate, on walls with slight differences - pointwise, at least 40% of the total area is covered. The sheets of Penoplex are held for a few seconds and even slightly taped, after which the state of the level is checked and the process is repeated.

To fix the insulation with dowels they start not earlier than 3 days later, this is necessary to achieve maximum adhesion reliability. There are brands of adhesives that allow you to reinforce before, but if the facade is self-insulated, the installation of the plates will take 2-3 days. Use at least 5 plastic dowels-fungi with a length that allows the spacer to penetrate into the wall 5 cm at least. One of them is hammered in the center, the others are closer to the edges or in the corners. The fastening scheme takes into account the location of the wiring or other communications.
By laying armoset start after filling large slots, an indispensable condition of the technology is its pressing into the solution and reinforcement of corners perforated or galvanized corner. Grout the first layer is carried out, without waiting for complete drying, the manufacturer recommends covering it with a primer. Finishing plaster is applied to the facade thinly and wiped only in the dried state. To prolong the life of the walls of the private house once again primed and painted.
Possible errors in thermal insulation
The violations of the technology of mounting the Penoplex plates on the facade include:
- Bonding sheets to damp walls. In the case of leveling the surface with cement-sand mortars, wait at least 4 weeks before starting the main work.
- Use of glue with organic solvents in the composition (toluene, acetone).
- Laying of thermal insulation on the facade with uncapped cracks.
- Filling large slots at the joints with glue for expanded polystyrene on a cement basis. Their sealing is mandatory, but only materials with the most appropriate coefficient of thermal conductivity.
- Fixing the heater without displacing the vertical rows. In the fastening scheme, the convergence of the four corners is avoided in every possible way, this is just as gross a violation of the mounting technology as the placement of individual pieces around the windows.
The technology of wall insulation by Penoplex means its exterior decoration with plaster compositions. But if desired, the expanded polystyrene is placed without problems under the siding, in which case two options are available: mounting the wall brackets to the walls before stacking the plates or stuffing the battens over the insulation. The second way is easier to perform on their own. An obligatory condition for warming under siding is the presence of a ventilation gap of 2 cm between the Penoplex and the outer facade lining.
To simplify the work and eliminate the cold bridges, it is recommended to use a heater plate with a L-shaped edge. Ideally, the material is placed in two layers, the sheets of the second overlap the joints of the first. Large slits are laid with pieces of expanded polystyrene or filled with sealant. It is not necessary to abuse the mounting foam, it is advisable to immediately lay the plates as tightly as possible, but you can not leave the outer joints with a width of more than 5 mm open. The lips of the sealant are carefully removed, and the seams are peeled off using a foam float.
The last nuance is related to the smoothness of the plates. Optimum variety for facade insulation are considered to be grades with a corrugated surface, designed for applying plaster mixtures. Ordinary forms are roughened beforehand: the slabs are scratched with nails, a needle roller or an insect with a stationery knife. Particular attention is paid to the reinforcing layer: the recommended density of the glass mesh is 140-160 g / cm2, to improve adhesion, plaster-glue compounds with grains of quartz are used. The thickness of the facade is monitored, ideally the armo-layer does not exceed 1-2 cm (fiberglass is pressed inwards), and the finishing one - 3 cm.


To all readers greetings!
With you, as always, the author of this blog. Today I want to consider a small, but relevant for many topics: how to fix penoplex to the wall. I think, it is not necessary to explain what is penoplex, what properties it has and for what it is applied. By the way, it is also called extruded polystyrene foam, abbreviated as EPPS.
Let's move straight to the point: let's talk about all the ways of fastening to different wall surfaces. The most common, of course - is concrete and brick. After all, the technology of installing a penoplex implies, first of all, the insulation of the stone facade of the building. For wooden and gypsum walls, such insulation is used much less often. So, let's start from the very beginning ...

Warming of the plinth and blind area
First of all, we clean concrete and brick from possible dirt, dust, old paint, any random oil spots, etc. If the walls are not even, you'll have to work with a putty and try to bring them to the plane. With wood and gypsum we proceed by analogy (except for putty).
For this dirty work sandpaper or a grid, spatulas, scrapers, brushes are used. In a word, what tool is, so we are working.
Primed walls should be primed. Here the usual primers of deep penetration are appropriate. Often happens that the base of the building "works" in tough damp conditions. Therefore, it forms a fungus, moss or other unnecessary vegetation. A simple method to get rid of it is to treat these parts with a solution of copper sulfate. Proven "grandfather" way. But you can apply more modern antiseptics, they are much more effective.

If the brick wall is too large, they must be removed. How and what to do, you can read in this article. This is done in order to prevent the destruction of the material, which we will not see behind the layer of insulation and finishing finish.
Further along the entire perimeter of the building strictly on the horizon we mount the starting socle bar. It can be in the form of a wooden bar or a special perforated metal profile. The goal is to make it easier to fasten the penoplex: it does not accidentally move downwards and is exactly aligned with the walls.
All ways of fixing this insulation
- The first and perhaps the most applicable option is the use of special adhesive bitumen-polymer mastic. A typical example is the well-known company "Technonikol". Mastics, as a rule, are sold already in finished form. It remains only to apply it to individual points on the surface of the penokloks plate. Then press firmly against the wall and wait for a while.
- The next method is the use of dry mixtures on a cement base. Ceresit products are in great demand. For example, a brand of dry glue, Ceresit ST-85, very popular with builders. Here is the perfect combination of price and quality. Diluted with water and carefully mixed with a mixer, apply to the entire surface of the insulation with a notched trowel and attach to the walls.
- Glue foam - also a fairly common fastener for penokpleksa. It is supplied in the form of cylinders, as a usual mounting foam. The method of application is simple: twist the balloon into the gun, apply on the EPPS sheet, apply to the wall and wait 5-10 minutes. This method is most often used for gypsum and plastic surfaces.
- Installation of expanded polystyrene with dowels of bowl type is usually done on concrete and brick. Here a special fungus is used to fix the heater. It is also called an umbrella. 5 of these umbrellas (4 on the edges and 1 on the center) is enough to securely fix the penoplex sheet to the wall. For work you need a puncher, a drill of the appropriate diameter and length, a hammer.
- Another option is to fix the foam on the wall - apply liquid Nails. It is used less often than others and quite expensive. Usually liquid nails are used when working in small areas, for example, when warming a balcony or a loggia. It is not necessary to speak about the insulation of the house from the outside here. The price will be sky-high.
 Bituminous mastic
  Dry mixture Glue-foam Dowel-umbrella
Quite often, a mixed method of attaching a penoplex to the walls is used. The dowel-umbrella is combined with bitumen mastic, dry mix or foam. The result is excellent. The reliability and durability of the installation work is assured for many years.
Features of fixing penoplex on wooden surfaces
We all know perfectly well that wooden surfaces "breathe". Cover the tree with cellophane and literally in a couple of years it will rot. Why? But because it is "alive", unlike a stone or a brick. The tree needs a constant supply of fresh air. Only in such conditions it will serve you faithfully for more than a decade.

We apply glue on a cement basis
When warming the wooden walls with penokleksom should adhere to the principle of ventilated facade. That is, between EPS sheets and a tree, there must be a ventilation gap. To do this, first the blocks are packed with a thickness of 20-25 mm, and already they are mounted insulation. All wooden elements must be treated with special impregnations.
The exception here is the OSB of grade 3 and. These modern materials are made and processed using new technologies. They are not afraid of moisture, temperature changes and other aggressive environments.
From the above, we can draw the following conclusion: Do not heat the wooden walls with expanded polystyrene. For these purposes, there are other excellent insulation, such as mineral wool. The walls will "breathe", at the same time - they will remain warm.
Well, it's time to sum up. On the question of how to properly fix the foam to the wall, we answered. Also examined all the surfaces on which this insulation is mounted. For today, everything! If it was informative - share it with a friend. If not, I will be corrected. Till! Till!
Quotation of wisdom: The true purpose of man is to live, not to exist.
The issue of keeping heat in the house is very actual for many owners of private houses, hotel complexes and other facilities heated by means of individual heating. Thermal insulation of the facade with penoplex, the laying technology of which does not cause special difficulties, is increasingly used by people to create comfortable temperature conditions in the house and reduce the costs of paying bills for electricity.
What do I need for the insulation work?
Today almost every person living in his home can easily warm the facade of the building with foam plastic with his own hands (video with detailed description of all stages of carrying out such work you can find in our publication).
Typically, for such work, one of the types of expanded polystyrene - extruded polystyrene foam (EPSP) and foamed (penokleks, VPPS) is used. And to understand which one is most suitable for warming your home, consider both options.
Penoplex

This material can easily be mounted on pre-leveled wall slabs. Thermal insulation of the facade of the house with foam plastic, in the majority, is carried out in regions where there are significant temperature drops in the winter. Although, today, even those people who live in the central strip of the globe resort to this option of conserving thermal energy. But in this case it is not only warming, but also a way of saving money.
Benefits:
- simplicity of installation;
- sufficiently high strength along with low weight;
- reduced thermal conductivity;
- moisture resistance;
- due to the insulation of the house with foam plastic, it is possible to spend less energy resources for heating the home;
- affordable cost as the most insulating foamed polystyrene foam, and components that are necessary for its mounting;
- a wide range of overall dimensions of the canvas, which allows you to choose exactly the option that is suitable for the insulation of a particular building.
But at the same time, there are certain drawbacks:
- deviation from the rules for assembling such energy-saving units, and minor flaws will lead to a decrease in the efficiency of its operation;
- in the basis of this kind of material there are harmful impurities, so only external facades are insulated with foam foam, on top of which puttying is applied, which allows neutralizing the negative influence of chemicals;
- small rodents can spoil this heat insulator, which in turn will reduce the effectiveness of this insulating block;
- combustibility of the material;
- a small operating period.
To get this consumable is best from a manufacturer that has a quality license for the product.
Unfortunately, the cheapness of this category of products attracts not only potential consumers who want to insulate the facade of the house with foam plastic, but also unscrupulous entrepreneurs who can sell such products of not very good quality.
This option, as mentioned earlier, is the same UPPS, but only it has improved performance with partially corrected deficiencies. The advantages of EPPS include:
- the insulation of the facade of the house with extruded polystyrene foam provides a more durable and durable surface, rather than with the device of the facade with the help of UPPs;
- low combustibility;
- high density and, as a result, strength;
- ease of installation - many EPPs are equipped with a special locking system, which ensures a tight laying of the sheets;
- moisture resistance;
- long service life;
- increased strength characteristics - EPS is used for exterior finishing of houses, as well as for basement floors, basements, etc.
As for the disadvantages of EEPs, they can be attributed a sufficiently high thermal conductivity, which requires the selection of a thicker cloth to avoid heat loss. In addition, the installation of such a heater requires some skills. And, in the end, the insulation of the facade with polystyrene foam will be cheaper than with the use of EPS.
Materials for insulation
So, on the example of facade insulation with foam plastic, we will consider the list of materials that will be required for this task. For a full understanding of the cost of such activities, the number of consumables is indicated on the basis of 1 wall covering:
- primary primer - 0,25 liters;
- glutinous composite - 10 kg;
- expanded polystyrene foam - 1;
- dowel in the form of a fungus - 8-10 pieces;
- reinforcing mesh - 1,3;
- leveling base - 500 grams;
- priming, which includes quartz sand - 330 grams;
- decorative plaster - 500 grams.
In addition, it will also require other materials:
- guide rails, the width of which depends on the thickness of the insulation;
- angles with reinforcing mesh for plastering the corners of the structure;
- mounting foam - it's better if it's a professional line item;
- emery cloth of medium hardness;
- self-tapping screws of different sizes.
You need to buy building materials with a margin. The minimum margin is 15% of each material.
Instruments
Tools - this is something without which you can not heat your house with polystyrene foam. So, to perform the installation of insulation we will need the following set of tools:
- stairs;
- spatula of different sizes;
- construction knife;
- a plumb line, a cord for churning out a straight contour;
- an ironing board;
- building level, not less than 1 meter in length;
- roulette;
- a bucket for mixing glue base;
- a construction mixer, but in the absence of such it is possible to use a drill with a special nozzle-mixer;
- screwdriver;
- rubber hammer;
- perforator;
- roller with an elongated handle.
Specificity of facade decoration with foam plastic
Regardless of which of the two options you have chosen for arranging your home, the stage-by-stage installation scheme will be the same: a glue base is applied to the wall of the house. Then the PPP is mounted, which is fixed by means of dowels. Further, on the corners of the structure have a reinforcing corner, after which the entire perimeter of the outer wall is plastered.

On top of the plaster is placed reinforcing mesh-serpyanka, which is fixed by means of putty. And the final stage is decorative plaster, which can be easily painted in any color you like.
It is worth noting one more thing: every layer of plaster and putty is treated by ground, which improves the adhesion of the subsequent coating.
Let's consider each stage of warming the house with foam plastic with our own hands.
Preliminary preparation of walls
Thermal insulation boards fit well on even walls, so first they need to be leveled. To do this, we clean the walls of the house from the old covering with a spatula and wipe the cracks with putty. If on the walls of your house there are relief patterns, the height of which exceeds 0.5 cm, then it is better to remove them with a jackhammer or a perforator. While for a more precise alignment, a reinforced mesh may be needed, which is fixed with a putty.
After the walls have been leveled, it is necessary to allow them to dry completely, after which it is necessary to treat them with a primer.

Mounting the profile-stand
Thanks to this structural element, it is possible to correct the evenness of the heater installation. Fastening of a profile-support is carried out by means of dowels on type "a fungus", in the size of 6-7 mm.

VIDEO: How to fix the socle profile
Installation of expanded polystyrene panels
Before using the adhesive composite, carefully read all the manufacturer's recommendations, because it is in them the method is indicated, and the proportion of dilution of the mixture.
The glue is not applied to the wall, as many inexperienced builders think, but to the surface of the insulation liner, filling its entire perimeter. In turn, the thickness of the adhesive layer depends on how smooth the walls are.
Stacking of expanded polystyrene plates starts from the bottom. Do not forget during the installation of the heat insulator to control the smoothness of the wall surface. And yes, always insulate the slopes at the windows, because the absence of heat-insulating material in these places can lead to heat loss.

Layout of sheets
Joints of plates should not pass along the border of the window or doorway, this will lead to significant heat losses.

In order for the façade to be durable and reliably to keep heat, for the window and doorways use fragments of penopolis cut in the form of a letter "G" 20 cm wide.

The final stage
After all the walls are covered with IPPA, it is necessary to give at least three days of this design to make it completely dry. And by the incident of the specified time, we fix each layer of material 4-5 dowels of the type "fungus", placing them on the edges of the thermocouple and in the middle of it.

Knowing the intricacies of installing such a heat insulator, you can easily insulate your house with polystyrene foam, saving money on calling workers whose services are not so cheap, and reducing the cost of paying bills for fuel.
VIDEO: How to insulate a house with penoplex