The most important benefit of civilization, with which owners strive to equip their Vacation home, is the water supply system. Moreover, the arrangement of such a system can now be afforded not only by those who live where the water supply networks run, but also by the owners of houses, dachas and cottages that are located far from civilization. To do this, it is necessary to dig a well or drill a well on the territory of a suburban area, and then, using a pumping station, organize an autonomous uninterrupted water supply for the entire house. If you decide to do the connection of such a system yourself, you may find our step by step guide and video instructions.
To ensure water supply to a private home, a household pumping station will be sufficient. The main tasks assigned to this unit are watering the garden, supplying water to the house, providing drinking water, as well as the needs of hot water supply and heating systems. Before installing the station with your own hands, you need to choose the right equipment.
When choosing a unit for a private home, it is very important to consider the performance of the model. It should not exceed the debit of the hydraulic structure and cover the family’s water needs. To determine how much water is needed for everyone living in the house, it is enough to know that the norm for one person is 250 liters.
It is equally important to consider the following indicators:
- depth of water rise;
- maximum pressure (when calculating it, it is worth taking into account not only the height of the rise from the source, but also the horizontal sections of the pipeline);
- performance;
- presence of automatic control;
- what type of pump is used (surface or submersible);
- presence and volume of the hydraulic tank.
Important to know: stations with surface pump easier to maintain and repair, but make a lot of noise during operation, and submersible-type units are quieter, but their repair and maintenance are quite difficult to carry out.
Choosing a location for the unit

You can install a pumping station with your own hands in one of three places:
- in the basement of a private house;
- in a separate building;
- in a caisson.
If your house has a dry, spacious heated basement, then you can use one of its rooms to install a pumping unit. The room must be well insulated and soundproofed. The station can be mounted on a stand away from walls to protect structures from vibration.
If the area of the house does not allow you to allocate a separate room for the unit, you can build an insulated extension to the house or build a separate structure. Of course, this will entail additional costs, but this is the only way you can properly install and protect the equipment. By the way, it is better to build the building where the heating networks run in order to heat this structure as well.
The caisson is installed close to the well head. This option is good because placing the unit away from the house will protect residents from noise during its operation. If you install the caisson with your own hands, do it correctly - its bottom and the pumping station itself must be located below the freezing point of the soil. To ensure uninterrupted water supply even in winter, the caisson must be carefully insulated.
Selecting an installation scheme

- a single-pipe scheme is suitable when water is lifted from a depth of no more than 8-10 m;
- a two-pipe scheme is used when pumping water from a well or well more than 10 m deep.
This difference is due to the fact that to lift water from a significant depth, a conventional pumping station will not be enough; you will need a unit equipped with a remote ejector, which has a two-pipe arrangement.
Connection sequence
Connection to a well and borehole

First, let's look at how to properly connect a pumping station to a well or well. In this case, we will pay attention specifically to the two-pipe connection diagram, since it is more complex. We work in this order:
- First, we assemble the ejector with our own hands. As a rule, this is a monolithic unit made of cast iron, which has three outlets.
- We install a coarse filter made of propylene mesh at the lower outlet of the ejector.
- There is a plastic socket at the top of the cast iron structure. You need to put a squeegee of the required length with a diameter of 32 mm on it.
- Next, you need to assemble a squeegee to fit the diameter of the pipeline. Usually two parts with adapters are enough for this.
- A bronze coupling is installed at the outlet of this outlet. With its help, the transition to polyethylene pipe.
Attention: It is very important to carefully seal all connections. To do this, you can use sealing paste or flax.
- Next, trenches are dug from the hydraulic structure to the house below the freezing point of the soil.
- Water pipes are laid in the trenches.
- A cap is installed at the exit of the well casing. If you can't find it, you can use a knee with a smooth angle.
- To connect the ejector to the water supply pipeline, couplings are used.
- Before lowering the second end of the pipe, it must be passed through the elbow at a right angle.
- Polyurethane foam is used to seal the space. After this, the pipe can be connected to an adapter (angular), and it, in turn, must be connected to the outer part of the water supply.
- Now you can lower the ejector into the well. In this case, the immersion depth must be determined in advance, taking into account the elevation of the top of the casing pipe.
- The head is fixed to the casing using reinforced sanitary tape.
Features of connecting to the water supply

If there are centralized water supply networks near your home, then the pumping station can be connected to them. Typically, the need for such a connection arises when the pressure in the system is too low, which does not allow the heating equipment to function efficiently and correctly. This situation can arise for several reasons:
- the hydrogeological conditions of the area have changed;
- outdated equipment is used;
- As the number of residents has increased, water consumption needs have become greater.
It is important to know: before connecting the pumping unit, you must purchase and install a storage tank or accumulator.
To connect to central water supply you need to perform the following sequence of actions:
- The place where the pipeline will be disconnected is selected in advance. After stopping the water supply, the water supply is divided into two parts.
- So the part that comes from the city highway is connected to the storage tank.
- The liquid from this tank must flow through pipes to the pumping unit. A pipeline leading to a residential building is connected to the outlet from the pump.
- Next, the electrical wiring is laid and connected.
- After this, you can perform a test run, configure and adjust the equipment.
The main thing in setting up a pumping unit is to select the correct pressure in the system. To adjust the equipment, a small amount of water (about 2 liters) is poured into a special hole on the pump unit. Now you need to open the tap and measure the pressure in the system at which the pump turns off and on.
Attention: the optimal pressure to turn off the device should be within 2.5-3 bar, and the maximum pressure to turn on the pump should be 1.5-1.8 bar.
If the pressure at which the unit operates does not fall within the specified limits, it is necessary to adjust the device. It's very easy to do this:
- The cover on the pressure switch opens.
- To adjust the device shut-off pressure, use a screw marked “DR”. It needs to be twisted towards decreasing or increasing depending on the results.
- To adjust the switching pressure, you need to turn the screw marked “P”.
- After adjustment, the cover on the relay is put in place.
Also, do not forget that the long-term and proper operation of pumping equipment is affected by the composition of the water, namely various admixtures of sand and clay. To protect the equipment from impurities, a filter is installed at the suction inlet of the station.
Important: so that installing a filter does not lead to a decrease in pressure in the system and a decrease in pressure, it is necessary to systematically clean it. If the filter becomes so dirty that it stops passing water through it, this can lead to breakdown of the pumping equipment.
Connection errors

In order for the connection to go quickly and correctly, you should take into account and avoid the mistakes that are most often made during self-installation:
- When laying a pipeline to the house, it is necessary to allow a small margin of length. The whole point is that it is worth taking into account the slightest turns, bends and even the thickness of the foundation through which the pipe will be inserted into the house.
- All threaded connections should be tightened with a wrench. If you use seals and tighten the connections by hand, this will not be enough, so there is a high probability of leaks during the operation of the system.
- The installation of the hydraulic accumulator should be given special attention. If the pressure in the hydraulic tank is below 1.2-1.5 atm, then it must be increased. To do this, you can use a regular car pump.
Video guide for connecting a pumping station with your own hands:
Staying outside the city, in a country residence, has additional difficulties, since centralized communications are not available everywhere. Residents of the periphery improve living conditions in a cottage or house so that it does not differ from urban comfortable housing. One of the points of a comfortable life concerns the constant availability of water in sufficient quantities. In this case, special equipment will help - a do-it-yourself pumping station. Due to self-installation you can save your family budget.
The majority of wells in summer cottages have a depth of up to 20 m – optimal for installing automatic equipment. With these parameters, there is no need to purchase a deep-well pump, an automatic control system or an intermediate tank: water flows directly from the well (or well) to the collection points. To ensure the correct connection of the pumping station, you need to understand what it consists of and how it works.
The main functional units of the station are the following equipment:
- , ensuring the rise of water and its transportation to the house.
- A hydraulic accumulator that softens hydraulic shock. It consists of two parts separated by a membrane.
- Electric motor connected to pressure switch and pump.
- A pressure switch that controls its level in the system. If the pressure drops below a certain parameter, it starts the motor, if there is excess pressure, it turns it off.
- A pressure gauge is a device for determining pressure. It is used to make adjustments.
- A water intake system equipped with a check valve (located in a well or well).
- The main connecting the water intake and the pump.

Using this formula, you can determine the maximum suction depth: the diagram clearly demonstrates what measurements need to be made for this

The most common version of a pumping station is a hydraulic accumulator with a surface pump mounted on top and a unit that includes a pressure gauge, pressure switch and dry-running protection

As can be seen from the table, the cost of pumping stations can vary. It depends on the power, maximum pressure, bandwidth, manufacturer
Before installing pumping equipment, it is necessary to purchase all functional parts according to the parameters of the well and water supply system.
Self-installation of a pumping station
At first glance, there are quite a lot of places for installing equipment - this is any free corner in the house or outside it. In reality, everything turns out to be different. However, only a well-thought-out installation of a pumping station guarantees its full operation, so some conditions must be observed.
Installation conditions:
- proximity to a well or well ensures stable water absorption;
- the room must be warm, dry and ventilated;
- the placement location should not be cramped, as preventive and renovation work;
- the room must hide the noise produced by the pumping equipment.
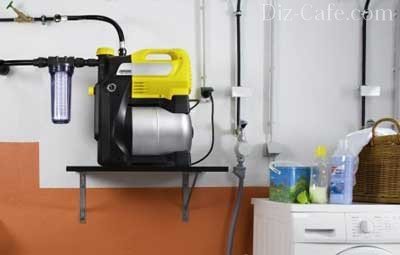
One option for installing a pumping station is on a shelf specially attached to the wall. The installation room is a boiler room, boiler room or utility room.
It is difficult to comply with all the conditions, but it is advisable to adhere to at least some. So let's look at a few suitable places for installation.
Option #1 – room inside the house
A well-insulated boiler room on the territory of the cottage is an ideal area for installation in case of permanent residence. The main disadvantage is good audibility with poor sound insulation of the room.

If the pumping station is located in a separate room country house, then it is best to install a well directly under the building
The material on how to make a well water supply system will also be useful:
Option #2 – basement
An underground or basement room can be equipped for the installation of a pumping station, but this should be considered during the design. If there is no heating in the room, and the floors and walls are not insulated, you will have to spend a lot of effort to prepare it.

A well-equipped basement is ideal for installing a pumping station. When laying a pipeline, a hole for communications should be made in the foundation of the house.
Option #3 – special well
A possible option that has a couple of pitfalls. The first is the difficulty of maintaining the required level of pressure in the house, the second is the difficulty of carrying out repair work.

When the pumping station is located in a well, on a specially equipped site, the pressure level should be adjusted, which depends on the power of the equipment and the parameters of the pressure pipe
Option #4 – caisson
A special area near the well exit is also suitable for installation, the main thing is to correctly calculate the depth of its location. The required temperature will be created by the heat of the earth.

The pumping station located in the well caisson has two advantages: complete noise insulation and protection from freezing during frosts
In the absence of specially designated places, the unit is installed in common areas (in the hallway, bathroom, corridor, kitchen), but this is a last resort. The loud noise of the station and comfortable rest are incompatible concepts, so it is better to prepare a separate room for installing a pumping station in the country.
Pipeline laying
The well is usually located near the house. In order for the pumping station to operate properly and without interruptions, it is necessary to ensure the unhindered flow of water from the source to the equipment, which is located in a specially designated area. For this purpose, a pipeline is laid.
Low winter temperatures can cause pipes to freeze, so they are buried in the ground, preferably to a depth below the ground freezing level. Otherwise, the line should be insulated. The work boils down to the following:
- digging a trench with a slight slope towards the well;
- making holes in the foundation for pipes optimal height(if necessary);
- pipe laying;
- connecting the pipeline to pumping equipment.
During the construction of the highway, you may encounter a problem such as the presence of high-standing surface water. In this case, the pipes are installed above the critical level, and heat-insulating material or a heating cable are used to protect against cold.

Advantages of polyethylene pipes and fittings over their metal counterparts: lack of corrosion, ease of installation and repair, low price (30-40 rubles/linear meter)

This pumping station installation diagram shows an option for insulating pipes above the ground freezing level

The best option for thermal insulation of external water pipes is a solid “shell” of polystyrene foam (8 cm thick) wrapped in foil
For thermal insulation of pipes that are laid above the ground freezing level, inexpensive and environmentally friendly material is often used - mineral wool on a basalt basis.
Exterior works
From the outside polypropylene pipe We attach a metal mesh that will serve as a coarse filter. In addition, you will need a check valve to ensure that the pipe is constantly filled with water.

It is possible to purchase a ready-made hose with a check valve and a coarse filter, but equipped with your own hands will cost much less
Without this part, the pipe will remain empty, therefore, the pump will not be able to pump water. We fix the check valve using a coupling with an external thread. The end of the pipe equipped in this way is placed in the well.

The coarse filter for the supply hose is a metal mesh with a fine mesh. Without it, proper operation of the pumping station is impossible
After completing these steps, you can start upgrading the well head.
Connecting equipment
So, how should you properly connect your home pumping station so as not to encounter technical inconsistencies in the future? First of all, we install the unit on a specially prepared base. It can be brick, concrete or wood. To ensure stability, we screw the legs of the station using anchor bolts.

For installation of the pumping station, special legs-stands are provided; however, to provide additional stability, the equipment must be fixed with bolts
Placing a rubber mat under the equipment can help dampen unnecessary vibrations.

For more convenient maintenance, the pumping station is installed on a base the height of a regular table, made of durable material - concrete, brick
The next step is to connect the pipe coming from the well. Most often this is a polyethylene product with a diameter of 32 mm. To connect, you will need a coupling with an external thread (1 inch), a metal angle with an external thread (1 inch), a check valve with the same diameter, and a straight American tap. We connect all the parts: we secure the pipe with a coupling, and we fix the “American” with a thread.

One of the check valves is located in the well, the second is mounted directly to the pumping station. Both valves serve to protect the system from water hammer and ensure the correct direction of water movement
The second output is intended for communication with water supply network. It is usually located at the top of the equipment. The connection pipes are also made of polyethylene, as it is inexpensive, flexible, durable material. Fixing occurs in a similar way - using an “American” and a combined coupling (1 inch, 90° angle) with an external thread. First, we screw the “American” to the outlet of the station, then we mount a propylene coupling into the tap, and finally water pipe We fix it in the coupling using the soldering method.

To completely seal the connections, they must be sealed. Traditionally, a winding made of flax is used, and a special sealing paste is applied on top of it.
After you have connected the pumping station to the water intake and plumbing system, you need to check the quality of its operation.
We are conducting a test run
Before starting the station, it must be filled with water. We let water through the filler hole so that it fills the accumulator, lines and pump. Open the valves and turn on the power. The engine starts and water begins to fill the pressure pipe until all the air is removed. The pressure will increase until the set value is reached - 1.5-3 atm, then the equipment will automatically turn off.

In some cases it is necessary to adjust the pressure value. To do this, remove the cover from the relay and tighten the nut
As you can see, installing a home pumping station with your own hands is not at all difficult; the main thing is to follow the installation instructions.
The installation of a well on the site allows for independence from the centralized water supply. However, in order to supply water to the house, it must be pumped through the system. A pumping station is used for these purposes. We will learn further about the features of connecting a pumping station to a well and a well.
Do-it-yourself connection of a well pump
Before you read the instructions for connecting a pumping station, we suggest you study the recommendations that will help you choose the right pumping station for your type of well or borehole.
There are two main types of pumping equipment stations - domestic and industrial. The first option is most often used for private houses and summer cottages, and the second is relevant for industrial enterprises that consume large amounts of water. A household pumping station is quite capable of providing the house with cold water, watering the garden, and providing water heating devices and basic household needs.

The technology for connecting the pumping station is determined by the type of water supply source. There are three main such sources - centralized water supply, well or well.
There are also two types of functioning of the pumping station. The first option involves manual mode, and the second option - automatic mode. There are also mobile and stationary stations. The choice of a particular station is justified individual characteristics plot, the amount of water consumed per day. Therefore, before purchasing a pumping station, it is necessary to carry out a series of calculations to help determine the most the best option. The optimal amount of water per day for one person is 230-250 liters. If the pumping station is installed on summer cottage, then these figures are reduced by 10-15%.
The pumping station is installed either in a caisson or in any room of the house. In addition, sometimes the pumping station is installed in the basement. Please note that the equipment should under no circumstances come into contact with water or be exposed to excessively low temperatures.
During the installation of the station in the caisson, it is necessary to provide additional insulation. The station is installed two meters from the water freezing level. If the well depth is up to ten meters, then we recommend choosing a single-pipe version of the station. Pumping stations two-pipe type are installed if the well depth is about twenty meters. Before the beginning installation work a pump connection diagram should be developed that takes into account all the key points of installation work.

Do-it-yourself connection of a pumping station to a well
The process of connecting the pumping station begins with the assembly of the ejector - a cast iron unit, which is distinguished by the presence of three connections at the outlet. A mesh filter is installed in its lower part. On the top of the ejector there is a plastic element on which the ejector is mounted. To assemble the drive, it is enough to connect its two components together using transition connections.
A coupling made of bronze is installed at the outlet part of the drive. It is this that is the adapter to the polyethylene pipe. Do not forget that all connections must be properly and hermetically sealed; flax or special paste is used for these purposes.
Dig a trench whose depth is below the freezing depth of the soil. To find out this indicator, refer to geological maps of your region. A water pipeline is installed inside the trench. In this case, it is necessary to use pipes with a small margin.
A special cap is installed on the casing pipe. If you did not purchase it, then replace this part with elbows that have a smooth angle. To connect the pipe to the ejector, use couplings. Before lowering the second end of the pipe, it is installed inside the elbow at a right angle. Next, it is connected to the external pipeline.

Next, the ejector is lowered into the well. The depth of its installation should be noted immediately. The installation location of the ejector coincides with the exit location of the casing pipe. Use plumber's tape to secure the pipe head.
There are certain mistakes that beginners make when connecting a pump, we suggest you familiarize yourself with them:
- when laying pipes from the station to the house, create a certain reserve, since the pipeline is laid in compliance with angles and bends;
- to tighten the connections, use a wrench; manual tightening is not enough, but you also shouldn’t overdo it with a wrench, as there is a risk of damaging the fasteners;
- Pay attention to the hydraulic accumulator; when pressure surges are below 1.3 atmospheres, a compressor is used to increase it.

Do-it-yourself connection of the pumping station to the water supply
If there is insufficient pressure in the centralized water supply system, it is recommended to connect a pumping station to it. Otherwise, the heating equipment suffers first of all. Lack of pressure is provoked by the following factors:
- changes in hydrogeological conditions;
- presence of outdated equipment;
- the need for large water consumption.
Please note that before connecting the pumping station, you must purchase and install a storage tank.

The installation process is as follows:
1. At the installation site, disconnect the water pipe and install taps.
2. That part of the highway that connects to the city highway is connected to a storage tank.
3. The tank is connected to a pumping station, the outlet of which is connected to the inlet pipe to the house.
5. The equipment is configured and adjusted in relation to the individual characteristics of the terrain.

The pumping station is adjusted in such a way as to supply the system with optimal constant pressure. To adjust the equipment, initially, two liters of water should be poured into the snail. Next, you need to determine the time to turn the pump on and off. If the pumping station starts too quickly, reduce the pressure. In addition, under the pump cover there are special screws that regulate its operation.
When connecting a circulation pump, you should also take into account facts such as the chemical and physical state of the water. Almost any water contains harmful components that must be removed before the water reaches the pumping station. Therefore, it is recommended to install an additional filter on the suction part of the station. If this is not done, then impurities such as sand, clay, metal will accumulate inside the pump and lead to its failure. This problem often occurs with vibrating type pumps.
Let's consider the negative aspects of installing the filter. First of all, this is the creation of additional pressure and pressure. To avoid this, periodically clean and replace filters in pumping equipment.

Connecting the pressure switch to the pump yourself
By connecting a pressure switch to the pump with your own hands, you can automate the operation of the water supply system and ensure automatic operation of the pumping station. The pressure switch is connected to the pumping equipment, water supply system and electrical supply.
First, the relay is connected to the plumbing system, then to the pump, and only then to the electrical network. When calculating the performance of the water supply system, first of all take into account the water pressure, which will subsequently be provided by the hydraulic accumulator. Most often, the relay and pressure gauge are installed directly on the hydraulic accumulator pipe. For these purposes, it is necessary to purchase devices in the form of fittings with five outlets.
The output sections are connected to water pipes, a hydraulic accumulator, a pressure gauge and a relay. In order to connect the pressure switch to the water supply system, you just need to fix it in the required hole. Make sure that the connections are sealed; fumlent is used for these purposes.
The pressure switch is distinguished by the presence of two holes for supplying electrical wiring. The first of them is connected to the pumping station, and the second is connected to the outlet. Next, the cover is removed and the wires are connected to the terminals on the relay.

Before connecting the relay to the electrical network, turn off the power. Install the power cable into the inlet of the housing part, while the cable is divided into several cores connected to terminals with different purposes. Do not forget to provide grounding, it is mandatory.
The contacts are connected to the terminals of the pumping equipment in the same way. After completing the work of connecting the relay to the power supply, configure the device and test its operation. In order to control the pressure in the system, use a pressure gauge; there is a specific outlet for connecting it to the fitting. Some pressure switches are distinguished by the presence of a built-in pressure gauge. If there are certain malfunctions in the operation of the device, we recommend contacting specialists. This completes the electrical connection of the pump.
Do-it-yourself connection of a pumping station to a well - technology and recommendations
Before starting work, decide on the installation location of the pumping station. There are two options - a basement or installing the pump directly in the caisson. The first option is acceptable only if the basement is heated and there is no high humidity. Thus, if problems arise with the equipment, you can quickly get to it. The cost of installing pumping equipment in the basement is much lower, and the time required to complete this work is also reduced.
The equipment is not installed next to a wall, since during operation the pump vibrates and there is a risk of damage to the casing part of the pump against the wall.

The second option is to install a pumping station in a caisson. In this case, you need to take care of installing a pit located above the shaft. In this case, the pumping station is installed directly into the well. The disadvantage of this method is the duration, physical and material costs of completing the work. In addition, to access the equipment, the pit must be dug again.
We suggest you familiarize yourself with the features of connecting a pump to a well with your own hands. In this case, the equipment will be two-pipe.
First read the instructions from the manufacturer. In it you will find detailed description installation work, as well as features of ejector assembly. A filter should be installed in the lower part of the ejector, which will provide additional water purification. Otherwise, pumping equipment without a filter will quickly fail. In order to ensure a smooth transition from the pipe to the plastic pipe, you will need to additionally install a bronze coupling between them.

To provide additional sealing of connections, use fume tape. Make a trench, the depth of which should be below the freezing depth of the soil. Install a plumbing system in it. Please note that pipes are installed with reserves. To ensure that the water in the pipeline does not freeze even in severe frosts, take care additional insulation water supply
Using a coupling, connect one part of the pipe to the ejector. The second end of the pipe is passed through the elbow, and the space is filled with polyurethane foam. Connect the pipe to the corner adapter. Next, the ejector is lowered into the well.
Be sure to install a filter system that will increase the life of the pumping equipment. After installing the filter, clean or replace it periodically. In this case, it is possible to efficiently connect the pumping equipment to the water supply system, in this case in the form of a well.
You can pump water into your house from a well or different ways- for example, equip a water source with a deep or surface pump, or equip it with a manual pump and carry water into the house in buckets, or you can assemble a full-fledged water supply system, assigning the responsibility for transporting water to the house to a pumping station. In the latter case, you are guaranteed complete automation of the water supply system. This, or more precisely, how a pumping station is installed in a dacha, will be discussed in this article from the website.
Correct installation of the pumping station photo
Installing a pumping station at your dacha with your own hands: choosing a location
In principle, deciding on the location of installation of a pumping station for a summer residence is not so difficult - there are not many options, unless, of course, you reinvent the wheel. In most cases, it is installed either in a pit near a well or well directly in, or a separate room is allocated for it. In any case, it is impossible to get rid of laying an underground water supply system. The only option that allows you to do this is to drill a well in the basement of the house - you understand that this cannot be done with the building erected, so we will leave this option alone and deal with the features, or rather, the advantages and disadvantages of the three previous places installation of a pumping station.

You can see how to install a pumping station at a dacha with your own hands and the principle of its operation in this video clip.
As mentioned above, the only thing that neither one nor the other option, or rather the installation location of the pumping station at the dacha, does not eliminate is from carrying out earthworks. You will have to live with this if you do not want to face problems such as freezing water pipes in winter. By the way, this is another reason to refuse to install the station in a pit. No matter how you insulate it, if it does not work constantly, it is guaranteed to freeze.
Instructions for installing a pumping station: sequence of work
To make it easier to understand how a pumping station is installed in a country house, let’s consider the entire progress of the work in the form of a certain sequence of actions.
- Excavation work and pipeline laying. Everything here is quite simple - from the water source to the house (to the installation site of the pumping station) or from the pit to the house (to internal water supply) a trench is being dug. Taking into account the average temperature in winter, it will have to be buried at least 1.2 m. The rest is not difficult either. A pipe is laid in the trench, thoroughly insulated and buried - first it needs to be filled with clean soil, but there is no need to throw construction waste there. Ideally, the pipe should be placed in a sleeve (in another pipe of larger diameter) - in this case, if it breaks, it will be quite easy to replace it with a new one. The most difficult part is lowering the pipe into the well - with a well things are somewhat simpler. You simply punched a hole in the casing rings and lowered the pipe into the water, having previously equipped its end with a special filter element and a check valve, the arrow of which is directed away. Availability check valve necessarily - it will hold water in the pipe and sediment and prevent it from returning back to the source. You can’t do this with a well—you’ll need a special adapter. In principle, it is also not difficult to install, although you will have to tinker with it. At this stage of work, the second end of the pipeline is simply brought out to the installation site of the pumping station.

Installation of a pumping station in a well photo
- Installation of a pumping station. Everything here is also elementary - at this stage of work you just have to secure the station to the floor through the holes in its base. To make less noise, it is better to lay thick rubber under the fasteners. There are no other nuances here other than reliable fastening.
- Pumping station piping. By and large, this stage of work is by no means difficult, especially if you have at least basic concepts in the plumbing trade. Of the main nuances, only a couple of points can be highlighted. Firstly, these are shut-off valves. Some may consider it unnecessary, but once you are faced with the system being full, everything will immediately fall into place. In case of repair, after dismantling the pumping station, in the absence of a tap, the water from the pipe will slowly but surely flow back to the source, and then after installing the already repaired station, you cannot avoid the repeated process of filling the system. And so they closed the faucet, installed, again, at the water inlet to the station and that was the end of it - the water from the pipe would not go anywhere. It is advisable to install the faucet with an American one - a detachable connection will allow repair work to be carried out without resorting to cutting pipelines. The valve is mounted directly at the inlet of the pump. Secondly, the American will also be needed to connect the pipeline at the water outlet from the pumping station. By the way, a tap won’t hurt here either - it will block the water in the distribution throughout the house, and after installing the repaired pumping station, it will flow into the pump, and the system will not have to be filled at all. Installation shut-off valves must be carried out using tow - there is no way to do without sealing the threaded connections.

Installing a check valve at a pumping station photo
And, of course, filling the system with water. For this purpose, you need to install a tee in front of the outlet tap and equip its branch with another small tap - it is through it that you will have to fill the system with water. Slowly, through a watering can, so that the air has time to escape from the system. By the way, in order to effectively fill the system with water, it is better to lay all pipelines running from the source to the pumping station on a slope - in this case, the water being poured will flow downhill better, and air will be more efficiently removed from the system. After the pumping station is filled with water (you will determine this moment when the water being poured will no longer flow into the pipe), it can be put into operation and enjoy the result, or rather the presence of water in the pump.

Do-it-yourself pumping station installation at the dacha photo
To conclude the topic, a few words about how to choose a pumping station for your dacha. There are only three factors to take into account here. Firstly, this is the purpose - there are domestic and industrial pumping stations. It is better to leave the latter alone; they will not be needed for a dacha due to their high cost - they are not intended for the volume of water supply. Secondly, this is a source of water, the features and type of which do not need to be paid attention at all, and if someone says differently, then he is a person far from the design and operating principle of the pumping station. Modern equipment This type can pump water from anywhere, even from the main water pipeline - they are also used to increase the pressure in the system. Thirdly, the optimal operating modes are daily fluid consumption, the presence of manual and automatic operating modes. In all other respects, modern pumping stations are unpretentious units.
Basically, that's it. As you can see, choosing and installing a pumping station at your dacha with your own hands is not at all difficult. If you thoroughly understand the principle of its operation, then every man with skillful hands can cope with this task.
Such an important procedure as connecting a pumping station can be carried out using various schemes, which allows you to pump out liquid media from different water supply sources. The choice of a specific connection scheme is determined by factors such as the water supply source used; number of water intake points; the number and type of household appliances that require water to function; the number of people living in the house; Availability garden plot(and therefore plants that need watering). After analyzing all of the above factors, you can select a specific model and begin connecting the pumping station according to a specific scheme.
What is a pumping station and what does it consist of?
A pumping station is a complex of equipment and technical means designed for supply, as well as for further transportation through a pipeline, of a liquid medium. The source of water supply to which such an installation is connected is usually a well (or well). Installing a pumping station in a country house or in a private house allows you to provide yourself with the required amount of water both for everyday needs and for watering the garden.
On the modern market you can find many pumping stations of various types and models. That is why it is important to know how to choose a device to solve certain problems, as well as how to install a pumping station in accordance with the chosen scheme so that such equipment operates with maximum efficiency.
Pumping stations, when compared with a separate water pump, ensure that the equipment operates in a more gentle mode, which significantly extends its service life. To understand how such installations work, you must first understand what kind of structural elements they consist.

So, the main structural components of pumping stations, used both to equip industrial enterprises and to solve everyday problems, are:
- a pump whose task is to pump out water (in the vast majority of cases, pumping stations are equipped with surface-type pumps);
- a hydraulic accumulator, which is a container, the inside of which is equipped with a membrane that separates the liquid medium pumped by the pump from the air;
- a control unit that ensures the operation of the pumping station in automatic mode, turning the pump on and off when the pressure level in the hydraulic accumulator reaches a certain value;
- control devices, the main one of which is a pressure gauge, which allows you to determine the pressure level in the water pumping station (WPS) system.
How to choose the right pumping unit
The question of how to connect the pumping station to a well or borehole is secondary. First you need to choose the right equipment. In this case, one must be guided by a number of factors.
Purpose
According to their purpose, pumping stations are divided into two main types: domestic and industrial. The latter, as their name implies, are equipped with manufacturing enterprises. Specifications These installations make it possible to use them for pumping significant volumes of liquid media. Connection, adjustment, and especially installation of industrial-type pumping stations are carried out by qualified specialists.

Domestic-grade pumping stations are easy to install and easy to use
You can install a pumping station with your own hands if this equipment is intended to solve household problems (providing a summer house or country house the required volume of water used for domestic needs, watering green spaces, organizing heating and operating washing and dishwashers, boilers, showers, instantaneous water heaters, etc.).
Source type
A pumping station for a private home can be connected to various water supply sources. Each of them determines the scheme according to which the pumping station should be installed.
Operating mode
The connection diagram of a pumping station to a well, borehole or water supply system may imply manual or automatic mode. Depending on the required degree of mobility on the modern market, you can choose a stationary or mobile model.

When choosing a pumping station based on its operating mode and other parameters, one must also take into account how much water it must pump per unit of time. Thus, it is generally accepted that one person living in a private house needs 250 liters of water every day. When choosing a pumping station to equip a dacha, this figure can be reduced somewhat.
Installation location
Installation of a pumping station in a private house can be carried out in the basement of the building itself, in a separate building or in a caisson. The best of all the listed options is to install the station in the basement of the building it serves, where certain conditions are created for it.

So, in particular, it is necessary that the water supply pumping station, when installed in the basement of a house, should be located at a level that will not allow it to be damaged during lifting groundwater. In addition, it is necessary to ensure that the pumping station, which is installed in the basement, does not touch the walls with its body, which can lead to their vibration. It should also be borne in mind that the room in which the pumping station is installed must be heated. This will protect the equipment from freezing in water during operation in the cold season.
If you decide to use a caisson, then it must also be insulated, and the station itself must be located below ground level at a depth at which the soil no longer freezes. Thus, the depth at which the caisson is mounted must be at least 2 meters.

If the depth of the underground water source, for which the pumping station is used, does not exceed ten meters, you can opt for single-pipe models. If this parameter is in the range of 10–20 meters, you need to choose two-pipe pumping stations for a well or well, equipped with an ejector device. Before equipping an underground water source with such equipment, it is necessary to develop a scheme according to which the pumping station will be installed in a well or borehole.
If a separate room located on the territory is used for installation of the pumping station personal plot, then the problem with the noise that such equipment produces is solved, but access to it for maintenance and repair is difficult. This option also assumes that the room in which the pumping station will be installed is insulated. It is also necessary to ensure that the pipes through which water from such equipment is supplied to the water supply system of the house are reliably protected from freezing.
How installation is carried out according to various schemes
Connecting the pumping station to the water supply in the house, as mentioned above, can be carried out according to various schemes. In order for you to choose the best one, you should consider each in more detail.
Two-pipe connection
Connecting a pumping station to a well or well using a two-pipe scheme is carried out according to the following algorithm.
- The ejector is pre-assembled (for this you will need a cast iron tee with outlets for connections and a fitting).
- A mechanical cleaning filter is mounted on the lower pipe of the ejector.
- A plastic socket is installed on the upper branch pipe of the ejector, to which a fitting of the required length with a diameter of 1 1/4 inches is connected. To connect a given ejector pipe to a pipeline of a certain diameter, it may be necessary to use several connections.
- To connect the last flow to the pipeline, a coupling made of bronze is used.
- When placing the ejector in a well shaft, it must be taken into account that the inlet pipe must be located at a distance of at least 1 meter from the bottom of the underground source, which will protect the device from getting into its internal part large stones and sand.
- Length plastic pipe, to which the ejector is connected before descending into the shaft, is calculated as follows: one meter is subtracted from the distance from the bottom of the source to the mouth of the well.
- A pipe bend bent at an angle of 90° is installed at the upper end of the casing pipe. This homemade head is connected to the casing pipe using plumbing tape.
- The upper end of the pipe, which is connected to the ejector, is inserted into the socket of a homemade head and the space between the walls of the pipes is sealed using polyurethane foam. The second socket of such a head is connected to the outer part of the water supply using corner adapters.
- After carrying out the above procedures, it is necessary to connect a well pump with a hydraulic accumulator to the system, configure it to work with an ejector, and perform the first start of the pumping station.

You can learn more about what the above-described pumping station piping scheme looks like and how it is practically implemented using a video that is easy to find on the Internet.
When connecting a pumping station to a well with your own hands using a two-pipe scheme, you should avoid typical mistakes listed below.
- When installing the pipeline leading from the pumping station to the house, the required pipe length margin was not taken into account.
- The threaded connections are not made very reliably and are poorly sealed, which can cause leakage of water supplied to the pipeline.
- No appropriate attention was paid to the hydraulic tank, which should ensure a pressure in the pipeline of at least one and a half atmospheres. If the pressure value is lower, then it should be increased by pumping air into the air chamber using a compressor or a simple pump.
Connection to the water supply system
The question of how to start a pumping station so that it pumps water from the main water supply most often arises in cases where the pressure is not enough for effective operation heating system. To properly connect the pumping station to the existing water supply, you must perform the following steps.
- At the place where the connection is planned, the water pipe is disconnected.
- The end of the disconnected pipe through which water flows from the central system is connected to the hydraulic tank.
- At the outlet of the storage tank, a pump is installed, the pressure line of which is connected to the pipeline leading to the house.
- Then the electrical part of the work is performed (connecting the power supply to the pump and performing a test run).
- Based on the test run results, the pumping equipment is adjusted and adjusted.

You can also get acquainted with the above-described process of connecting a pumping station in more detail using videos posted on the Internet.
It is very important to understand not only how to make the connection, but also how to adjust the pumping station, which is installed in a caisson, well pit or embedded in a central water supply system.
A properly adjusted set of such equipment should automatically turn off at a certain pressure (2.5–3 atm), and also automatically turn on when the liquid pressure in the system drops to 1.5–1.8 atm.
Both the installation of a pumping station in a well, borehole or a central water supply system, as well as its adjustment, can be done by yourself, the main thing is to know the algorithm for performing such procedures. After the connection is made well pump to the well, the pumping station has been installed in the well or pumping equipment has been inserted into the central water supply system, you can proceed to adjustment.