Creating reports is one of the main functions of any accounting system. What types of reports exist in 1C Accounting 3.0, how reports are configured in 1C Accounting 8.3 and what tools exist for creating new reports - we will look at today.
Types of standard reports
The company's 1C accounting program is initially pre-installed with a wide range of reports that allow you to obtain all the necessary information. Their full list is presented in the “Reports/Standard Reports” section:
Also, each section of the program presents other types of standard reports, for example, salary reports in 1C 8.3 are stored in the “Salaries and Personnel/Salary Reports” section.
In each report, there is the possibility of “additional customization” of the report, namely, you can add or remove some additional fields, add grouping, selection, etc.
Let's consider the setup option using the example of adding an additional field to the standard report “Account balance sheet” (select account 10). To do this, from the “Show settings” button, go to “Additional fields”, add a new field, and in the selection form go to the field we need, for example, to reflect the item number in the report, select the “Article number” field, which is located inside the “Nomenclature” field (to expand the field you need to click “+”):
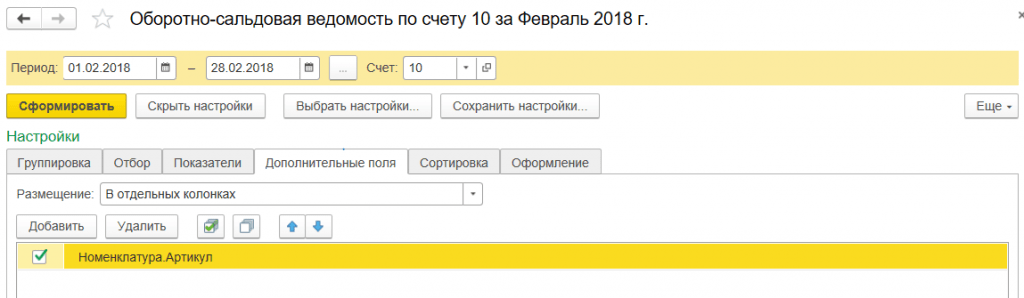
After clicking “Generate”, the additional field we selected appears.
As an example, consider a situation where the report requires including the entire list of items containing the word “boot” in the name. What do I need to do? By clicking “Show settings”, go to the “Selection” tab, add a new field, and in the window that appears, opening the “+” field “Nomenclature”, select “Name”.
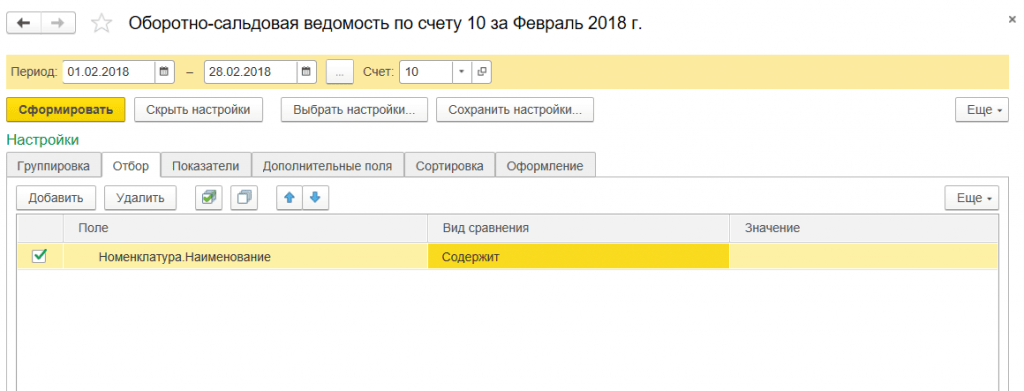
After generating the report, we receive a nomenclature that contains only the value we specified in the name.
Generating reports by document
In the “Standard reports” section there is a universal report that allows you to display information from such configuration objects as:
- Document;
- Directory;
- Accumulation register;
- Register of information;
- Calculation register.
Let's look at examples of situations where a report will help the user not to resort to developing external reports, but to use a standard settings mechanism.
For example, we need to generate a report that will reflect all goods received from a specific counterparty for a certain period. To do this, in the report header, select from the drop-down list the type of object – “Document”, the type of object – “Receipt (acts, invoices)”, and indicate the type – “Goods”.
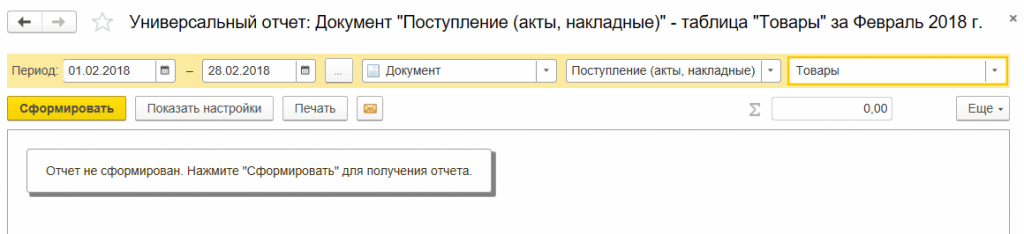
*The Counterparty field is not there initially.
In the “Type of comparison” field set “Equal”, in “Value” select the desired counterparty from the directory.

At the top of the report, indicate the required period and generate the report.

You can save the settings we have made: to do this, click the “More/Save” button.
Let's consider a situation where, in order to correctly generate regulated reporting, it is necessary to check all movements in the “Separate VAT accounting” register by document.
To do this, in the report header, select the object type from the drop-down list - “Accumulation Register”, in the next field select the object type - “Separate VAT accounting”, in the last field select the type - “Balances and turnover”.
In order for the report to display information in the context of documents, click the “Show settings” button to go to the report settings, then go to the “Indicators” tab, add a new field and in the window that appears, select the “Registrar” field (“registrar” is the document that contains a movement was formed along the accumulation register). The newly added field is reflected at the bottom of the list of fields by default: using the “blue arrows” we move the “Registrar” field to the top of the list.

In this article, we looked at what options exist for working with reporting in 1C Accounting 8, how to use the report settings and what information can be obtained using a universal report.
In the “Reports” section there are many different reports for each type of activity. Basically they are enough for everyday accounting. But sometimes, to analyze a particular problem, it is necessary to dig deeper, even down to comparing, for example, entries in a document and in the registers that it affects. And there are times when standard reports are simply not enough.
For such in-depth data analysis or to create your own report in the 1C 8.3 program, there is a “Universal Report”. I am going to consider its capabilities in this article.
General description of the universal report in 1C 8.3
First, let's figure out where to find a universal report? If we go to the “Reports” menu and then click the “Universal Report” link, we will see this window:
Let's take a quick look at its controls.
We're done with the top line.
- Below, the most interesting button is “Show settings”. It's better to show this with an example.
Instructions for setting up a universal report 1C 8.3
Since we work in the 1C: “Enterprise Accounting 3.0” program, we are primarily interested in accounting registers. In configuration 3.0, only one is available to us - “accounting and tax accounting”. Let's choose it. Let's look at the turnover on the 10.01 “Materials” account.
Get 267 video lessons on 1C for free:
Select a period. I will have this throughout 2012. Next, click the “Show settings” button:

To get the names of materials, we will select a grouping by the 1st subconto. It is in it that the name is stored, or rather, a link to the nomenclature.
Go to the “Selections” tab:

Here we need to indicate that we only want to see the score 10.01.
If you wish, you can specify as many selection conditions as you like here.
Let's click the generate button and see what we got:

It can be seen that the report contains too many unnecessary columns. Such as currency accounting, tax accounting, etc. I don’t keep these records, and I want to remove these columns from the report.
We go back to the settings and immediately go to the “Indicators” tab:

We remove the checkboxes from those columns that we do not need to display.
On the “Generate” tab, you can specify the field by which the sorting will take place. For example, I want my materials to be listed in alphabetical order:

After reading this article, you will learn how to use a universal report and will be able to create your own custom reports in the program.
As an example, I will create two reports: a report on sales documents and a report on enterprise costs.
Let's open the universal report form (section Administration):

At the top there is a settings panel, and at the bottom there is a table field for displaying data:

Sales document report
Let's start setting up a report on implementation documents. Let's choose a period:
In the next field we indicate that the report will be based on documents:


In the next field you need to select the data source in the document (the tabular parts of the document are listed + Basic data- these are the details of the header). Let's select data from the tabular part Goods to get data about sold items:

Click below Complete and form:

The result was a linear report without any groupings. Let's complicate it a little and group the data obtained by organization. Let's go to settings:
Choose expanded view settings:

Go to the bookmark Structure:

Here we see the only grouping - detailed records - it is in it that all data is displayed:

Double-click on it and select the organization field in the form that opens (this is not a property in the Products tabular section, but in the document, so the field will look like this: Link.Organization):

Click Close and Form:

Now for organizations, let's add a nested grouping by counterparties (select the grouping by organization, click Add and select the nested field Counterparty by the field Link):

The report has changed:

But as you can see, we have lost data about the documents themselves, nomenclature, accounting accounts, etc. This happened because we changed the group Detailed entries, let's add it to the existing groupings:

Now the missing data is back in the report:

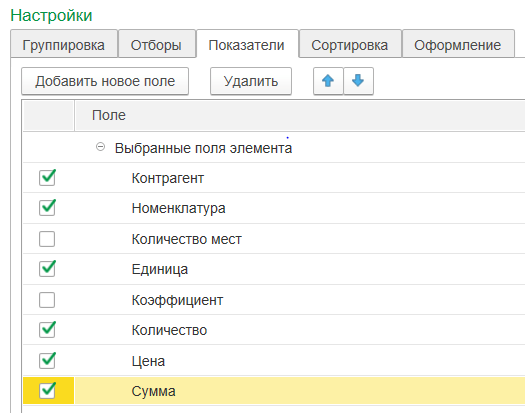
To configure the list of columns, go to the settings tab Fields and sorting:

Let's turn off the checkboxes for unnecessary fields and reformat the report:

Now the number of columns has decreased.
There is no need to think that we have made a full-fledged sales report. Firstly, reports in the program need to be made not according to documents, but according to registers (internal tables of the system) and secondly, some of the given documents may not be posted or even marked for deletion, so the picture may be incorrect. In this case, we did exactly this according to all the sales documents created (for the specified period).
Cost report
Let's create a full-fledged cost report, only now we'll use the document data instead of the postings. To do this, you need to select an accounting register:
In the left field, the program offers the transaction register data type. The rule here is this: if you are making a report that will show some balances (for example, goods in warehouses), select the type Leftovers, if you need a report that will show some operating information for a period (for example, sales for the month or recorded expenses), choose Revolutions. Balances and turnover you need to choose if you want to make, for example, a statement of mutual settlements with counterparties, which, in addition to the initial and final balances, will also show the turnover for the period.
In our example, this will be revolutions. Go to settings, Structure tab:

We add an upper grouping by organization and a subordinate grouping by subaccount1 (these will be cost items). On the bookmark Fields and sorting we set only the sign of using the field Subconto turnover Dt:

On the right side of the sorting table, click Add and select the name of the organization and subconto1, type - in ascending order:

On the first tab we will add selection by accounts:

Click Close and form:

The result was a full cost report. To be able to use it in the future (without having to configure it again), you need to save the report version:

There can be an arbitrary number of saved options. This way you can collect arbitrary information in the system in a form convenient for you.
If some moments caused you difficulties and misunderstanding, watch the video at the beginning of the article, where I show everything more clearly. For a more detailed acquaintance with the configuration, I recommend
The report "Universal report (by registers, documents, directories)" allows you to display data from documents, directories, their tabular parts, accumulation registers and information registers and their virtual tables.
In the "Data Type" field, the data type is selected, and a list of objects of the selected type is presented in the "Object" field.
If a document or reference book is selected, the first tabular part is automatically inserted into the "Table" field. If there are no tabular parts, the "Table" field is missing and the report will be generated based on the directory itself.
If the turnover accumulation register is selected, “Turnover” is substituted in the “Table” field. The report will be generated using the "Turnover" virtual table.
If the balance accumulation register is selected, “Balances and turnover” is substituted in the “Table” field. The report will be generated using the virtual table "Balances and Turnovers".
For periodic accumulation registers in the "Table" field, you can select "Slice of the latest" (set by default) or "Slice of the first".
For accumulation and information registers, in addition to selecting virtual tables, you can select the register table itself - the empty "Table" field.
The report was developed based on the settings of the Report of the magnificent Elena Gryanina from the site BukhExpert8 (the resource is very useful and high-quality, I advise you to register if you are not there yet)
So, in order.
We generate a report.

If we are satisfied with everything, we save the report version. Click the More button - Report options - Save report option...
ATTENTION!!! If the above method did not work. Open the application in the thick client. Then go to the section %Taxes and contributions - Reports on taxes and contributions - Universal report. Selecting the accumulation register Calculations of taxpayers with the budget for personal income tax. Click the More button, Edit diagram (It won’t open in a thin client!). In the window that opens, go to the Settings tab, Load settings from file, select the file. Screenshots below.


- For the report to work correctly, it is necessary to expand the Payment of wages and personal income tax transfer block in the payment documents (Statement to the bank, Statement to the cashier, etc.) by clicking on the link of the same name. It is MANDATORY to fill in the Payment document field! according to the example: "Document 12/29/2016 No. 123". Important, the date must start with the 10th character.
