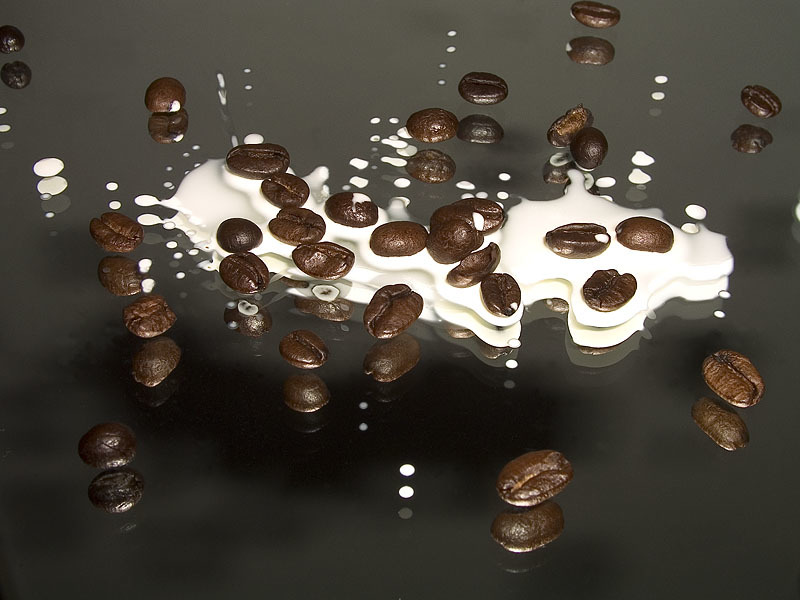
“Handmade” has long grown from the category of knitting “grandmother’s” socks into art. Indeed, one can only be amazed at the abundance of materials used to create unique homemade masterpieces: rice, cinnamon sticks, beans, peas, twine, candy and even used tea. Perhaps the most remarkable and intriguing material is coffee.
“Hot as hell, black as the devil, pure as an angel and sweet as love,” Talleyrand said about these aromatic grains.

- After vegetable oil, coffee is the second most consumed food in the world.
- 10 percent of people are immune to the effects of its aroma.
- Roasting coffee for a long time reduces its caffeine content.
- Contrary to the belief that the energy drink has a stimulating effect, when consumed, the effects of stress are reduced.

And therefore, in order to avoid stress and fill the house with the aroma of warmth and comfort (and at the same time purchase a unique decoration), we will turn to crafts made from aromatic grains.

There are a lot of ideas and master classes on the Internet for making panels from coffee beans with your own hands. Complete freedom for creative personality- there would be a desire.


The main thing is the right ingredients
For your product to be original, it is desirable that the grains be of different sizes. Therefore, it is better to buy them in specialized stores in bulk and in the desired shade.

As a base for the panel, you can use burlap or a piece of thick wallpaper, and for decoration - buttons, pebbles, plants, hay, herbs, cinnamon, nut shells.

A glue gun is used for gluing, but it can be replaced with Moment glue.

The step-by-step process of making panels
The simplest product is frames for decorating your favorite photo or interesting painting. Choose a suitable cardboard frame, apply glue with a brush and glue the grains to the surface at your discretion.

To make panels, we make markings on the base. Moreover, burlap can be decorated different ways: using a piece of cardboard, fold it over to the back side and glue it, or you can “ruffle” the edges and give the panel a bit of “boho” style.

Then, using a simple pencil or a bar of soap, apply the design of your choice. Now you can get creative directly.


Panel “Cup of Coffee”
For the first option use:
- canvas or cardboard as a base;
- glue;
- coffee beans;
- decorative elements at your discretion.

If you do not have any special artistic talents, you can ask your friends to draw a ready-made stencil for a panel - there will always be someone you know who will be happy to do this. And then you will refine and present a unique item as a gift.

You just need to apply perseverance and patience. It’s good if you have a glue gun, otherwise each coffee bean will have to be glued by hand.

For the second option you will need a base (canvas or cardboard), glue, coffee beans, finely ground coffee and a neck to give volume to the cup plastic bottle, as well as adhesive tape.

Cut the neck of the bottle to create a crescent moon. Cover it with adhesive tape. Make a saucer in the same way, only smaller in size.

Then connect all the components with glue and coat with varnish to give a final shine. Decorate the frame with coffee beans, vanilla sticks, cloves, pebbles or shells.


Let's imagine with children
There is another simple and charming option for a coffee panel - zebra. Even your kids can handle this kind of work.

And girls will especially like the cute kitten - and they will be able to use their abilities in decorating such a Vaska or Murka. You can use buttons or foamiran as eyes.

Coffee crafts seem complicated only at first glance, but they are not. Many needlewomen encourage people not to be afraid to experiment - try, fantasize, don’t repeat other people’s works, but create your own, unique ones.


The panel One World, One Family, One Coffee, made in 2011, measures 25 square meters. meters and weighing 140 kg from a million aromatic grains by the Albanian master Samira Strati, perhaps the most grandiose canvas in the world. So go for it, skillful hands!

Photo panel of coffee beans


If you don't have much time to master complex crafts, try mastering paintings and crafts using ground coffee. It's simple, flavorful, exciting and very beautiful!
Everyone knows that you can create coffee, but few have heard that ground coffee is used as a material for creativity. Meanwhile, the aromatic powder is great for complementing other types of needlework, decorating figures made from coffee beans, and for independent use. We have no doubt that you will like crafts and paintings made from ground coffee; even a girl who has never had a penchant for coffee can draw them with her own hands.
Who invented drawing coffee and who needs it
Unfortunately, it is unknown who came up with the idea of painting with coffee powder. But this hobby can be put on a par with painting with salt and creating paintings from bulk materials. Perhaps the first coffee painting was given to the world by a coffee lover who did not like the taste of a new type of coffee and decided to dispose of the product as such. in an original way. However, the world is gradually conquering this fragrant art. Some cities already host drawing competitions, and at crafts fairs it’s easy to buy a painting or panel.

Who is this hobby suitable for? We can safely say that everyone! There are practically no costs, little time is spent, and the result almost always lives up to expectations! For example, it takes several days to create a butterfly on a napkin, but creating a coffee masterpiece will take less than an hour!
Paintings from ground coffee: features of the technique and first steps
To draw, you don’t need to buy, which we have already told readers about who are passionate about this invigorating drink. The cheapest finely ground product recommended by the manufacturer for brewing in a cup or Turk will do just fine.
You won’t need brushes to create masterpieces, but you will need to find a drawing stencil, for which a children’s coloring book or the outlines of images on the Internet will be quite suitable. Carefully cut out the image so that after filling the internal space, you get a recognizable and desired motif. To start, take something simple: a butterfly, a leaf, a flower.


Funny bear

As a basis for the picture, you can take a board, thick cardboard, glass, or plywood. Select white wallpaper or suitable paper and paste the background onto the base. After this, carefully transfer the stencil onto the paper and cover the places that need to be painted with PVA glue.
Then everything is simple - sprinkle coffee on the places with glue, let the masterpiece dry and blow off the remains. If desired, the picture can be supplemented with whole coffee beans, rhinestones, beads and other suitable elements.
Crafts made from ground coffee - simple and fragrant
Having mastered the simple technique of drawing pictures with ground coffee, you can move on to more complex crafts. Feel free to create panels on fabric, decorate napkins with spectacular designs, decorate dishes, bottles, vases, flower pots, candlesticks, and boxes. Always choose a clear adhesive that is suitable for the base material.
Coffee powder can be used for decoration easter eggs(real and decorative), topiary balls, which are much easier to make than covering the base with grains, creating stylish valentines and much more.

Panel on fabric
If nothing comes of drawing and decorating figures, don’t despair. You will definitely get aromatic crafts from ground coffee if you use this delicious raw material to fill miniature soft toys, aromatherapy pillows. This useful ingredient can also be used in cream making. IN as a last resort, you can always recycle coffee powder in the bathroom by preparing an effective body scrub using it.
Be sure to check it out and choose another hobby for your soul!
A very fashionable trend called “Hand Made” has recently become a popular and incredibly exciting activity. Today, skilled needlewomen use all kinds of devices and materials for their creations, one of which is coffee beans. It turns out that they are suitable not only for preparing an invigorating drink, but also for creating a very interesting and original piece of furniture.
Even if you are not professional artist, you can still create beautiful pictures from coffee beans with your own hands. Moreover, rest assured, the process will give you great pleasure, and the resulting result will please you much more than decor purchased in a store. Panels and topiaries made from aromatic grains charge with optimism and vigor, and anyone can make them. You will see this by reading the master classes in this article.
Crafts from coffee beans for beginners
Mastering the technique of making masterpieces from coffee beans is not such a difficult science, and anyone who has at least a little imagination can do it. It’s better to start with the simplest crafts, including:
- Decorative jars, vases, glasses.
- Photo frames.
- Decorative candlesticks and candles.
- Postcards.
- Decorative paintings.
Choosing material for work
If you decide to create a small masterpiece that can decorate your home, then the first thing you need to do is buy the right coffee beans. To create decor, packaged packs of coffee in opaque packaging, in which you will not be able to consider the purchase, are not suitable. It is better to buy the material in stores where coffee is sold by weight.
Important! You should also not buy Arabica beans, since for greater texture, beans of different sizes are required. It is better to give preference to a cheaper variety.
Coffee painting
For beginning needlewomen, creating a painting from coffee beans with your own hands will be a wonderful pastime. It will not only become a beautiful piece of furniture, but will also be a pleasant gift for loved ones. You can choose any subject for a “coffee” painting—from a traditional steaming cup to a grandiose artistic canvas.
To make such a picture you will need:
- Thick cardboard.
- Glue.
- A piece of fabric (preferably smooth and light-colored, however, if coarse burlap fits into the concept of your masterpiece, you can use that too).
- Leg-split.
- Coffee beans.
- Picture frame.
- Stencils.
- Decorative beads, ribbons or dry leaves.
- Clear varnish.

Sequencing:
- Cover a thick sheet of cardboard with fabric, securing it with glue on the opposite side.
- Think over the plot of the picture and use stencils to draw the image.
Important! If you don’t have stencils at your disposal, then replace them with a simple device: print the picture on a thin sheet of paper and, having outlined it with cosmetic blush or shadows, transfer the drawing to canvas.
- After this, carefully glue the coffee beans.
- Decorate the outline of the picture with twine, fixing it on the picture with glue.
- Finally, coat the grains with colorless varnish, and after complete drying, insert the picture into the frame.
Important! To ensure that the frame and the painting are in the same style, it is better to choose a dark brown frame.
Coffee panel
To create another version of a painting from coffee beans with your own hands, you will need the following:
- Liter plastic bottle.
- PVA glue.
- Stationery and construction tape.
- Scissors.
- Canvas.
- Brush.
- Bean or ground coffee.
- Cardboard.
Sequencing:
- Separate the top of the plastic bottle and then cut it in half lengthwise.
- Cut off the neck of the resulting cone - this way you will get the front convex part of the cup.
- Make the back flat part of the cup from cardboard and glue it to the plastic blank using hot glue.
- Wrap the resulting cup with paper construction tape, then cover it with glue and sprinkle with ground coffee. This is necessary so that subsequently there are no gaps between the coffee beans.
- Leave the craft to dry.
- Cut out a saucer from cardboard, use glue to fix grains and a dried lemon slice on it.
- Grease the completely dry cup with glue again and glue the grains to it: first along the contour, and then to the rest of the surface.
- The background can be left white or powdered with ground coffee. You can also glue a small cinnamon stick.
Important! Finally, coat the product with varnish. This will make your painting shine beautifully and make it easier to wipe off dust.
Craft made from coffee and twine
In addition to painting your own coffee beans, you can also create an unusual cup, vase or flower pot. The simplest option would be a decorative aroma candle, which can be used not only for aesthetic purposes, but as a gift for loved ones.
To make an original candle you will need:
- Scented candle.
- Glue or glue gun.
- Leg-split.
- Coffee beans.
- Clear varnish.
Sequencing:
- To begin, wrap the candle tightly with twine. This can be done around the entire circumference of the candle or to its middle.
- After this, using a glue gun, secure the ends of the twine to the candle so that they fit tightly to its surface, without forming a void or protruding.
Important! You can even do without glue by melting small sections of the candle and pressing the twine into its surface.
Crafts made from coffee beans are an unusual and modern creativity that has great practical significance.
An incredibly fashionable trend called “hand made” in last years has become a popular and exciting pastime. In recent years, skilled needlewomen have been using... various material and accessories, and now crafts made from coffee beans are at the peak of popularity, because it turns out that they are suitable not only for creating a fragrant drink, but also for creating no less fragrant decor and interior items.
Coffee crafts for beginners, master class
Mastering the technique of creating a masterpiece from coffee beans is not such a complicated science and anyone who has at least a little ability to manipulate objects and has a little creative imagination can do it. It's better to start with simpler crafts for beginners.
A variety of materials can be used in coffee crafts. 
 For unusualness and diversity, grains can be painted in different shades
  Creativity is a path in which initiative is not punished. Show your imagination
It can be:
- decorating a vase, jar, glass
- creating a photo frame
- decorating candles, candlesticks
- postcard
- decorative painting
 Coffee beans are a universal material
 Simple and boring household items can be transformed beyond recognition by covering them with coffee beans.
 If you decide to try to create a small masterpiece that will decorate your home, then the first thing you should do is buy the right coffee beans. Packed packs of coffee in opaque containers, in which you cannot see the purchase, are not suitable for this - it is better to give preference to stores where coffee is sold by weight.
Also, you should not buy Arabica beans, since for greater unusualness and texture, beans of different sizes are required. Therefore, give preference to the cheaper variety.

 It is better to use grain in work various sizes, and not selected Arabica
 The simplest coffee crafts do not require many tools - all you need is a glue gun and a blank for decoration on which the beans will be glued.
After completing the work, it can be coated with colorless varnish.
Video: DIY crafts from coffee beans
Crafts from twine and coffee
An extraordinary vase, cup or even flower pot can be made from twine and coffee beans. The simplest option would be a decorative scented candle, which you can not only use for aesthetic purposes in your home, but also give as a gift to loved ones.

 Candles decorated with coffee beans look very original
 To make an unusual candle you will need:
- scented candle
- leg-split
- glue or glue gun
- coffee beans
- clear varnish

 Twine can be purchased at any hardware or craft store.
 Making a decorative candle is very simple, and the end result directly depends on your imagination:
- First you need to wrap the candle tightly with twine.
2. This can be done around the entire circumference of the candle or to its middle
3. After this, using a glue gun, secure the ends of the twine to the candle so that it fits tightly to its surface, without protruding or forming a void. You can also skip the glue by melting small sections of the candle and pressing the twine into the surface of the candle.
4. The candle wrapped with twine is covered with coffee beans to the middle, doing this in rows, so that the layer of twine under the beans is not visible.
5. At the final stage, the grains are painted with colorless varnish, which will provide shine and make it easier to wipe the structure from dust in the future.
 Instead of a scented candle, you can use a regular one.
 The finished candle can be decorated with beads if you want to give it a more festive look or immerse the beans inside the melted wax along the edge of the candle.
Video: Crafts from coffee and twine
Craft a coffee heart
You can please your other half by presenting her with a heart made of coffee beans. It's easy to do and doesn't require much time. For the heart you need:
- coffee beans
- A4 paper
- cardboard
- scissors
- cotton wool or cotton pads
- glue gun or regular glue
- leg-split
- brown paint
- decorative decorations: beads, lace, ribbons, bows
 Making a coffee heart is quick and easy, and most importantly, it requires a minimum of materials
 First you need to cut out the blanks. Perhaps you will be able to purchase a ready-made heart made from foam plastic at a handicraft store, then your work will be much easier. If you want to create a masterpiece entirely on your own, then you should start by creating a paper heart.

 It is necessary to cut out a symmetrical heart
 You can buy a ready-made foam heart at a craft store.
 Sequence of work:
- Fold the A4 sheet in half and draw half a heart, so that when you turn the sheet you get a whole symmetrical heart
- Attach the heart to a piece of cardboard and redraw it
- Glue a layer of cotton wool to the resulting heart or place cotton pads in balls, increasing the volume of the figure
4. After this, the heart is surrounded with twine in a free order in all directions to form relief
5. Next, the heart is painted: a foam sponge is suitable for this, which is used to apply the paint using blotting movements.
6. After the paint has dried, glue the coffee beans to the heart: coat each bean with glue and place it tightly together
7. The final stage is painting the craft with colorless varnish

 The finished work can be decorated to your taste
 Craft painting made from coffee
For beginning needlewomen and crafters, creating a picture from coffee beans will be a great way to spend time. Not only will it become a wonderful piece of furniture that will fit into almost any stop in your abode, but it will also a good gift for loved ones. The subject of a “coffee” painting can be very different: from a traditional steaming cup of coffee to a grandiose artistic canvas.
The plot is limited only by your imagination.

 The most common theme of “coffee” paintings is coffee itself.
 For a painting made from coffee beans you will need:
- thick cardboard
- a piece of fabric (preferably light and smooth, but if coarse burlap fits into the concept of your masterpiece, feel free to use it)
- coffee beans
- leg-split
- stencils
- picture frame
- decorative beads, ribbons or even dried leaves
- clear varnish
 If the coffee beans are not dark enough, they can be fried in a frying pan.
 The process of making a painting is not labor-intensive and requires only accuracy and creativity. By following the step-by-step guide, you can easily recreate your intended image from coffee beans:
- Cover a thick sheet of cardboard with fabric, securing it with glue on the opposite side
2. Think over the plot of the picture and use stencils to draw the image (if there are no stencils, then a simple device will replace them: print the picture onto a thin sheet of paper and, tracing it with cosmetic shadows or blush, transfer the drawing to canvas)
3. After this, carefully glue the coffee beans
5. Decorate the outline of the picture with twine, attaching it to the picture with glue
6. The finishing touch: coat the coffee beans with clear varnish, and after drying, insert the picture into the frame

 To make the task easier, coffee beans can be glued directly onto the drawing.
 In order for the picture and the frame to be in the same style and color composition, it is better to choose a dark brown frame. This way the painting will create the impression of completeness and will please the eye with its aesthetics.
DIY coffee bean topiary
For those who consider paintings made of coffee and candles covered with coffee beans to be child's play, there is also a more difficult craft - topiary. This “tree of happiness,” as it is commonly called in Europe, will become a real work of art, and the time spent on the topiary will pay off in spades when all the guests begin to admire such a sophisticated masterpiece and even envy your skill.
 Topiary is modern and fashionable
 For topiary you will need:
- coffee beans
- thick cardboard
- A4 paper
- glue or glue gun
- small jar or box, cut bottle
- clothespins
- brown paint (can be used quality paints for drawing)
- thick wire
 A ready-made blank can be used as a heart
 It is most convenient to glue grains with a glue gun, but in the absence of one, you can use simple glue
 Sequence of work:
- Fold a sheet of paper in half, draw half a heart and cut it out so that when you turn the sheet you get a whole heart.
2. Attach the paper heart to a sheet of cardboard and redraw it, and then cut it out with scissors
3. Glue a wire or curved wooden branch to form the trunk of the topiary
4. Using cotton wool or cotton pads, laid out in layers, create the volume of the figure by gluing them to the cardboard heart
5. Wrap the resulting heart with twine in different directions to secure the structure. Wrap the wire tightly around it until the very end.
6. Paint the resulting structure using a small foam sponge
7. While the painted tree is drying, form a pot for it: separate the wooden clothespins and cover the jar or box with them, so as to create the impression of a wooden tub. You can paint the pot any color, or you can leave it as is.
8. Cover the dried “crown” of the tree tightly with coffee beans so that they fit right next to each other and no empty gaps are visible. You can apply grains in several layers, on top of each other - such chaos will only add gloss to the craft
9. Fill the finished topiary pot with plaster and place the tree in it
10. After the plaster has dried, the tree can be decorated with ribbons, flowers and beads to your taste
 Topiaries come in many different shapes
 Coffee bean trees
If the heart-shaped crown seems irrelevant and uninteresting to you, then you can form a topiary with a spherical crown. To do this, you will need a blank, which can be purchased at a craft store, in the form of a foam ball, or any ball that you can find at home and the material of which allows you to attach it to a wire.

 Topiary with a spherical crown
 Making a spherical topiary is practically no different from a topiary with a heart-shaped crown, but the work will be greatly facilitated due to the fact that initial stages You can skip crown formation and start immediately by painting the crown brown. Next, you need to follow the instructions outlined above.

 "Trees of Happiness"
 You can decorate topiary using all available means.
 Topiaries can be bonsai style
 Coffee beans can be used to make other trees
 Crafts from coffee and beans
By combining coffee beans with beans of different colors, you can create interesting applications, flower bouquets and paintings, as well as toy figures. In addition, these materials form interesting unique interior details that no one else will have.

 Beans and coffee go well together in a craft.
 A craft made from an elegant bottle filled with beans and coffee beans will be simple and original. To do this, you need an empty bottle of some alcoholic drink that has a bizarre shape. By filling it to the top with layers of white beans and coffee beans, you will create an unusual craft that will decorate your home or the austere atmosphere of your workplace.

 Bottles filled with grains, cereals and salt are a popular decorative element of the interior.
  Bottles are decorated with coffee beans
 Pictures made from beans and coffee beans look very colorful and aesthetically pleasing. The principle of their creation is no different from “coffee” paintings, but the difference in texture and color of the material gives a flight of fancy.

 Coffee beans and beans can be used to cover jars, vases and boxes, making them unique
 Crafts made from coffee and burlap
Using simple materials such as coffee beans and burlap, you can recreate real masterpieces of applied art. The most common type of material used is to make panels from coffee beans, because it is simple, practical and looks very beautiful.
Even a person far from this technology can easily make a small creation.

 In crafts, grains can be laid out in rows or randomly
 To make the panel you will need:
- coffee beans
- sackcloth
- leg-split
- bamboo sticks (can be purchased at a craft store)
- stencil
- pencil
- clear varnish

 Burlap is a universal material in needlework
 First of all, you should think about the plot of the panel, what you would like to depict. For beginners, it is better to choose a simpler design: a heart, a cup of coffee, some kind of inscription, an apple, etc. Having completed this task well, you can easily begin more difficult work, which will require some experience and perseverance.

 You can create entire compositions from “coffee” crafts
 Operating procedure:
- Using scissors, cut the burlap to the required size
2. Redraw the outlines of the drawing using a stencil and pencil
3. Stick the coffee beans as intended
4. Cover the grains with varnish and wait until the panel dries
5. Using twine, form a frame from bamboo and tie the panel to it, pulling the twine through the holes in the burlap
 Bamboo can be replaced with another tree, but the picture will lose a lot from this
 At first glance, many crafts made from coffee beans seem incredibly complicated, but this is far from the case. Most needlewomen who have delved into this creative direction and reached great heights of skill urge them not to be afraid to experiment and not stop even if something doesn’t turn out quite the way they wanted it to be.


After analyzing their experience, we can highlight the following tips that will help you in working with coffee beans:
- Use quality material for your crafts. This does not mean that you need to buy everything expensive - much can be found at home for free.
- use your imagination and experiment, don’t try to copy other people’s work, but create something new and unusual
- learn to enjoy the process of creating a creation, then it will come from the soul and please the eye
Video: Crafts from coffee. Master Class
Master class “Panels made of coffee beans. Coffee cup"
This master class is intended for middle-aged and older children, additional education teachers, educators, for lovers of natural coffee and simply for connoisseurs of beauty.
Purpose: interior design, making gifts for family and friends for the holidays with your own hands.
Performed: Stol Oksana Vladimirovna, teacher at MADOU No. 203 “ Kindergarten combined type" Kemerovo.
Target: making panels from coffee beans.
Tasks:
- introduce the technology of making a hollow mug from a plastic bottle and coffee beans;
- improve practical skills in working with coffee beans and natural materials;
- to develop artistic taste in children and adults, the desire to do something unusual with their own hands.
Interesting Facts about coffee...
Coffee is the most popular drink in the world. Among all products, coffee ranks second in popularity (after vegetable oil).
Approximately 10% of people are not at all susceptible to the effects of coffee. Vigor, tone and increased blood pressure from a cup of hot drink are not about them.
The longer coffee is roasted, the less caffeine remains in it.
Coffee tastes well with almost any food.
The aroma of coffee is in the top ten most recognizable smells.
The smell of coffee relieves stress
It is generally accepted that the smell of coffee is wonderfully invigorating. However, scientists from three countries have found that the smell of coffee beans has another property.
Experts from South Korea, Germany and Japan have proven that the smell of coffee reduces the symptoms and effects of stress. Such conclusions were made during experiments on laboratory animals.
Tests show that the aroma of coffee leads to changes in the functioning of 17 genes and the production of proteins in the brain, writes Web MD. Thus, the smell of coffee beans stimulates the production of substances with antioxidant properties.
These substances protect nerve cells from damage and help you recover faster from stress.
Coffee beans are by far the most popular material for creating various DIY crafts. Coffee beans have a pleasant smell, do not spoil, have a rich color and interesting texture. Coffee beans bring happiness to the home; they have a unique coffee aroma that creates an atmosphere of warmth and comfort.
This is the kind of panel we will make from coffee beans.
Let's stock up on a good mood and move forward!
For work we will need:

- coffee beans
- ground coffee
- masking tape
- finished frame
- thick burlap
- PVA glue (preferably thick construction glue)
- glue "Titan"
- hot glue
- decorative flowers and decorations
- cinnamon
- dried lemon, orange, zest roses
- leg-split
- packaging cardboard
- brown gouache
- brush, ruler, scissors
Step-by-step production
1. Cut off the top part of a plastic bottle, the length from the neck is 13 cm (two parts are made from one bottle), cut in half lengthwise, then cut off the neck


2.Cut from packaging cardboard back wall and a bottom for a mug. For the saucer it is better to cut out two parts and glue them together, since my cardboard is thin

3.Glue the parts to the mug using Titan glue

4. We cover the workpiece with masking tape, we need this for the strength of the mug, for better gluing of the coffee beans and so that the hot glue does not melt the workpiece

5. Paint the mug and saucer with brown ink.

And you can do it differently. First, spread the workpiece with PVA glue, and then sprinkle with ground coffee (I didn’t really like the second option, this option is suitable for those who glue coffee beans only with hot glue; I mainly use “Titanium”, and use hot glue in those cases , when you need the coffee to stick immediately; and I painted the top of the workpiece again with gouache)

6. Making a mug
It is necessary to choose coffee beans of the same size. Glue the coffee around the edges of the mug using hot glue. Please note that we glue the grains exactly along the workpiece so that they do not protrude beyond the borders of the mug, otherwise they will not stick to the base of the panel


7.Then glue the coffee beans onto Titan glue (I drop a little glue onto the workpiece and spread it with a wooden skewer small area) You can glue all the grains on one side

I prefer to alternate grains with different sides


8. Making a saucer
Glue the coffee beans first along the edge and then along the entire workpiece.


Please note that the saucer on top is made of one layer of cardboard, it was impossible to bend it into the desired shape. But the lower saucer was already glued together from two parts and it was easy to give it the desired shape.

9. Trying on cups with different saucers


10. Cover the frames with burlap


11. Glue a mug and saucer with hot glue and make a handle from grains

12. Decorate the panel
We tie the cinnamon with twine and glue it on with hot glue, on the other side a dried lemon slice
One of the options for decorating the panel is dried orange, lemon and zest roses.

13.This is how I make roses from orange zest and dry them


I buy cinnamon like this

15. We create the “coffee aroma” coming from the mug.
Draw, apply PVA glue and sprinkle with ground coffee. Shake off the remains.


16. Decorate the panel with artificial flowers and decorations


Second version of the panel "Summer Morning"

For this option, we do everything the same as in the first case. We only decorate the frame with cinnamon and ground coffee.
1. Measure the required distance (6 cm) from the edge of the panel and glue the cinnamon with hot glue

2. Making a frame
To do this, you need to outline the frame and coat it with PVA glue, and then sprinkle with ground coffee, shake off the rest on the table