The shower cabin has long ceased to be a curiosity in houses and apartments. People who have enough money can afford to purchase an option with a huge number of functions (hydromassage, Turkish bath, aromatherapy). For those who have a limited budget for bathroom renovations, you can install a shower stall yourself. Cabin installation usually starts with preparatory work and installation of the pallet.
The tray is one of the main components of any shower design. However, it is possible to equip a shower room without using it; more precisely, the floor of the shower room, which is made at an angle for better drainage of water, will serve as a tray. Such showers are usually found in swimming pools, fitness centers and other public places.
A cabin with an inclined floor can be built in an apartment or private house. The construction of this type of shower stall requires following several basic points:
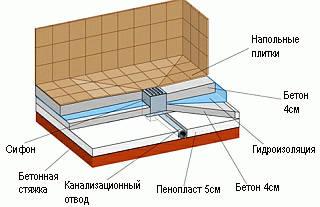
- The first step when building a sloping floor for a future shower stall is to make recesses for the drain hole.
- After this, a layer of foam plastic must be placed on the concrete layer for thermal insulation.
- Then you need to waterproof it to prevent leakage.
- For practicality, after waterproofing, a 4-centimeter layer of concrete is poured.
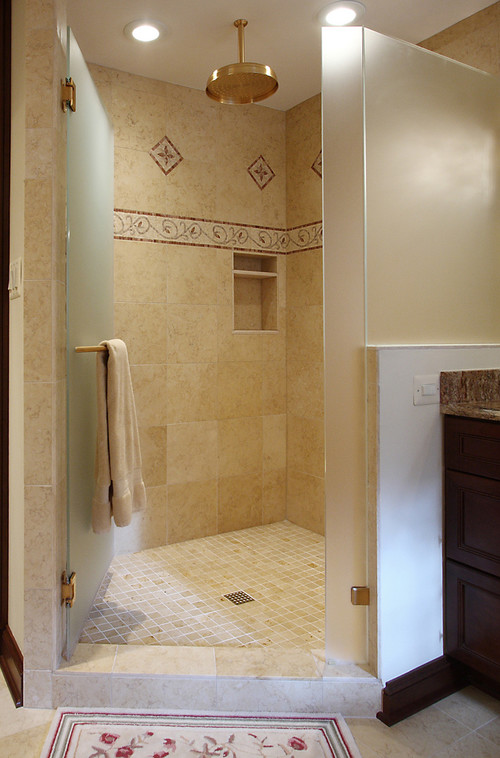
- Lastly, lay the tiles. It must be laid at a slight angle, which descends towards the drain hole.
The construction of this type of pan will prevent the constant formation of water accumulations and stagnation. Laying tiles at an angle requires not only knowledge, but also experience in this field.
- ease of floor cleaning;
- a special tile pattern will ensure safety thanks to the non-slip surface;
- The dimensions of the cabin are not limited by the dimensions of a regular pallet.
Construction of a pallet with low sides
stages of construction of a cabin pallet
The main function of the pan is to drain water from the sewer and prevent water from flowing out of the shower stall. Usually such a pallet is located at a certain height. The ledge on which the pallet will be installed can be built from brick, then concrete can be poured and waterproofing can be laid. An important point In the installation of the pan there is a clear place where the drain hole should be. For successful construction, you must follow the following rules:
Installation of shower doors
Any shower stall must have walls. They can be made of glass. To independently prepare the glass for the walls, you need to mark it. The doors can be made matte; to do this, you need to use a drill with a grinding attachment and process the glass at low speeds. After this, it is necessary to attach a metal profile made of stainless steel. This will make the cabin look even nicer. You also need to drill holes for installing mounting loops.

Glass with hinges will serve as a door. After this, the finished glass wall is installed on a pallet or floor. Align it clearly vertically. Then the places for attaching the glass walls, decorated with metal profiles, are determined. After work on creating holes in the floor or pallet, the walls are secured with screws.
shower cabin with glass doors
The last stage of installing a shower cabin is the installation of the doors of the future cabin. All shower cabins that are built independently are open type. They are made without installing a ceiling; some options have only a tray and doors.
The construction of a shower cabin requires certain knowledge and skills, therefore, regarding the installation of such a cabin, it is better to consult with a specialist and carefully study this issue.
I want to talk again about shower cabins in construction design. The topic is very interesting and in demand by people nowadays. If you follow the technology and do not violate it, then everyone will be happy and proud of the decoration and functionality of their bathroom. It’s so wonderful when you can collect all your “WANTS” in one bathroom. A built-in shower cabin will help you gain freedom of action and joy in life. This happiness will accompany you for many, many years. But you will only get this if the work is done by real professionals in this field.
There are great disappointments after the wrong approach to the issue of renovating an apartment and bathroom, especially when constructing shower cabins. This often happens after master generalists who know and can do everything, but in the end nothing. Over time, you see all the professionalism of these mountain masters. Here are striking examples from my practice. I deal with shower cabins in construction at a professional level, people often ask for help in this important matter. Here are just some requests and requests for help and advice on this issue.
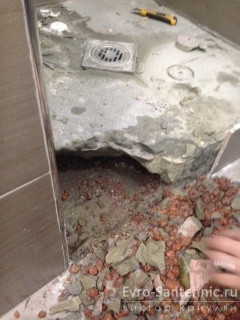
Good afternoon Tell me, we built a shower in our apartment and after a month mold began to grow and a stench appeared, especially in the morning, that is, at a time when we are not bathing. What should we do? How to fix everything?Answer: Victor Kriulyan
My answer is to break everything and redo it all over again.Question: Anastasia
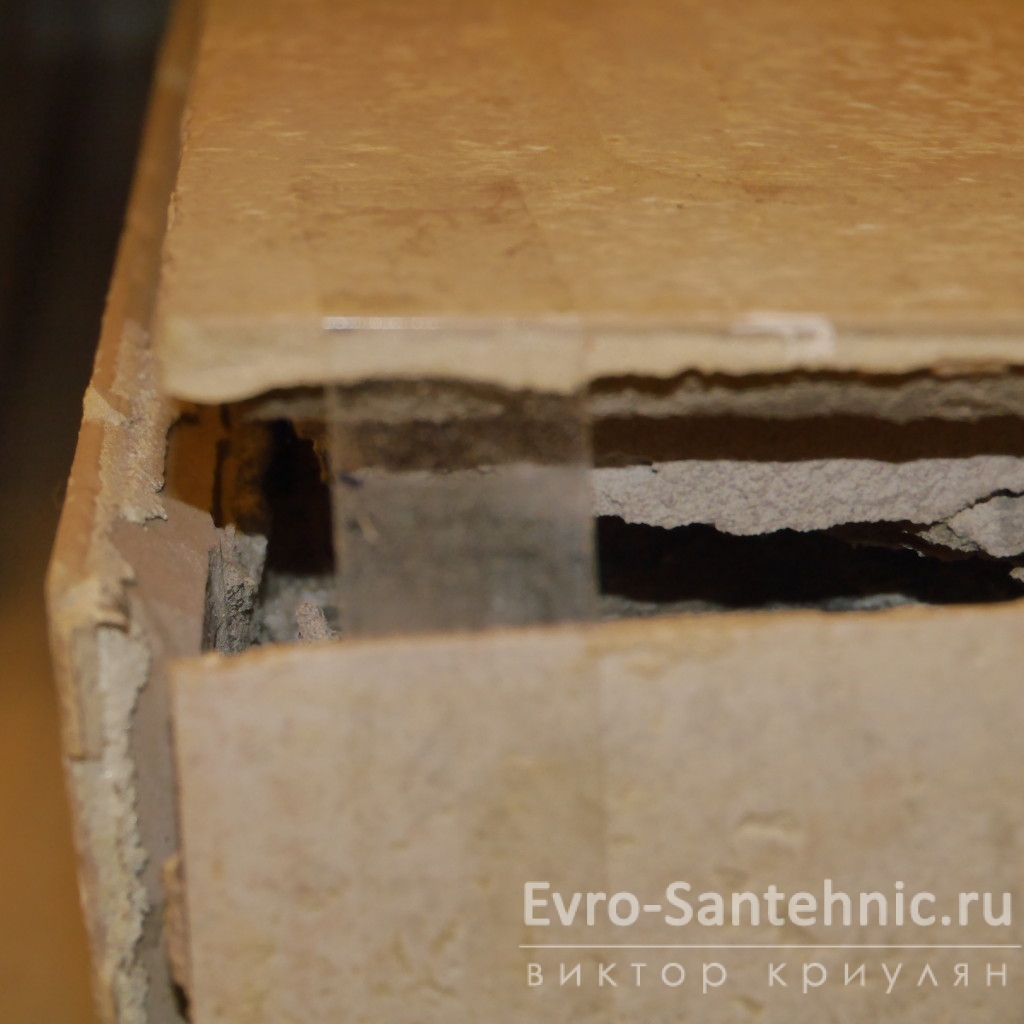
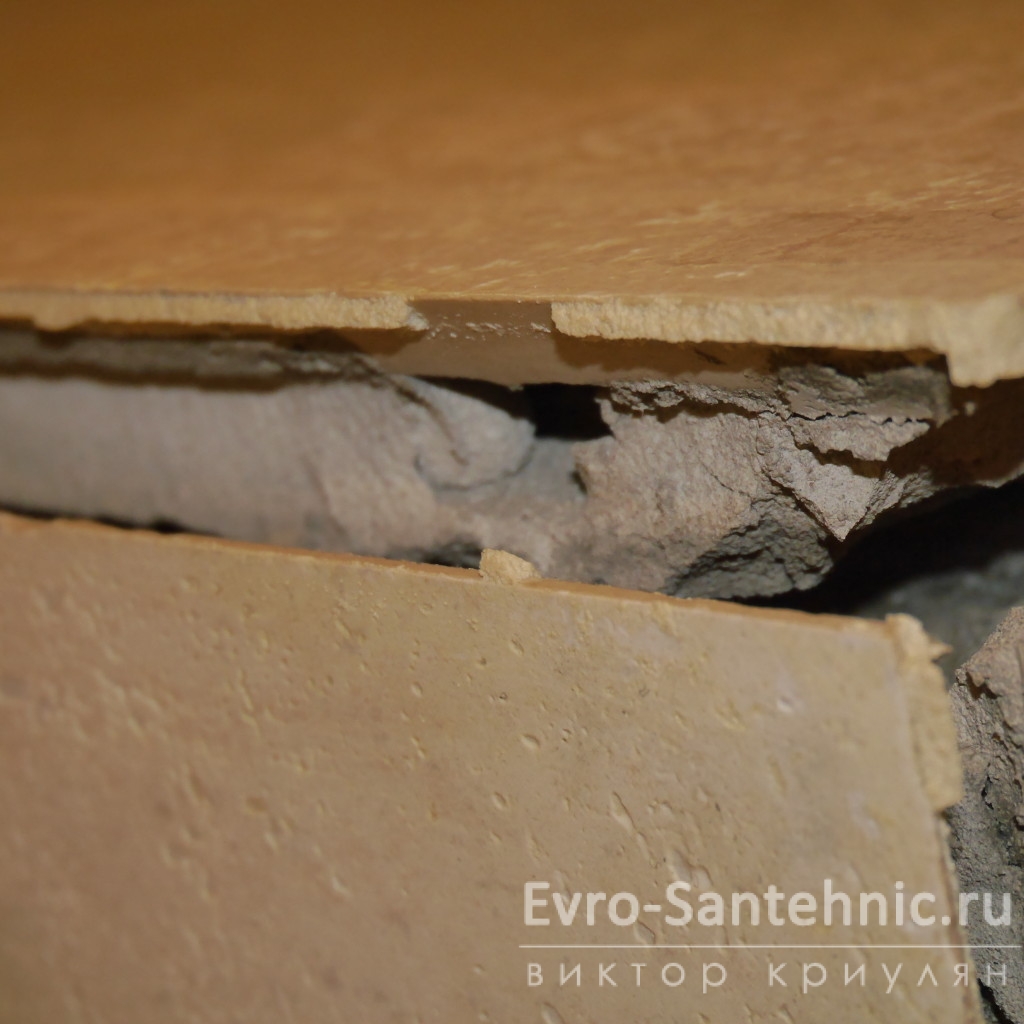
We listened to you and forced the master to redo the ladder. That's what was there! What was his mistake!Answer: Victor Kriulyan
1) There may be a poor connection between the sewer and the shower drain.
2) I don’t see the cabin sealing.Question: Kirill
Victor, hello!
The reason was a disaster with a construction shower tray.
Can't get through by phone yet. If you have the opportunity to call me back, I would be very grateful. Help is needed.
And these are just a few examples on this topic. My advice to you: think carefully before entrusting your happiness to the first person you meet.

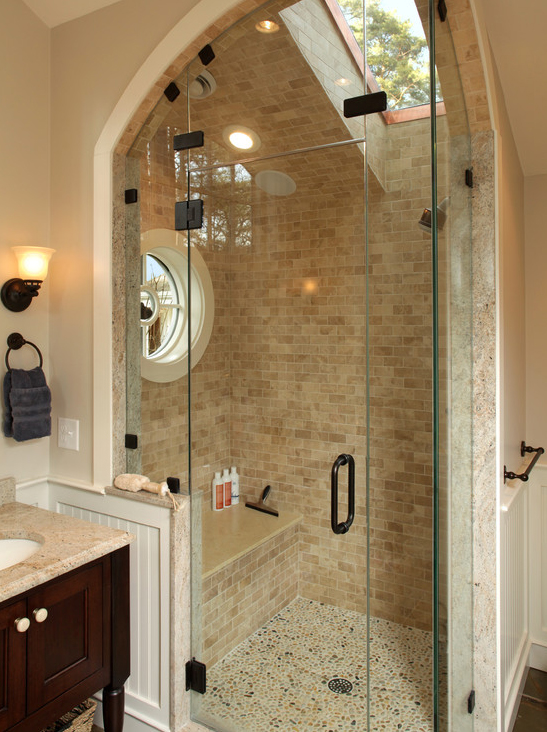
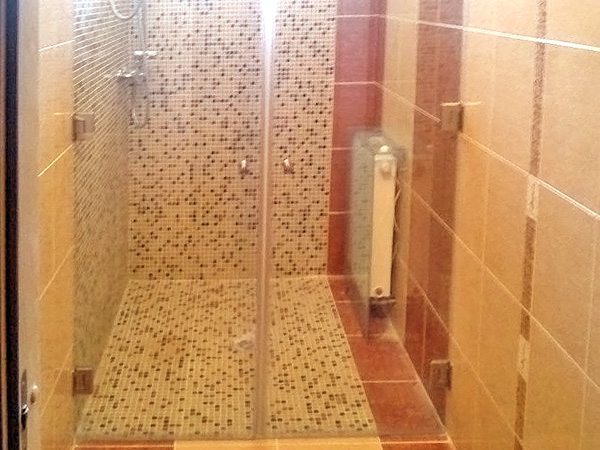
Construction of shower cabins + in apartment d Let's take an example of one of my works, let's look at the execution of the work. Let's start from the beginning and move forward with the project. Let's carefully study the design of shower cabins in construction. The design of construction cabins can only be limited by your vision of this product or your imagination. You can take pictures from the Internet or draw it yourself on a sheet of paper.
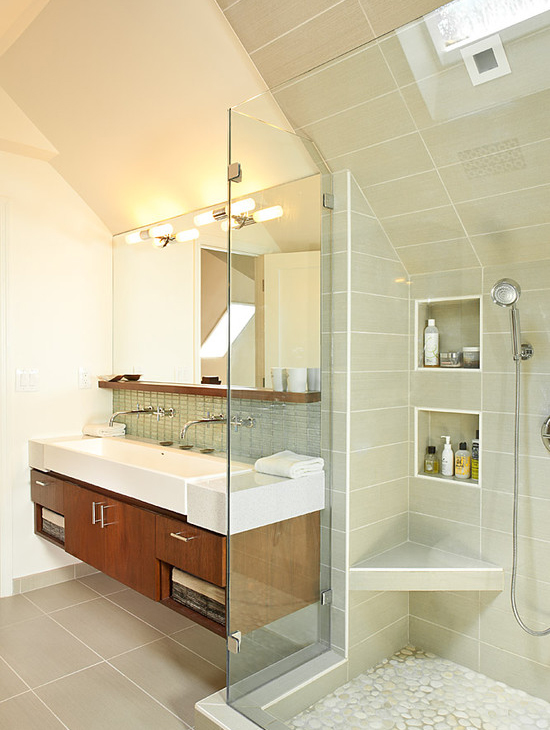
Construction of a shower cabin in the bathroom
Construction of a shower cabin + in an apartment most a cheap option for this work is to prepare a pallet for a finished corner. How does this happen when you ask a question, the answer is very simple: we take a tape measure, measure your bathtub and think about all the appliances that will be in your room. For example, let’s take the size of a bathroom of 1.35 meters by 1.5 meters and start counting. If we take as an example in the bathroom will have a washbasin, a cabin and a washing machine. We begin to make markings of 1.5 meters - 60 cm (horizontal loading machine) = 90 cm, But since we need to leave a gap of 5 cm for the washing machine to operate, we will have one side left shower cabin 85 cm. But if you take a machine with a vertical loading of 42 cm. then we get 1.5-45 cm = 1.05 meters. This is a pretty good size and you will not be constrained in your actions.
Construction of a shower cabin + in an apartment Now, if we take another 1.35 meter wall, we need to install a washbasin with a 45 cm cabinet. We have a radius of 90 cm. Leaving a gap between the glass and the washbasin, the second wall will be 85 cm. So we got a cabin 1.05 cm * 85 cm. Now let's think about these baths before there were 1.2 meter baths, what is better than a shower cabin 1.05 cm * 85 cm. or a 1.2 meter bath. This is approximately what the construction of a shower cabin + in an apartment looks like.
 Having made the formwork of the cabin office and having carried out all the preparatory work, we begin to fill the formwork with a mixture with wire reinforcement. After we prepare the shower tray, we mount the shower tray. At the same time, do not forget about connecting the grounding wires to the tray. Having prepared the shower tray, we mount insulation to delimit cold zones. Having completed this operation, fill the floor of the podium. We leave the screed to dry and get this result
We waterproof shower stalls
You need to start by assessing the available space. What to do if it is small, but you would like to place a shower there?
Firstly, a small bathroom can be enlarged through redevelopment - combining it and the toilet into a combined bathroom. But let’s make a reservation right away that this technique is appropriate for a family of two, or maximum of three people.
Secondly, there are options when the bathroom area is increased due to the corridor. I have had to use this solution more than once when working on redevelopments, which made it possible to significantly expand the bathrooms and place shower corner with tray or arrange .
If the bathroom is spacious and there is enough space in it, as is often the case in private houses and open-plan apartments, then you can place the shower in any suitable place:
- in the corner of the room, using two adjacent walls for construction;
- in the middle of the wall, by installing partitions, at the same time they can separate the “toilet” or “washroom” area;
- in a niche;
- in the back area of the bathroom, using the entire short wall and partly those adjacent to it
- in a separate place, or rather, at a distance from the walls, if, of course, the area allows and just such a compositional solution is required
In any case, when choosing a place, you must take into account the layout, size of the bathroom, maximum ergonomics of the space and personal taste preferences.
When installing soul in construction we must not forget about communications and when there is such an opportunity, it should be located closer to the sewer and water risers. If pipes are laid again, this is done before the partitions are erected. In this case, it is advisable to install them in the floor screed and walls, for which you will have to drill channels.
Construction work and selection of materials
For placement in a corner, square and semicircular structures are convenient, near a wall or in a niche - square and rectangular, and for cabins that are not adjacent to existing walls, you can choose any shape, even round, spiral or hexagonal.
Often, in order to isolate the shower, it is necessary to install additional partitions. These can be walls made of brick or tongue-and-groove blocks 8-10 cm thick. The partitions must be treated with a waterproofing compound, after which they are lined with ceramic tiles or mosaics. Fences made of metal frames and moisture-resistant gypsum fiber board are also quite acceptable. In this case, all joints are carefully processed and glued with a special tape, and for waterproofing a special composition is used, intended specifically for drywall.
A stylish, effective and inexpensive option is a glass block shower. They can be used to construct fences entirely or combine them with lined brick or tempered glass. The only condition for the use of glass blocks is the minimum width of the seams and their mandatory waterproofing. 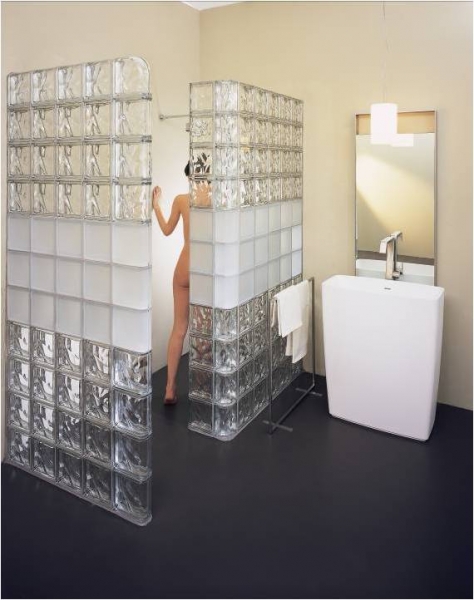
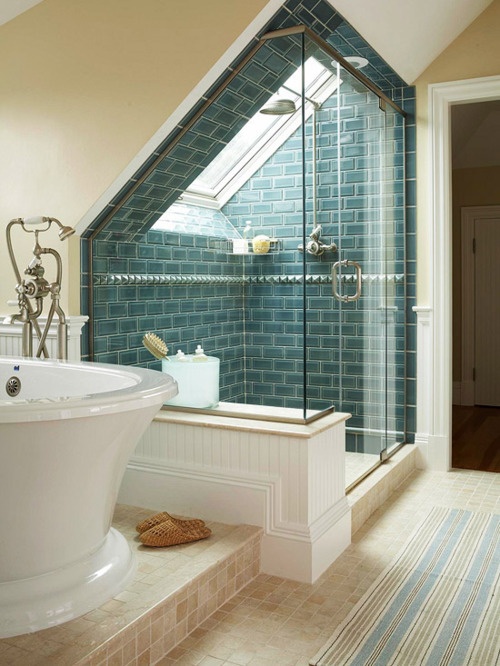
In a small room, the most suitable option for shower partitions is unbreakable tempered glass. Such walls do not take up space and, being completely transparent, visually increase the space. An interesting option could be a glass partition made in the form of a folding screen and mounted on the wall. If necessary, it is simply moved to the side, like an accordion.
Floor construction
Paul in shower area arranged in several ways. You can install a ready-made tray, fence off the shower structure with a border, or use a coating common to the entire bathroom. In cases where it is not possible to organize a place for a shower close to the risers, as a rule, a podium is installed. All options are quite practical, but from the point of view of convenience and visual effect, the most advantageous would be a single floor on the same level made of the same material.
 The listed solutions, with the exception of the finished pallet, in which everything is initially provided, require a slight slope towards the drain (drain) so that water does not accumulate and flows away better.
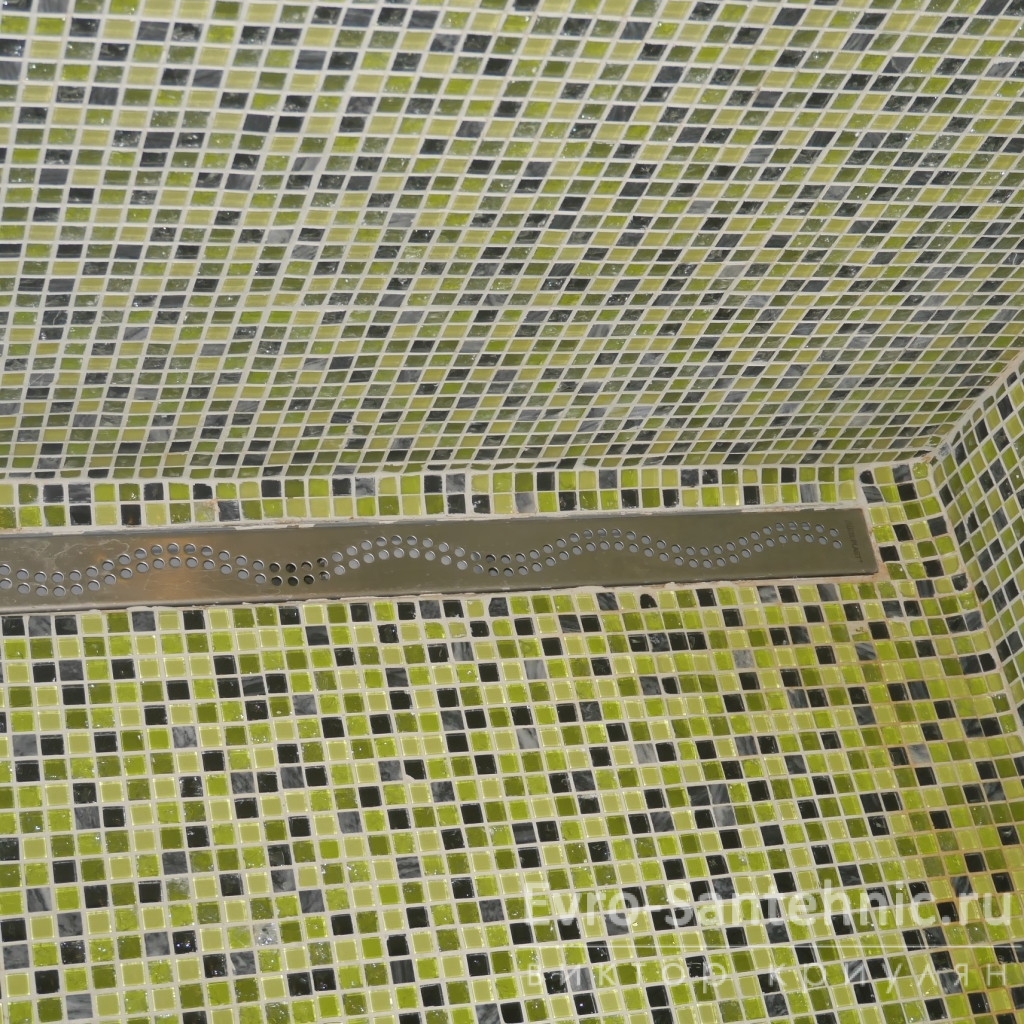
Most suitable finishing material for covering the shower floor, is ceramic tile or mosaics with a low coefficient of water permeability.
Login registration
The entrance can be left free if the shower compartment is spacious enough and splashes of water do not fall outside of it. If the shower is small in size or has hydromassage jets installed, then it is better to close the entrance with a glass door.
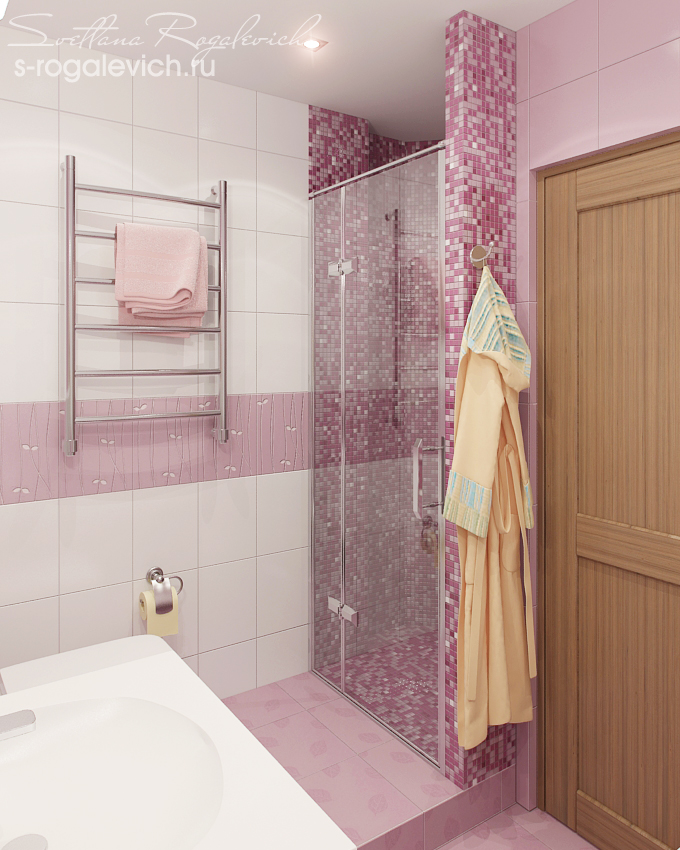
A curtain is also quite suitable, especially since it is not at all necessary to use dull consumer goods in the form of a plastic curtain - you can find or order a double-sided one, where on one side there is waterproof material, and on the other - any beautiful fabric that matches the design.
Unfortunately, my customers do not always take advantage of the opportunity to arrange such a shower, although a small redevelopment with the allocation of an area for it is quite feasible in their apartments. The costs of installing such additional convenience on the scale of the entire renovation are not so high, and the real benefits and pleasure from water treatments in a separate shower area can hardly be overestimated.
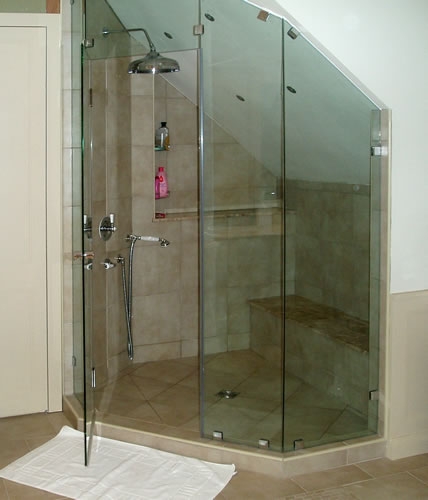
However, it is construction shower (in the image on the right) I recently had the opportunity to design for a family whose head really dreamed about it, but doubted the possibility. At the planning stage, we managed to find a completely rational and ergonomic solution, increasing the area of the bathroom at the expense of the corridor. The configuration of the shower compartment has a non-standard pentagonal shape, but the main thing is that it has enough space and is very comfortable. According to customers, the bathroom is now their favorite place in the apartment.
You can read about this project and see the initial and final layout on this page of the site .